To help you get comfortable with your new virtual reality, we’ve created a handy resource that has everything you need to get started, including a video walkthrough and a step-by-step written guide
Answers to questions you might have about Hazard Ready Training.

Here's a quick overview of how to use the controllers that come with the Meta Quest 3 (or similar systems). Keep in mind that the functions of the buttons may change depending on the environment or the specific area of the application you're using.

Below is a list of the uses for the Meta Quest 3 Touch Plus controller buttons in the headset main menu


Below is a list of the uses for the Meta Quest 3 Touch Plus controller buttons in the Hazard Ready Training main menu:
Here's a quick overview of how to use the controllers that come with the Meta Quest 3 (or similar systems). Keep in mind that the functions of the buttons may change depending on the environment or the specific area of the application you're using.
Some content from this section is referenced from external resources. For further information, please see the original sources below:
Meta. (2026). How to use Meta Quest Touch Plus controllers. https://www.meta.com/en-gb/help/quest/articles/getting-started/getting-started-with-quest-3/touch-plus-controllers
Below is a quick overview of how to setup the Meta Quest 3.
When you take your Meta Quest 3 out of the box, use the power adapter and charging cable provided to fully charge your headset before use. Once your headset is fully charged, follow the directions below for additional guidance.
To unbox your headset and controllers and get them ready for setup:
To ensure a proper fit when using your Quest 3:
For more information please see the official fit and feel guide at:
https://www.meta.com/en-gb/help/quest/articles/getting-started/getting-started-with-quest-3/adjust-fit-feel-quest-3/
The Meta Horizon app acts as a companion to your Meta Quest 3, allowing you to browse the Store, buy, download and remote-install apps, customise your device settings, cast your experience to your phone or compatible screen, and more. Learn more about how to install the Meta Horizon mobile app on your phone.
You won't need to use the Meta Horizon app every time you use your headset, but you will need it to complete the initial pairing and setup process.
To pair your headset to the Meta Horizon app and complete device setup:
Make sure that you've updated your Meta Horizon app to the latest version. If you can't see an option to add a Quest headset in your app, update and then fully close the Meta Horizon app before reopening the app and trying again.
Please note that you need to have Bluetooth and sharing with nearby devices turned on in order to connect your phone with your headset.
If you're still having trouble with setting up your Meta Quest 3, please contact Meta Store Support for additional assistance.
Here are some tips for keeping your Meta Quest 3 safe and in good condition:
To turn on your headset:
To turn off your headset:
To restart your headset:
If your headset is unresponsive or you're otherwise unable to restart your headset, you can do a force restart:
The Meta Quest 3 is equipped with two types of status display lights (LEDs), a status display light and a bystander signalling display light.
Status display light
The light on the side of your Quest 3 headset lets you know the status of the headset, including its battery charge state.
Bystander signalling display light
The display light on the front of your headset lets those around you know if the sensors on your headset are engaged, and if bystanders may be in your field of view.
To pair your Touch Plus controllers to your Meta Quest 3 or Meta Quest 3S headset:
Once you've paired your controllers, the controllers will automatically connect to your headset each time you turn it on, if it's nearby.
Your Meta Quest headset has a rechargeable battery, which you can charge using the included power adapter and USB-C charging cable. When plugged into a wall outlet using the included power adapter, the headset should fully charge in about 2 ½ hours.
How to charge your Meta Quest headset:
The LED light on the side of your headset will indicate the charging status of your headset. When the LED light is orange, your headset is charging. When the LED light turns green, it's fully charged.
Headset wattage requirements:
Each Meta Quest Touch Plus controller is equipped with an LED status display light at the top edge of the controller to help you understand its current status. To check the status of your controller, press the "Meta" button/"Menu" button once.
Status display light
When the battery level in your controller is low, the status display lights on your controller in headset will show 1 red dot.
To change the battery in your Touch Plus controller:
To connect to Wi-Fi using your headset:
If you experience trouble connecting your headset to Wi-Fi, please take a look at Meta's Wi-Fi troubleshooting tips.
If you've tried the troubleshooting tips and need more assistance, please contact Meta Store Support.
When setting up a boundary, you can choose from these modes:
To adjust your boundary modes or redraw your boundary:
To manage boundary history:
Some content from this section is referenced from external resources. For further information, please see the original sources below:
Meta. (2026). How to set up your Meta Quest 3. https://www.meta.com/en-gb/help/quest/articles/getting-started/getting-started-with-quest-3/set-up-quest-3
Meta. (2026). How to restart your Meta Quest headset. https://www.meta.com/en-gb/help/quest/articles/getting-started/getting-started-with-quest-2/restart-quest
Meta. (2026). How to charge your Meta Quest headset. https://www.meta.com/en-gb/help/quest/articles/getting-started/getting-started-with-quest-3/charging-meta-quest
Meta. (2026). How to use Meta Quest Touch Plus controllers. https://www.meta.com/en-gb/help/quest/articles/getting-started/getting-started-with-quest-3/touch-plus-controllers
Meta. (2026). Status display light colours on Meta Quest 3 and Meta Quest 3S. https://www.meta.com/en-gb/help/quest/articles/getting-started/getting-started-with-quest-3/status-display-light-colors-quest-3-and-3s
Meta. (2026). Connect your Meta Quest headset to Wi-Fi. https://www.meta.com/en-gb/help/quest/articles/getting-started/getting-started-with-quest-2/connect-quest-to-wi-fi
Meta. (2026). Set up your boundary for Meta Quest. https://www.meta.com/en-gb/help/quest/articles/in-vr-experiences/oculus-features/boundary
Please follow the steps below to download the Hazard Ready Training application on your device.
How to download the application:
How to run the app:
The Hazard Ready Training app should update automatically.
If the Hazard Ready Training app requires updating manually:
You can redeem your content license code using the Meta Horizon app or your Meta Quest headset.
To redeem your new content license code through the Meta Horizon App:
To redeem your new content license code on the Meta Quest:
Bear in mind that you need to activate your headset before you can redeem your license code.
Here’s a step-by-step guide to help you navigate the main menu of the Hazard Ready Training application.
To recenter your headset view, and realign the environment's forward orientation to align with current HMD physical orientation:
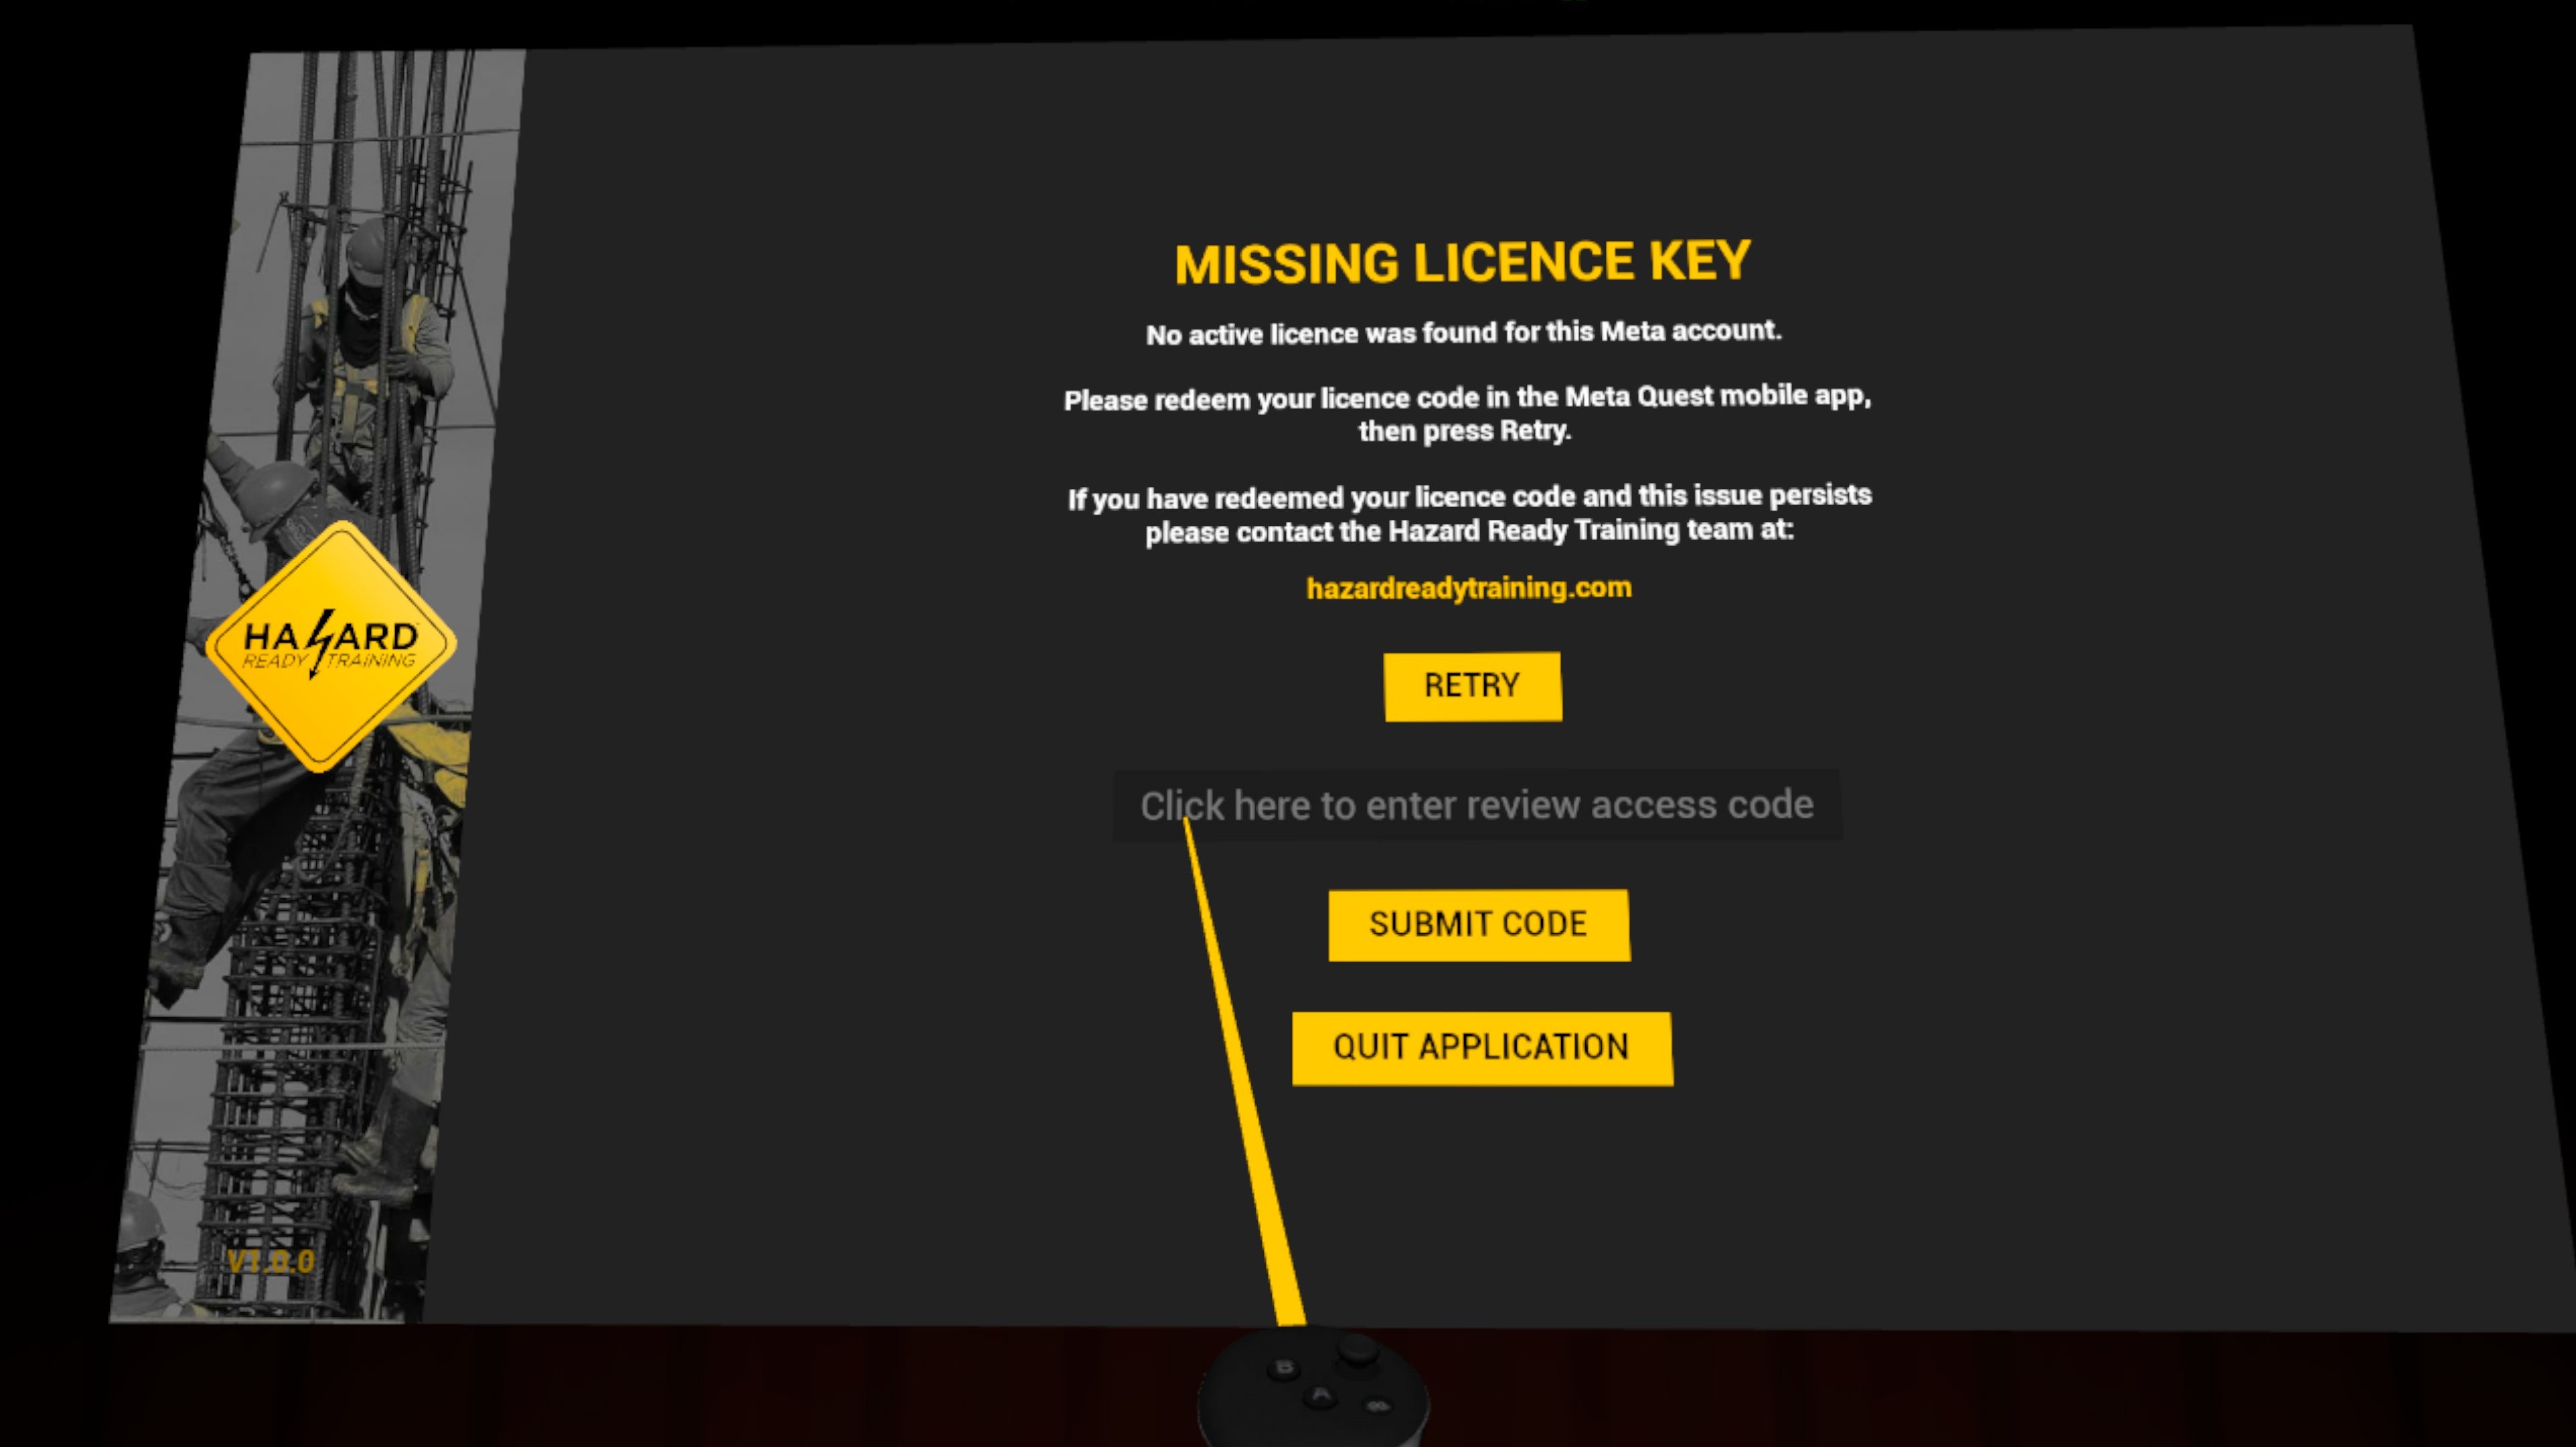
The license key menu will automatically check the signed in account for any valid content license keys.
If a valid license key is found on the signed in account the main menu will be displayed.
If no valid content license keys are found on the signed in account the license key menu will display an "Missing License Key" screen with further details.
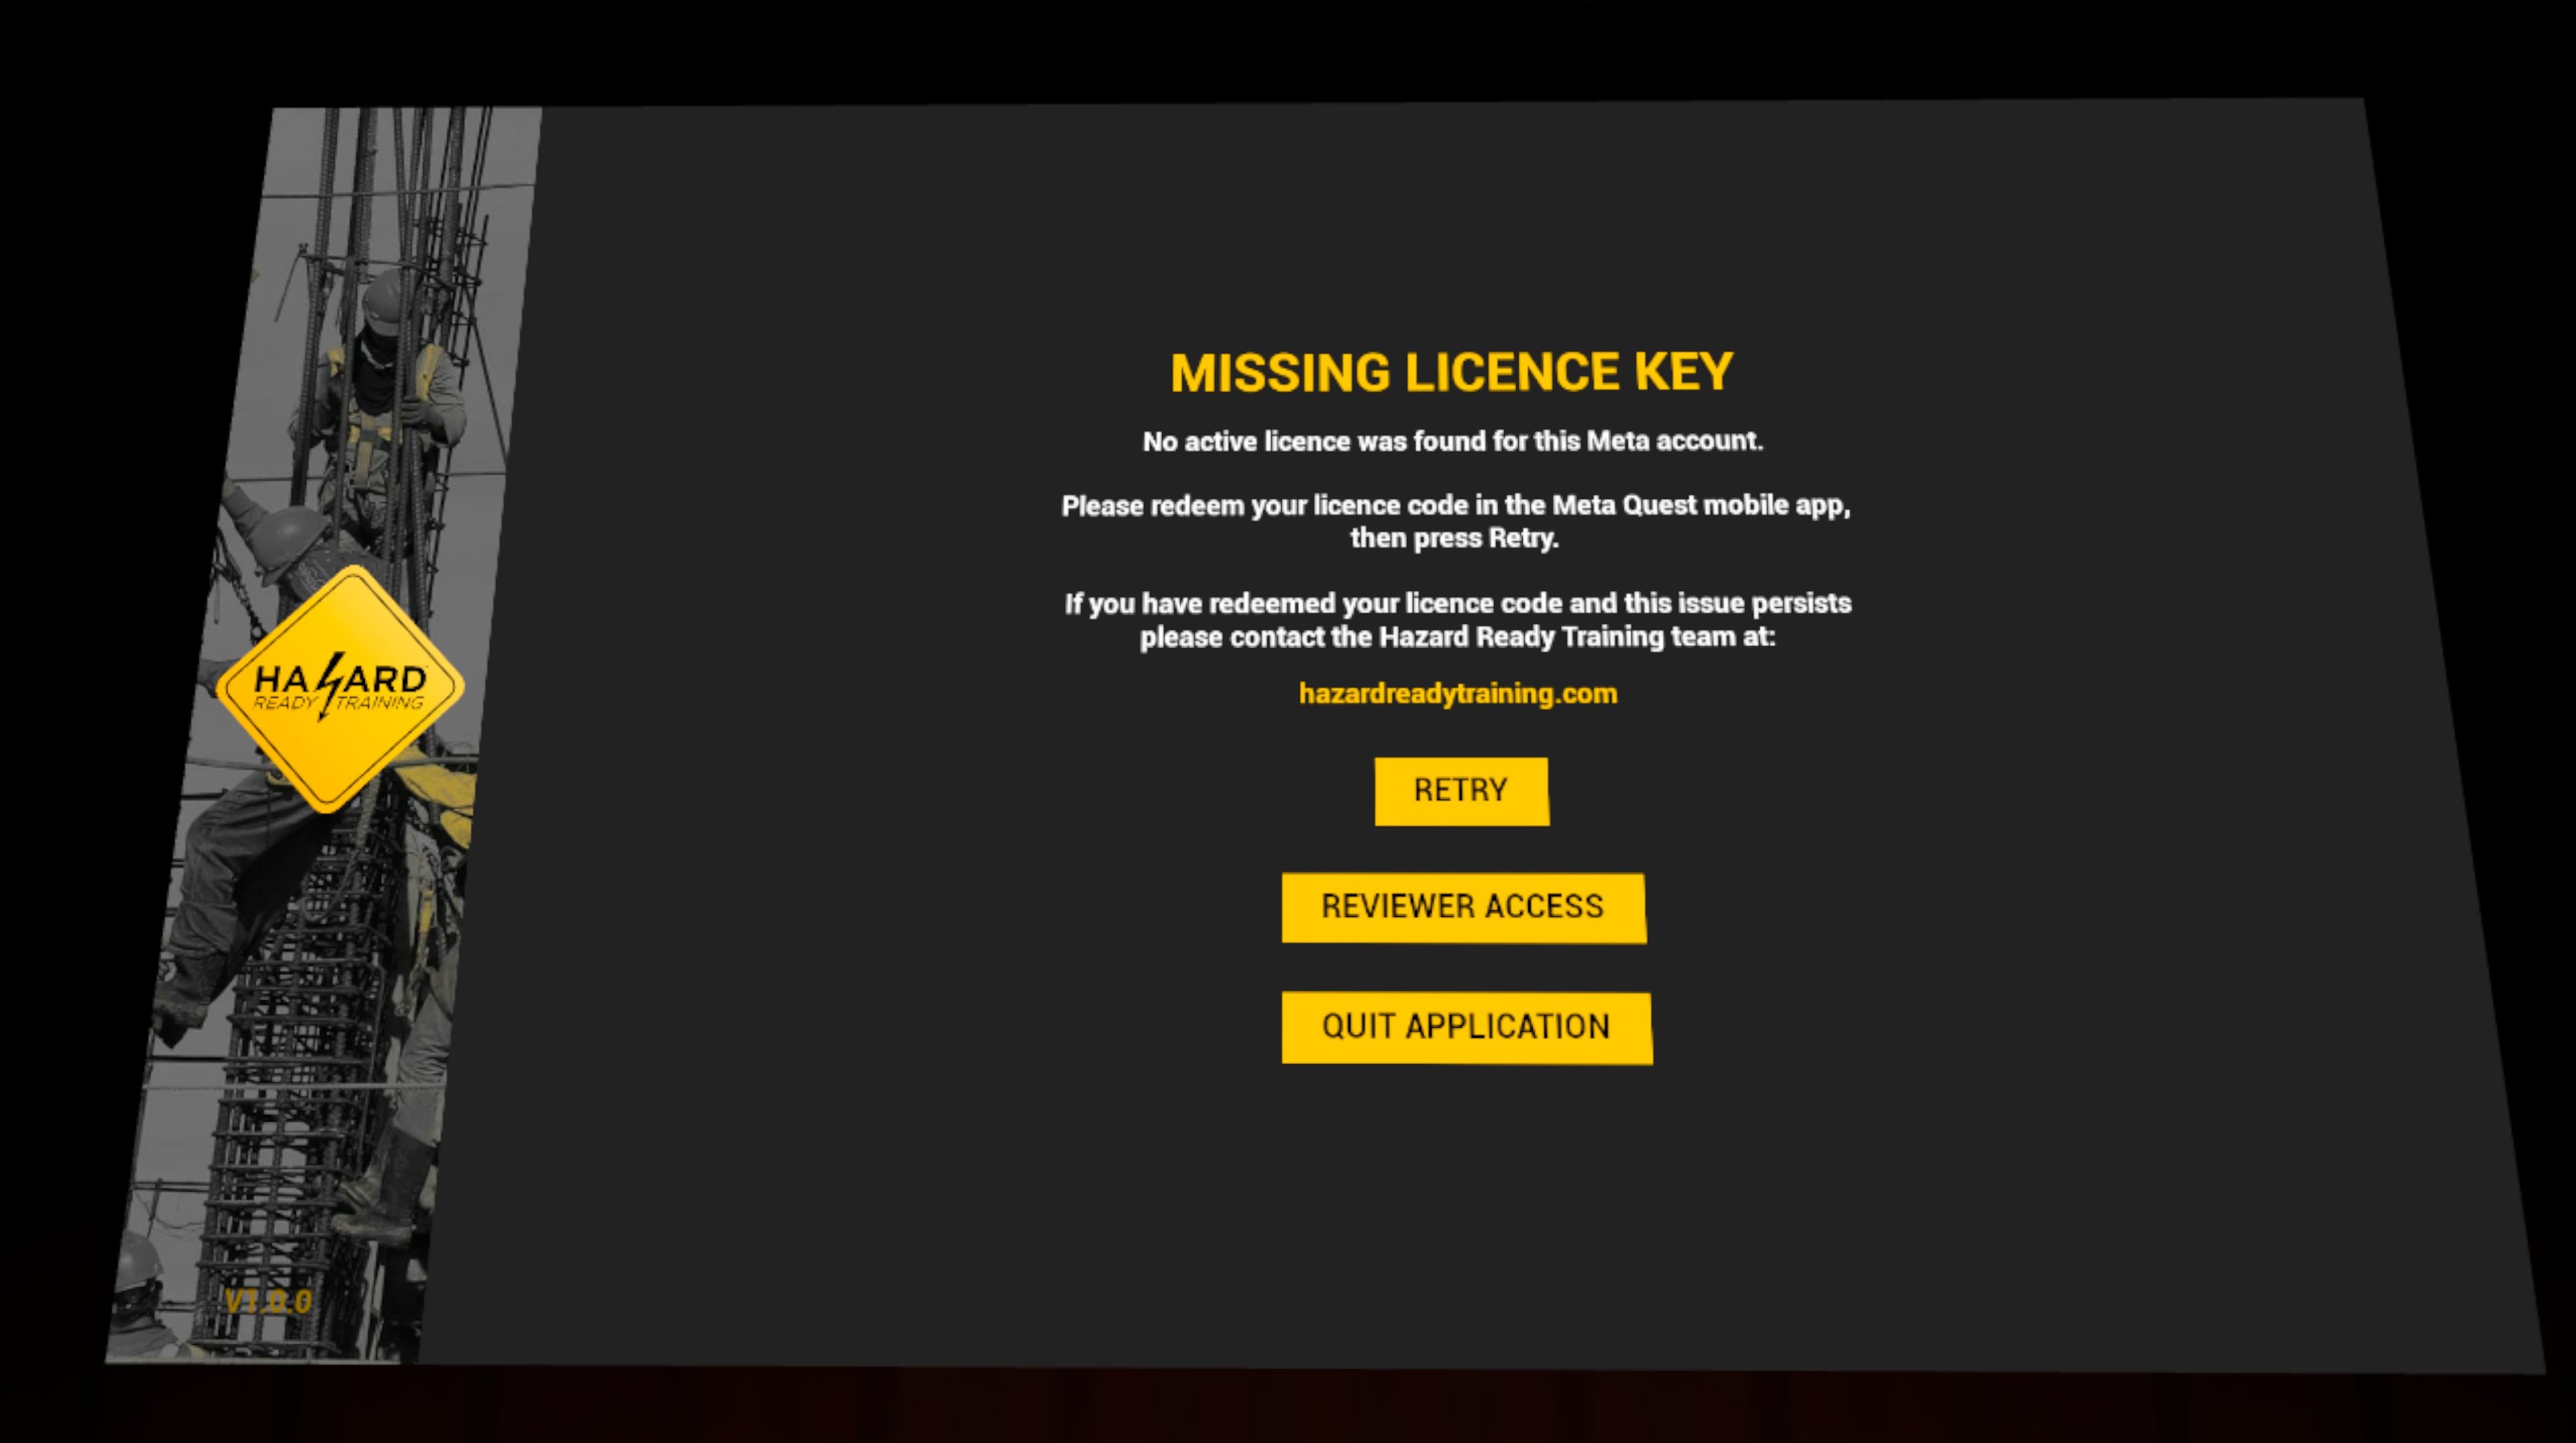
On this screen three two options:
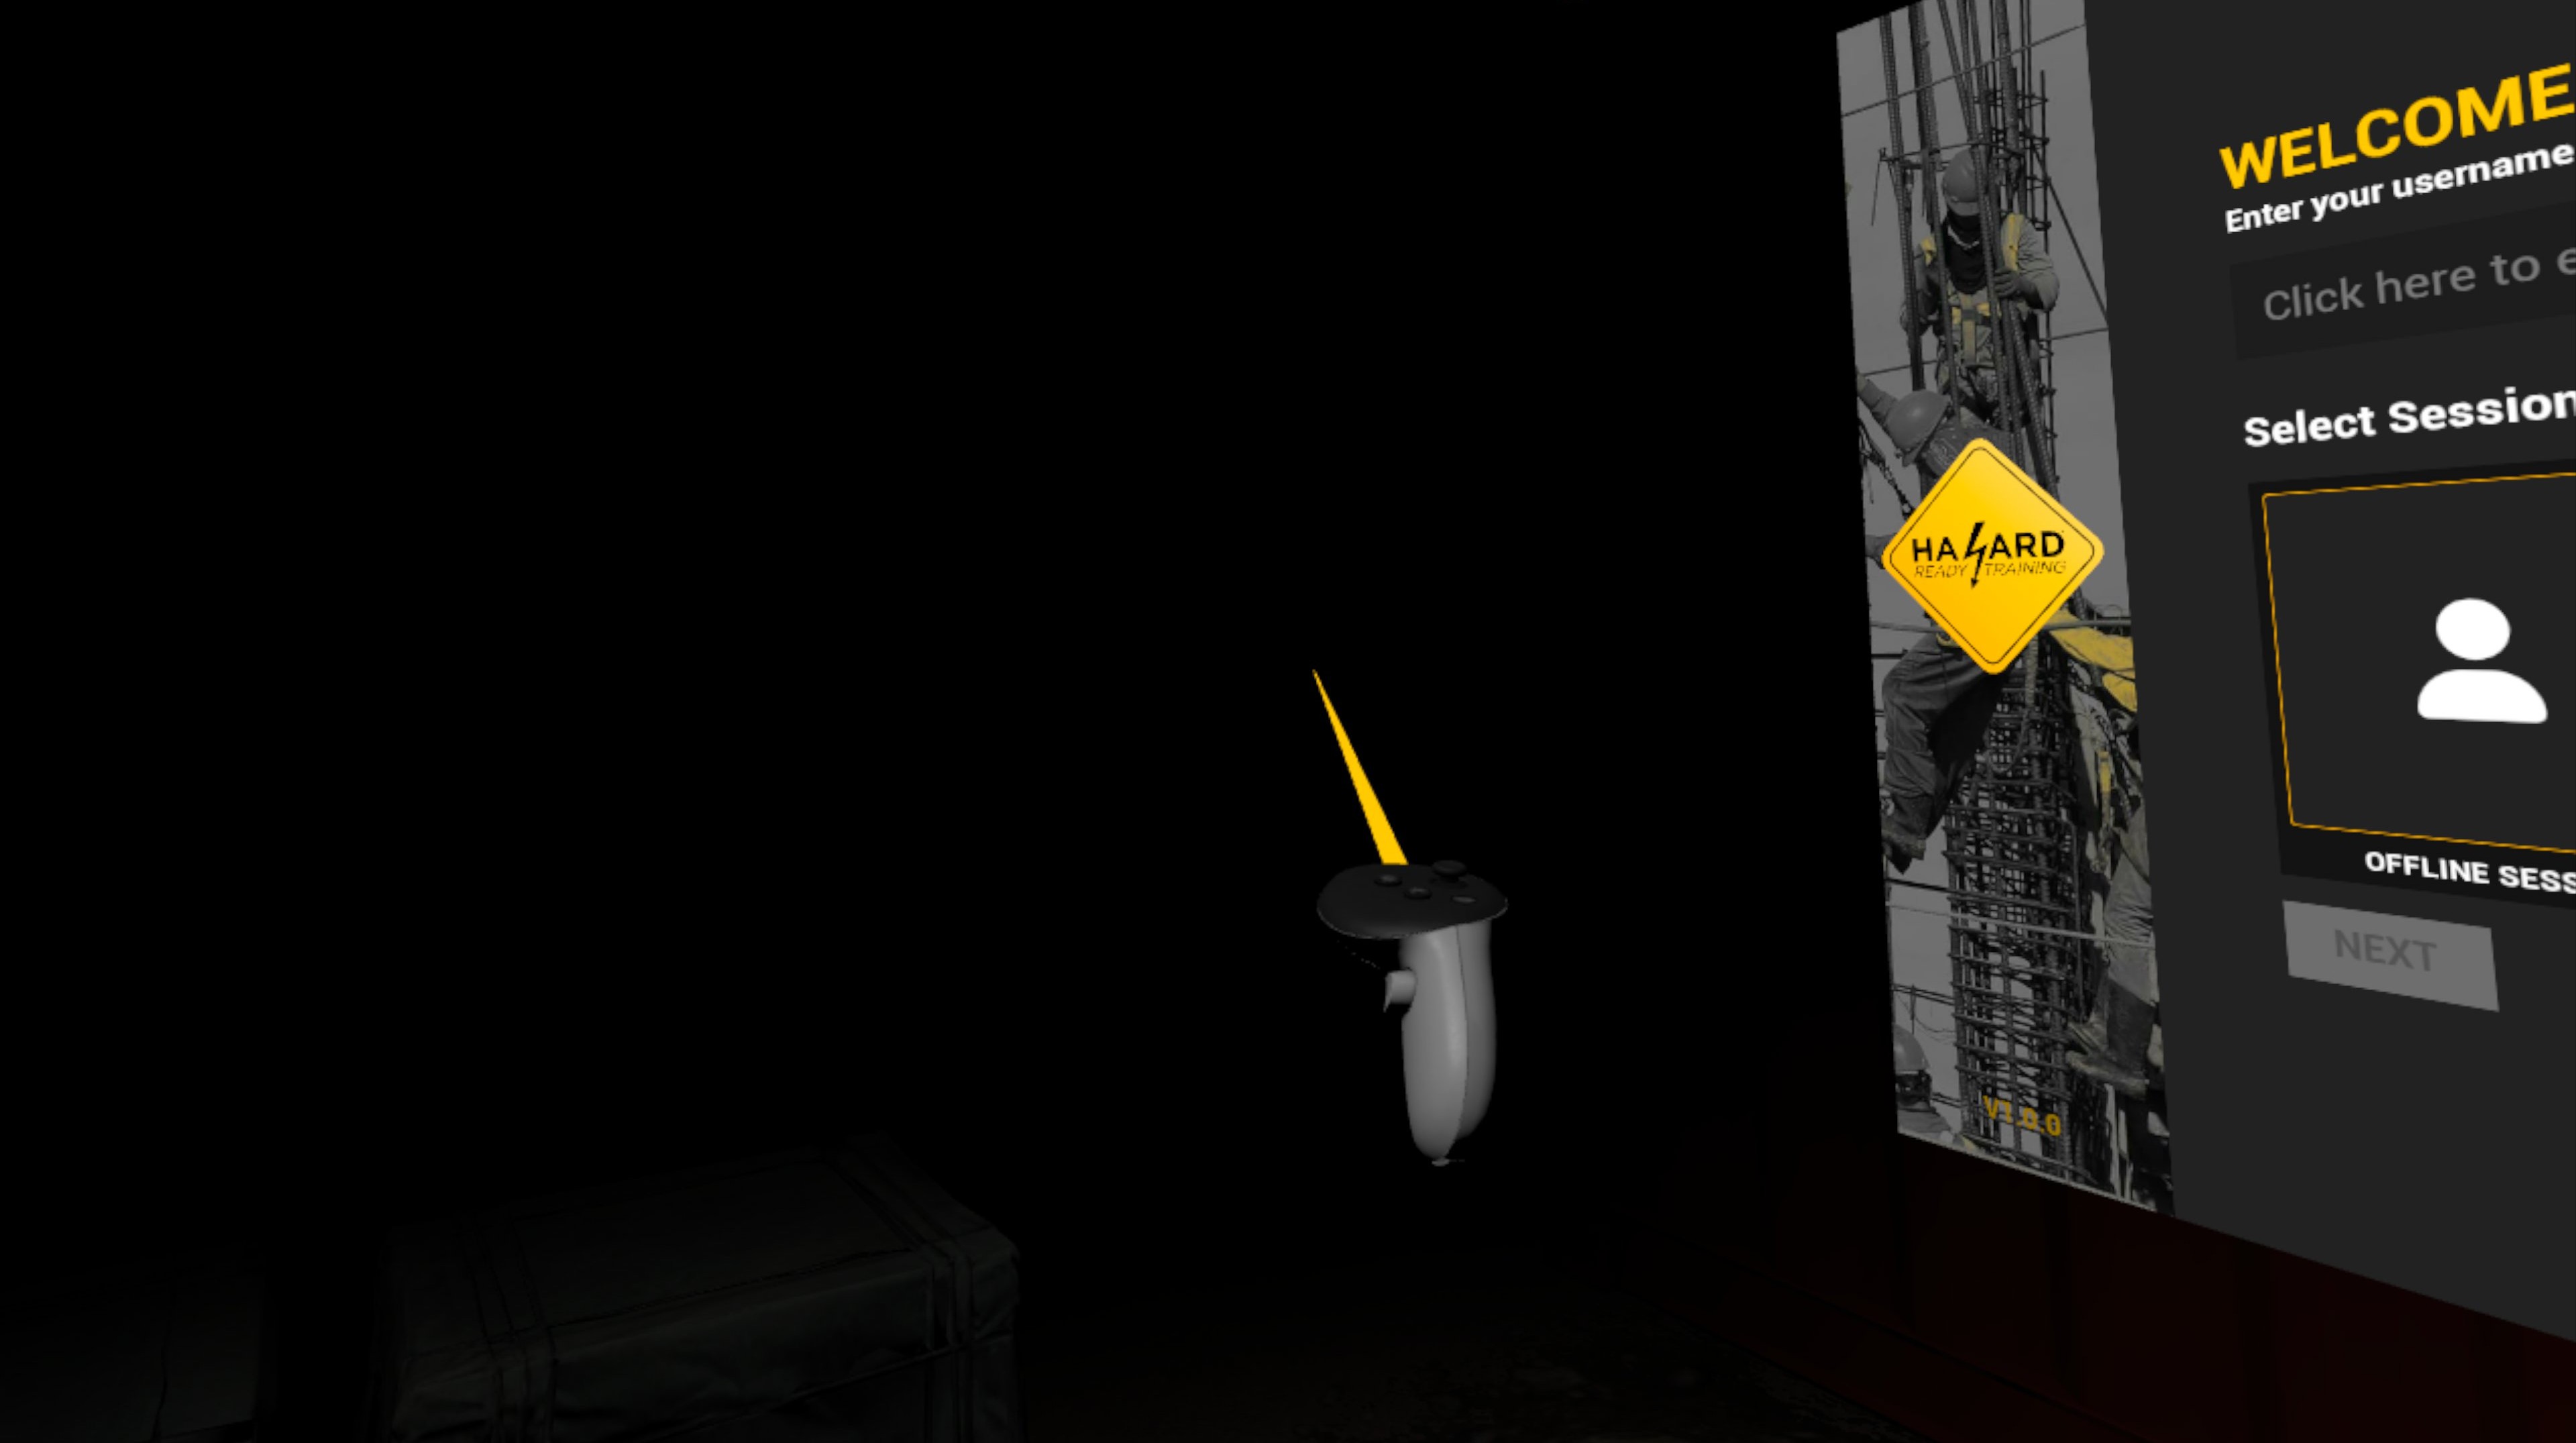
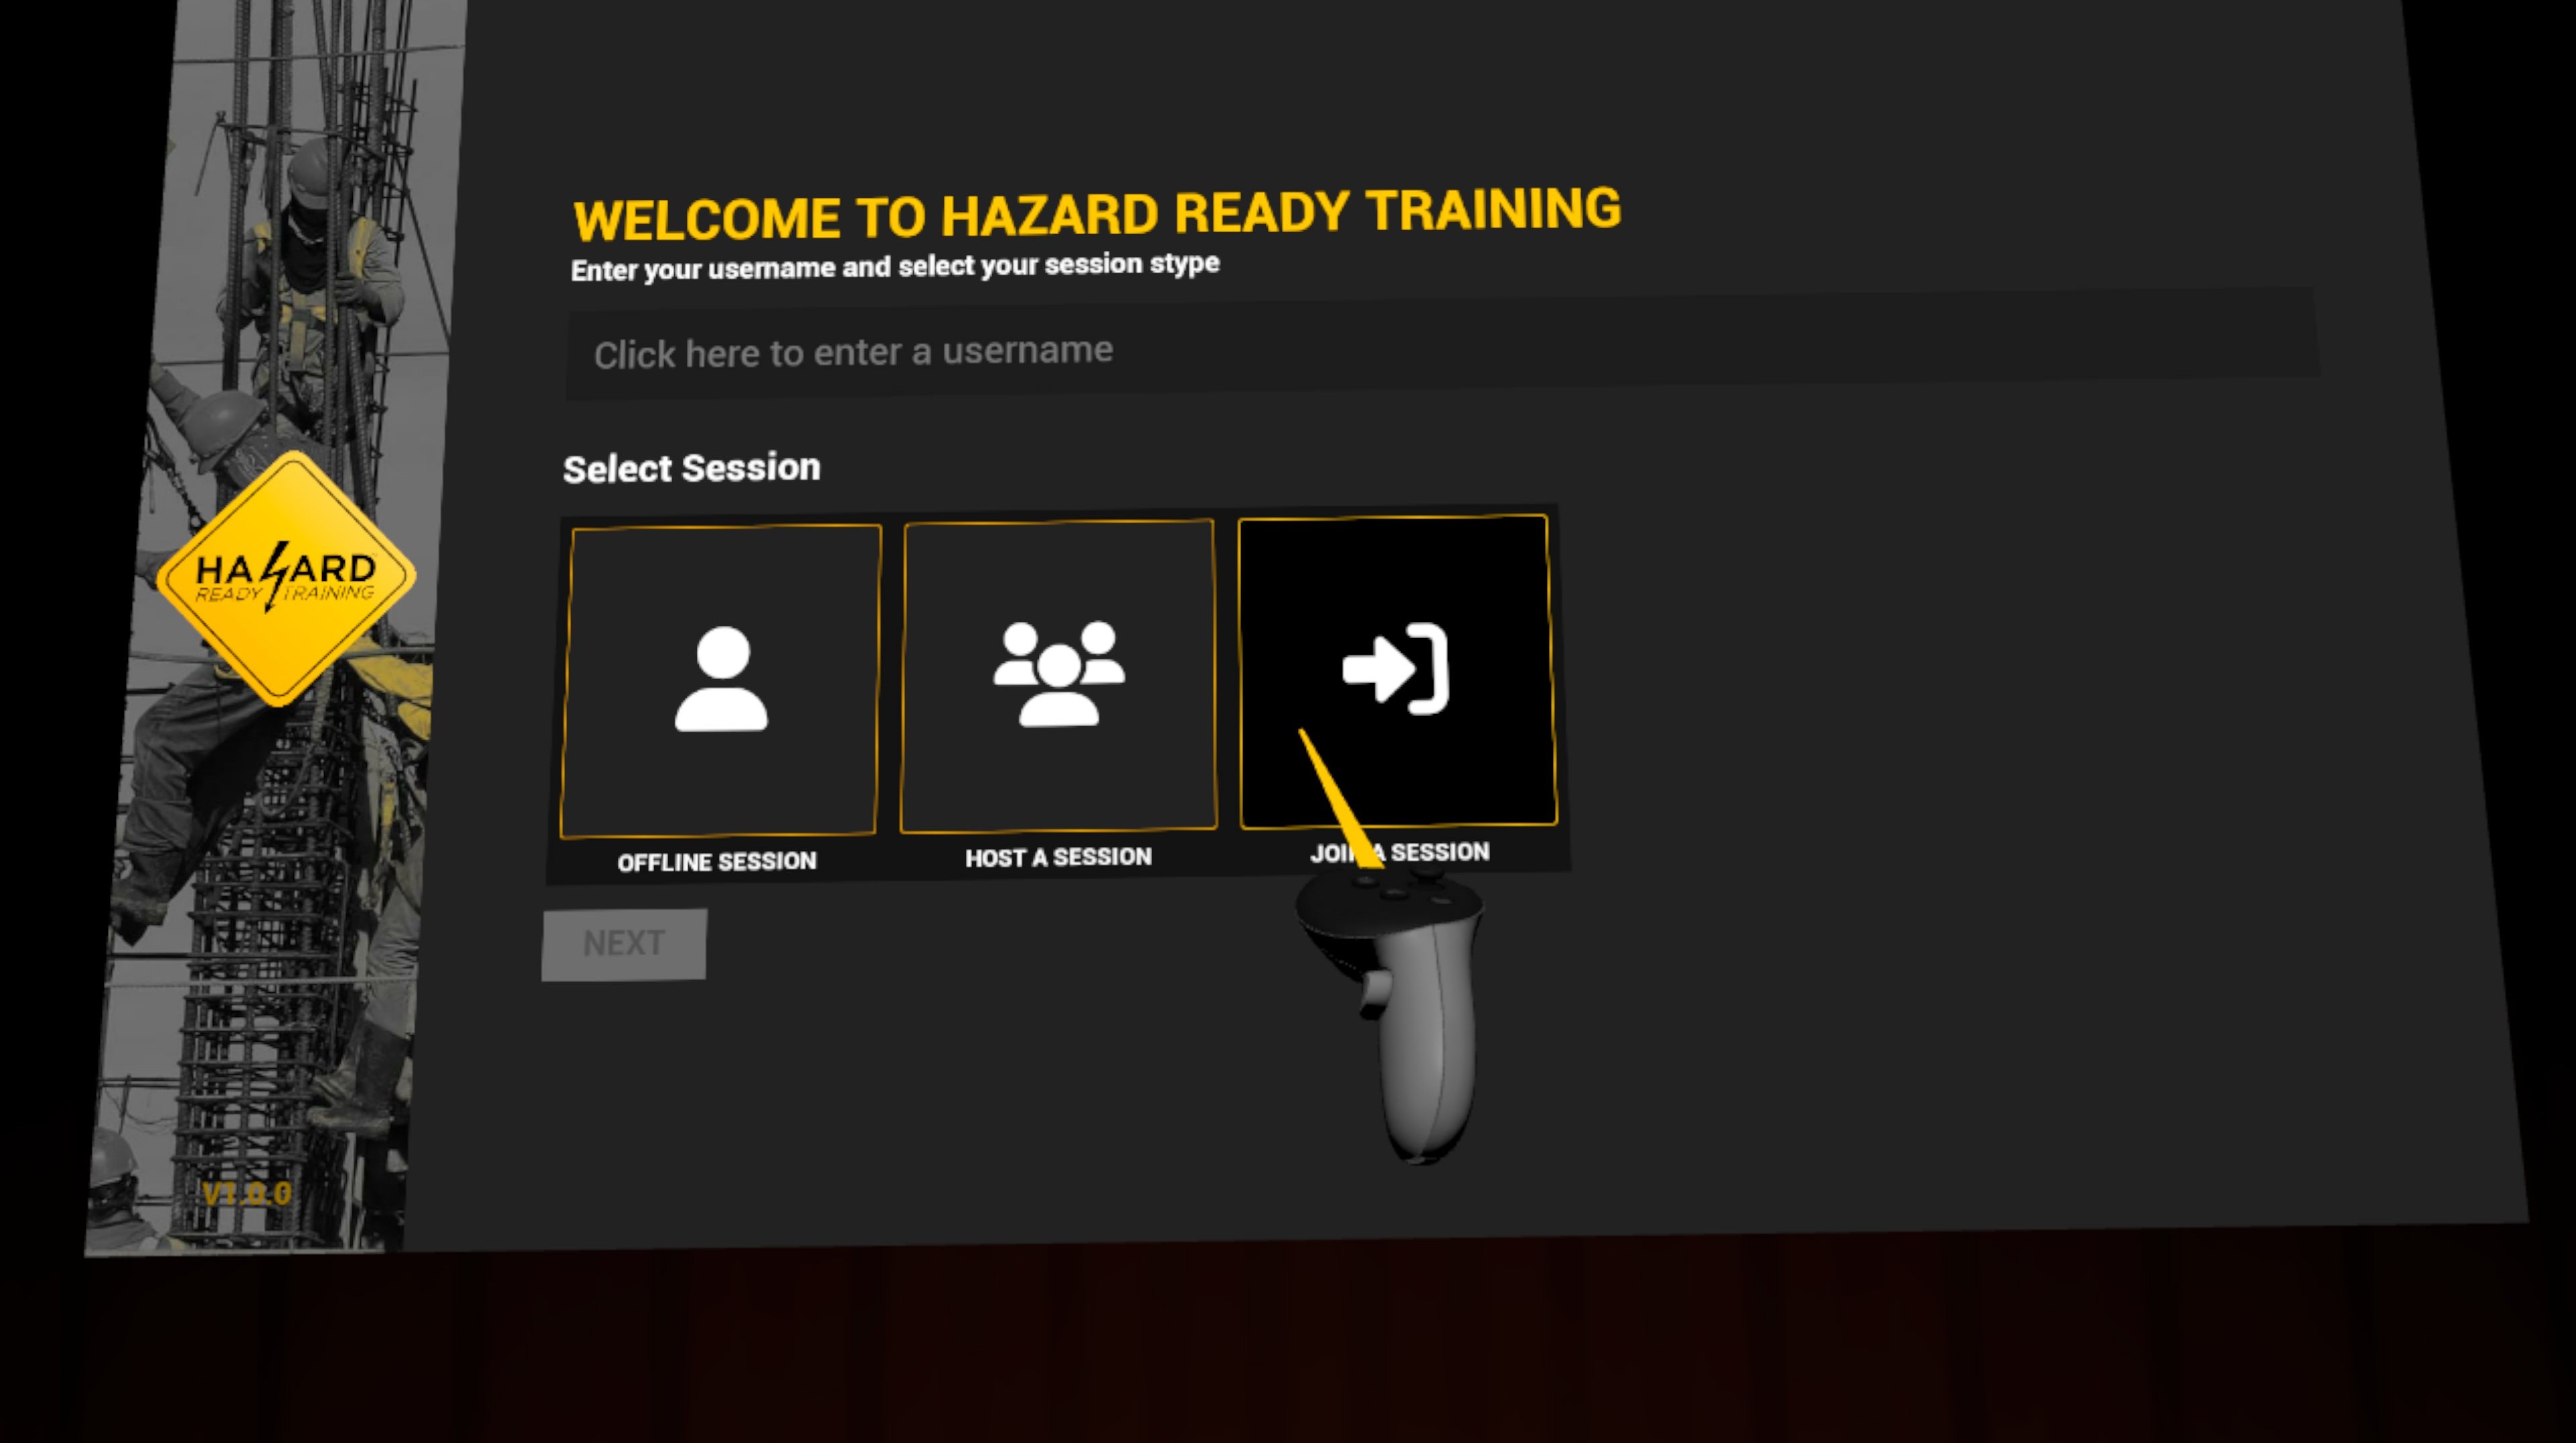
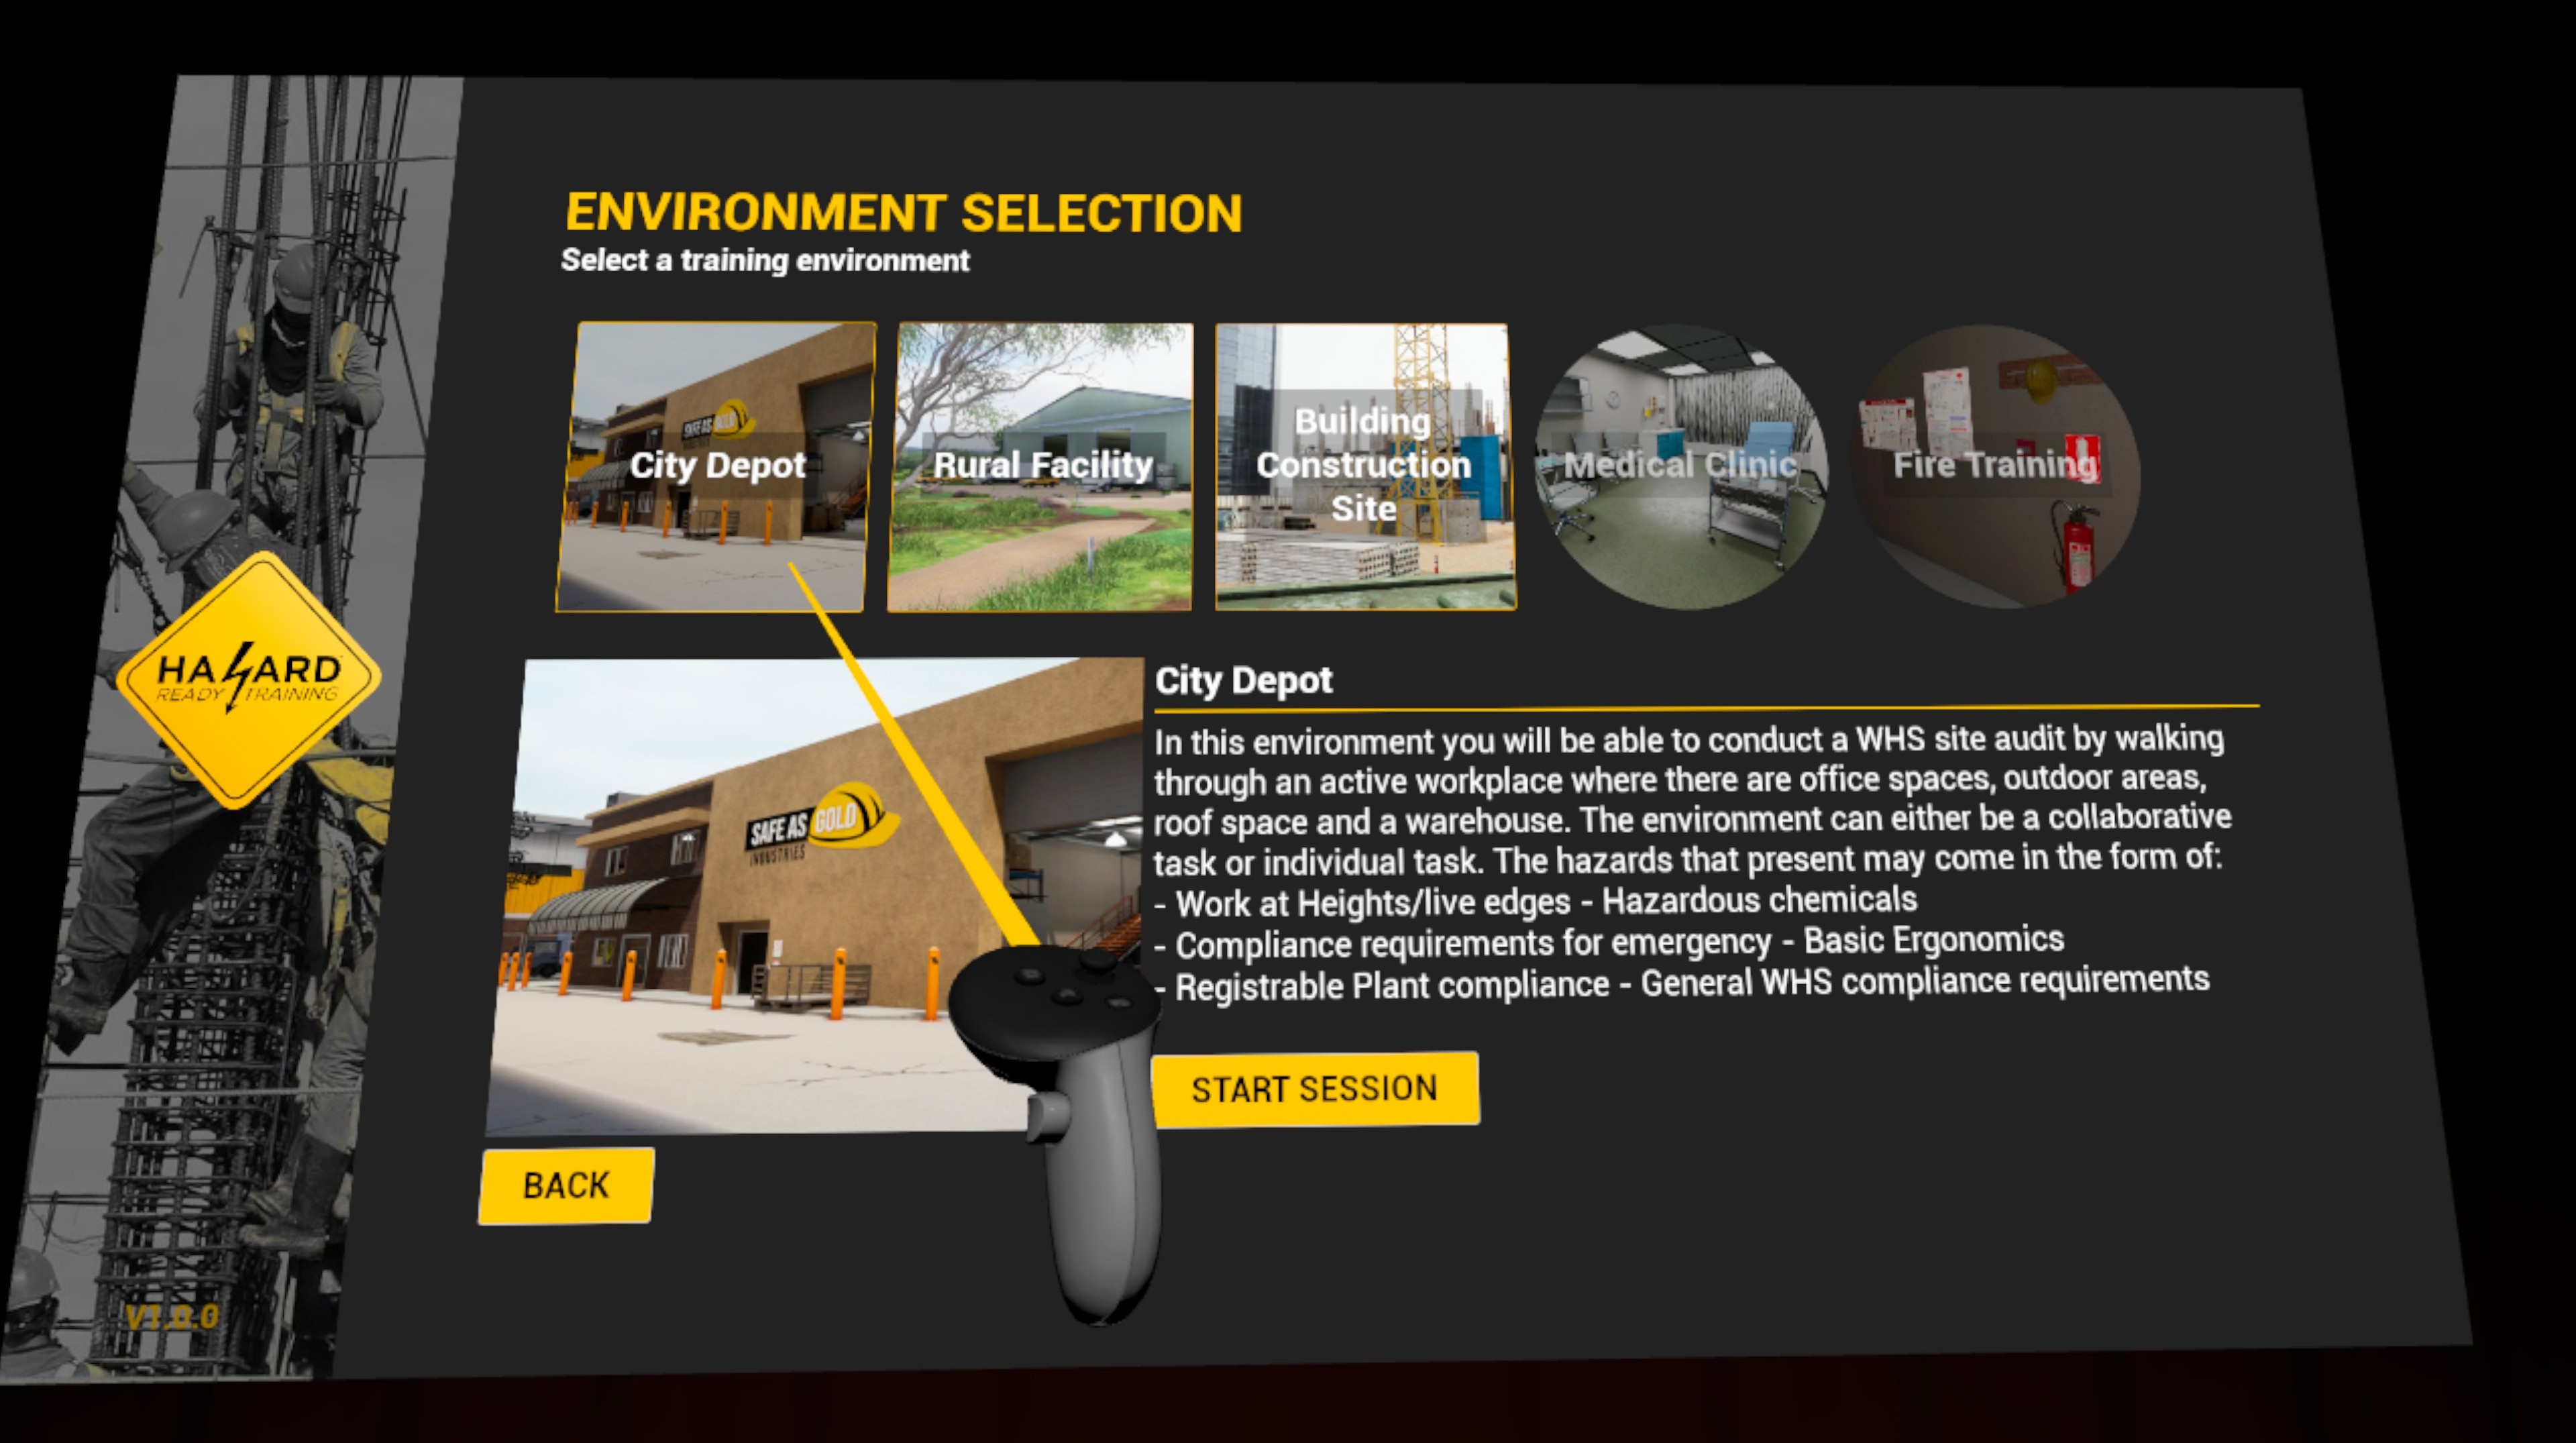
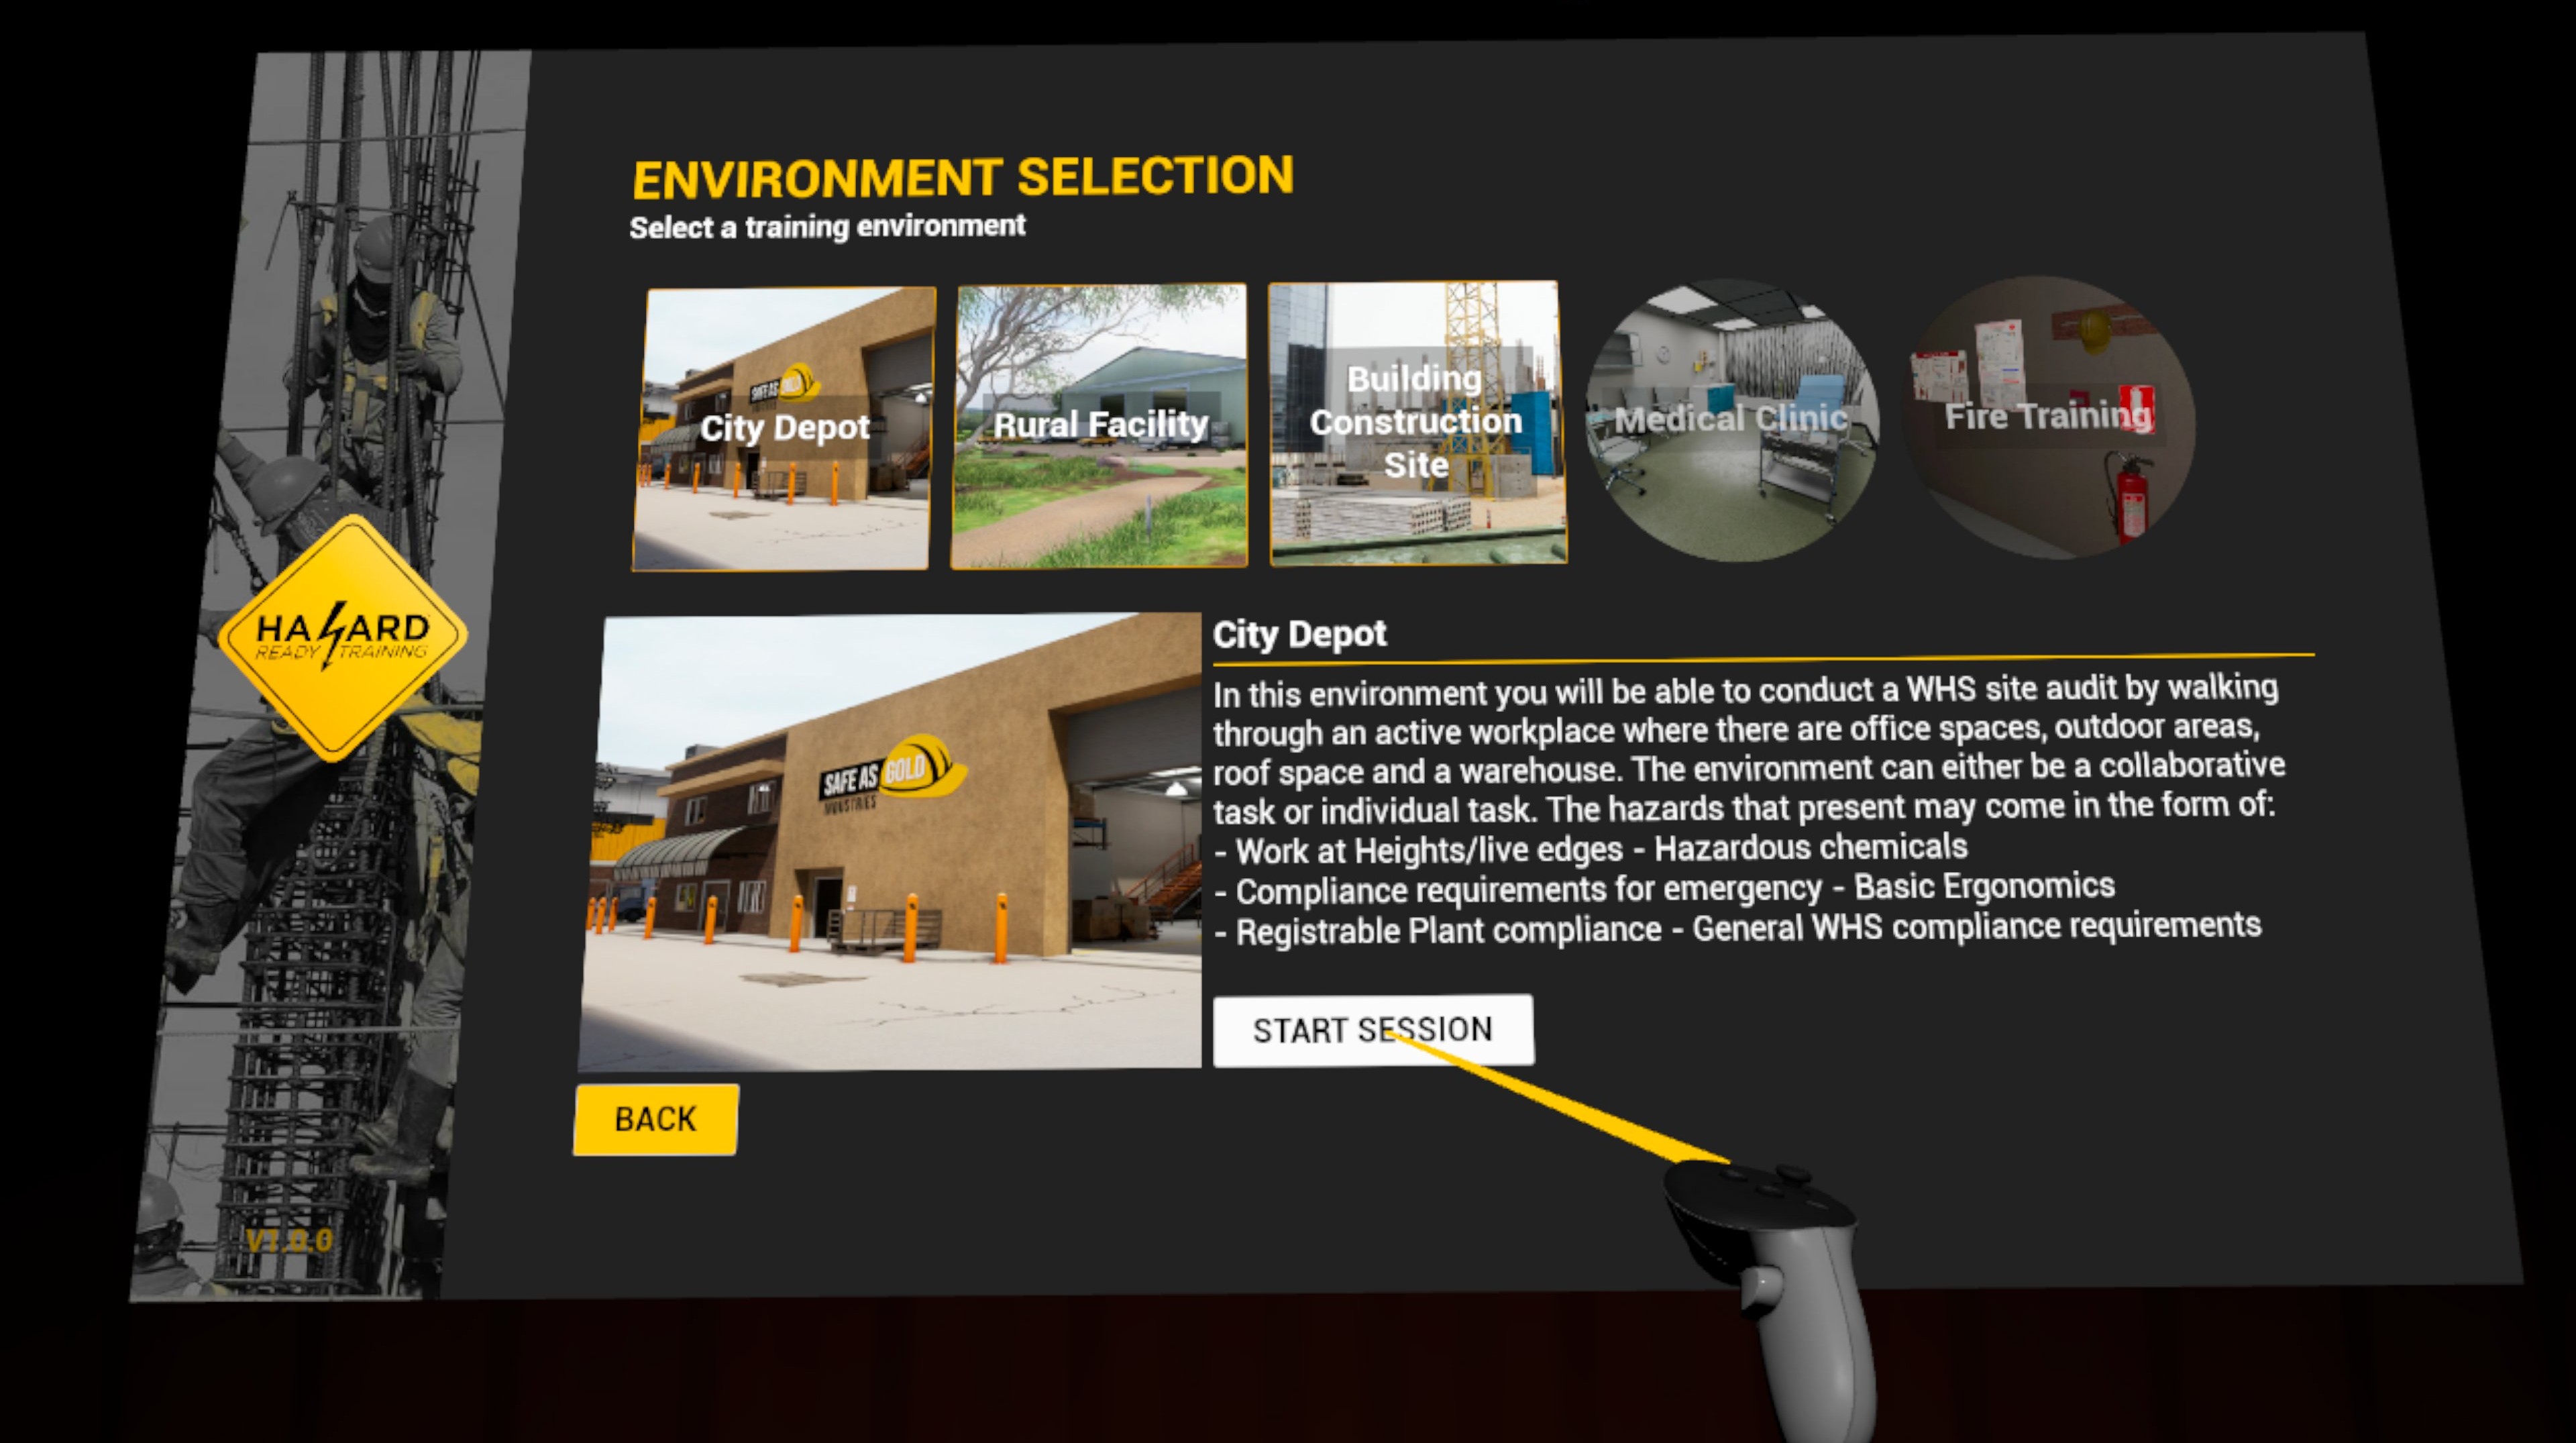
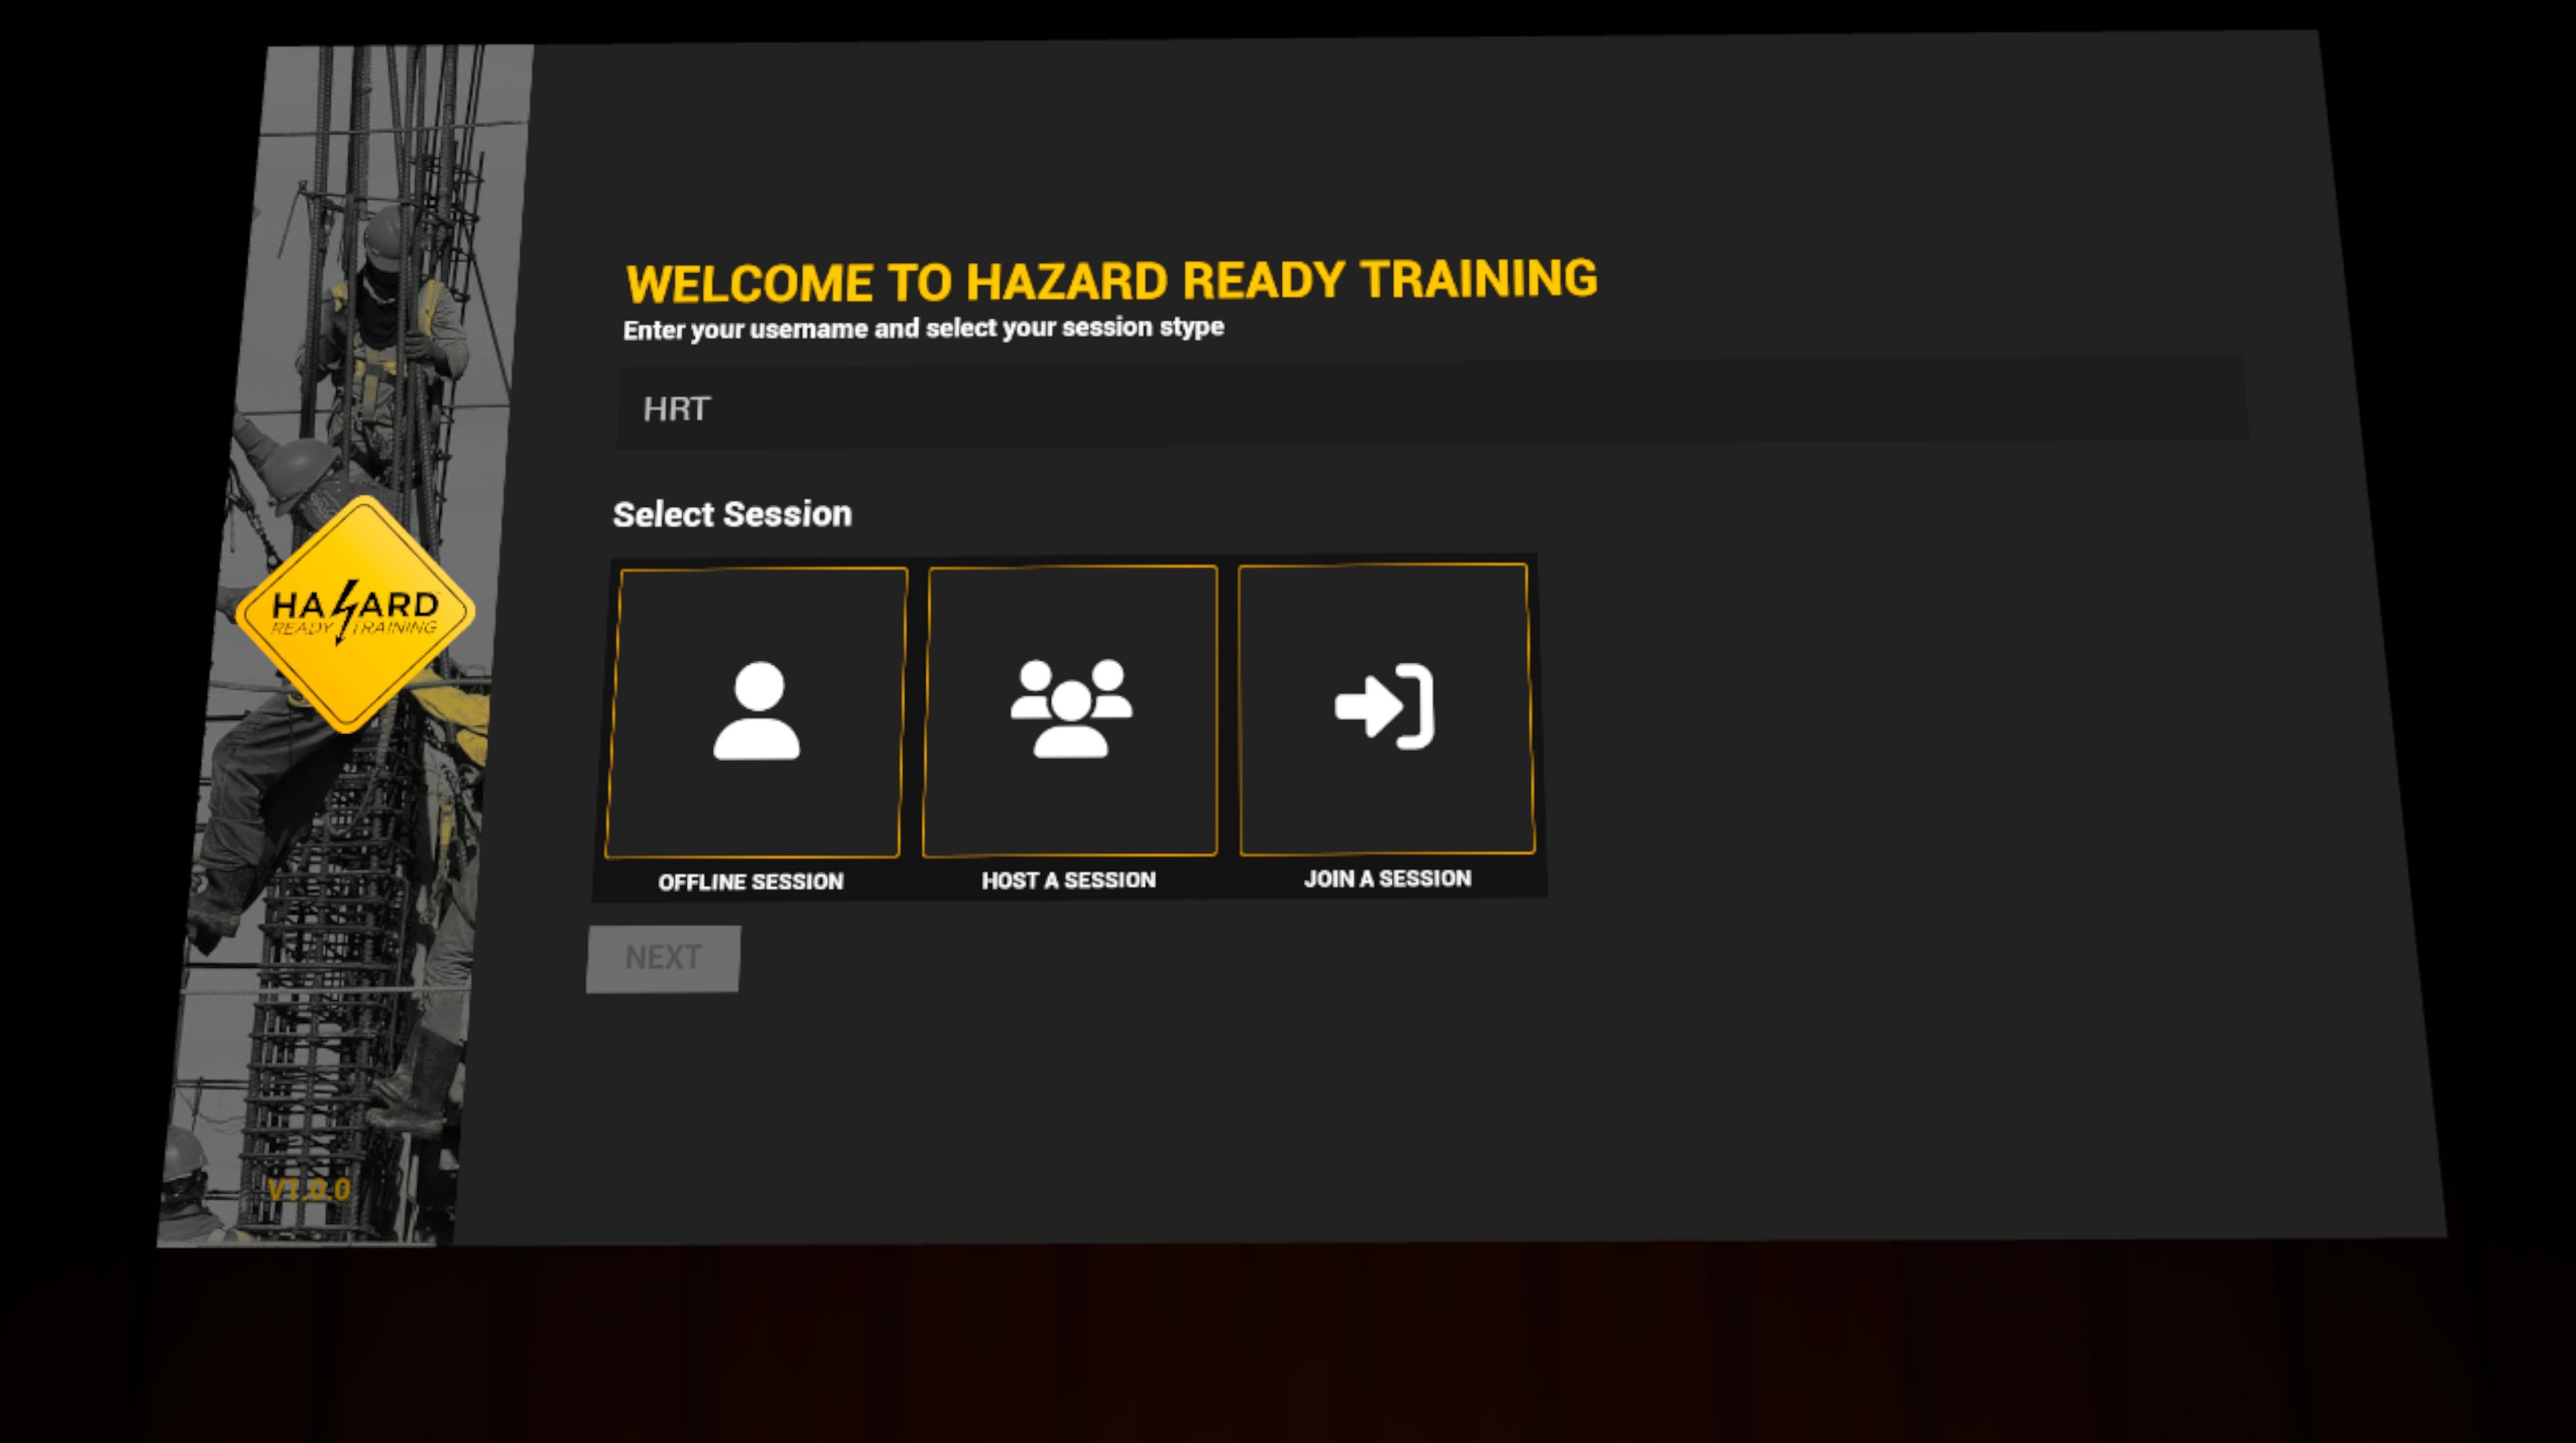
To enter a user name and select a mode to launch:
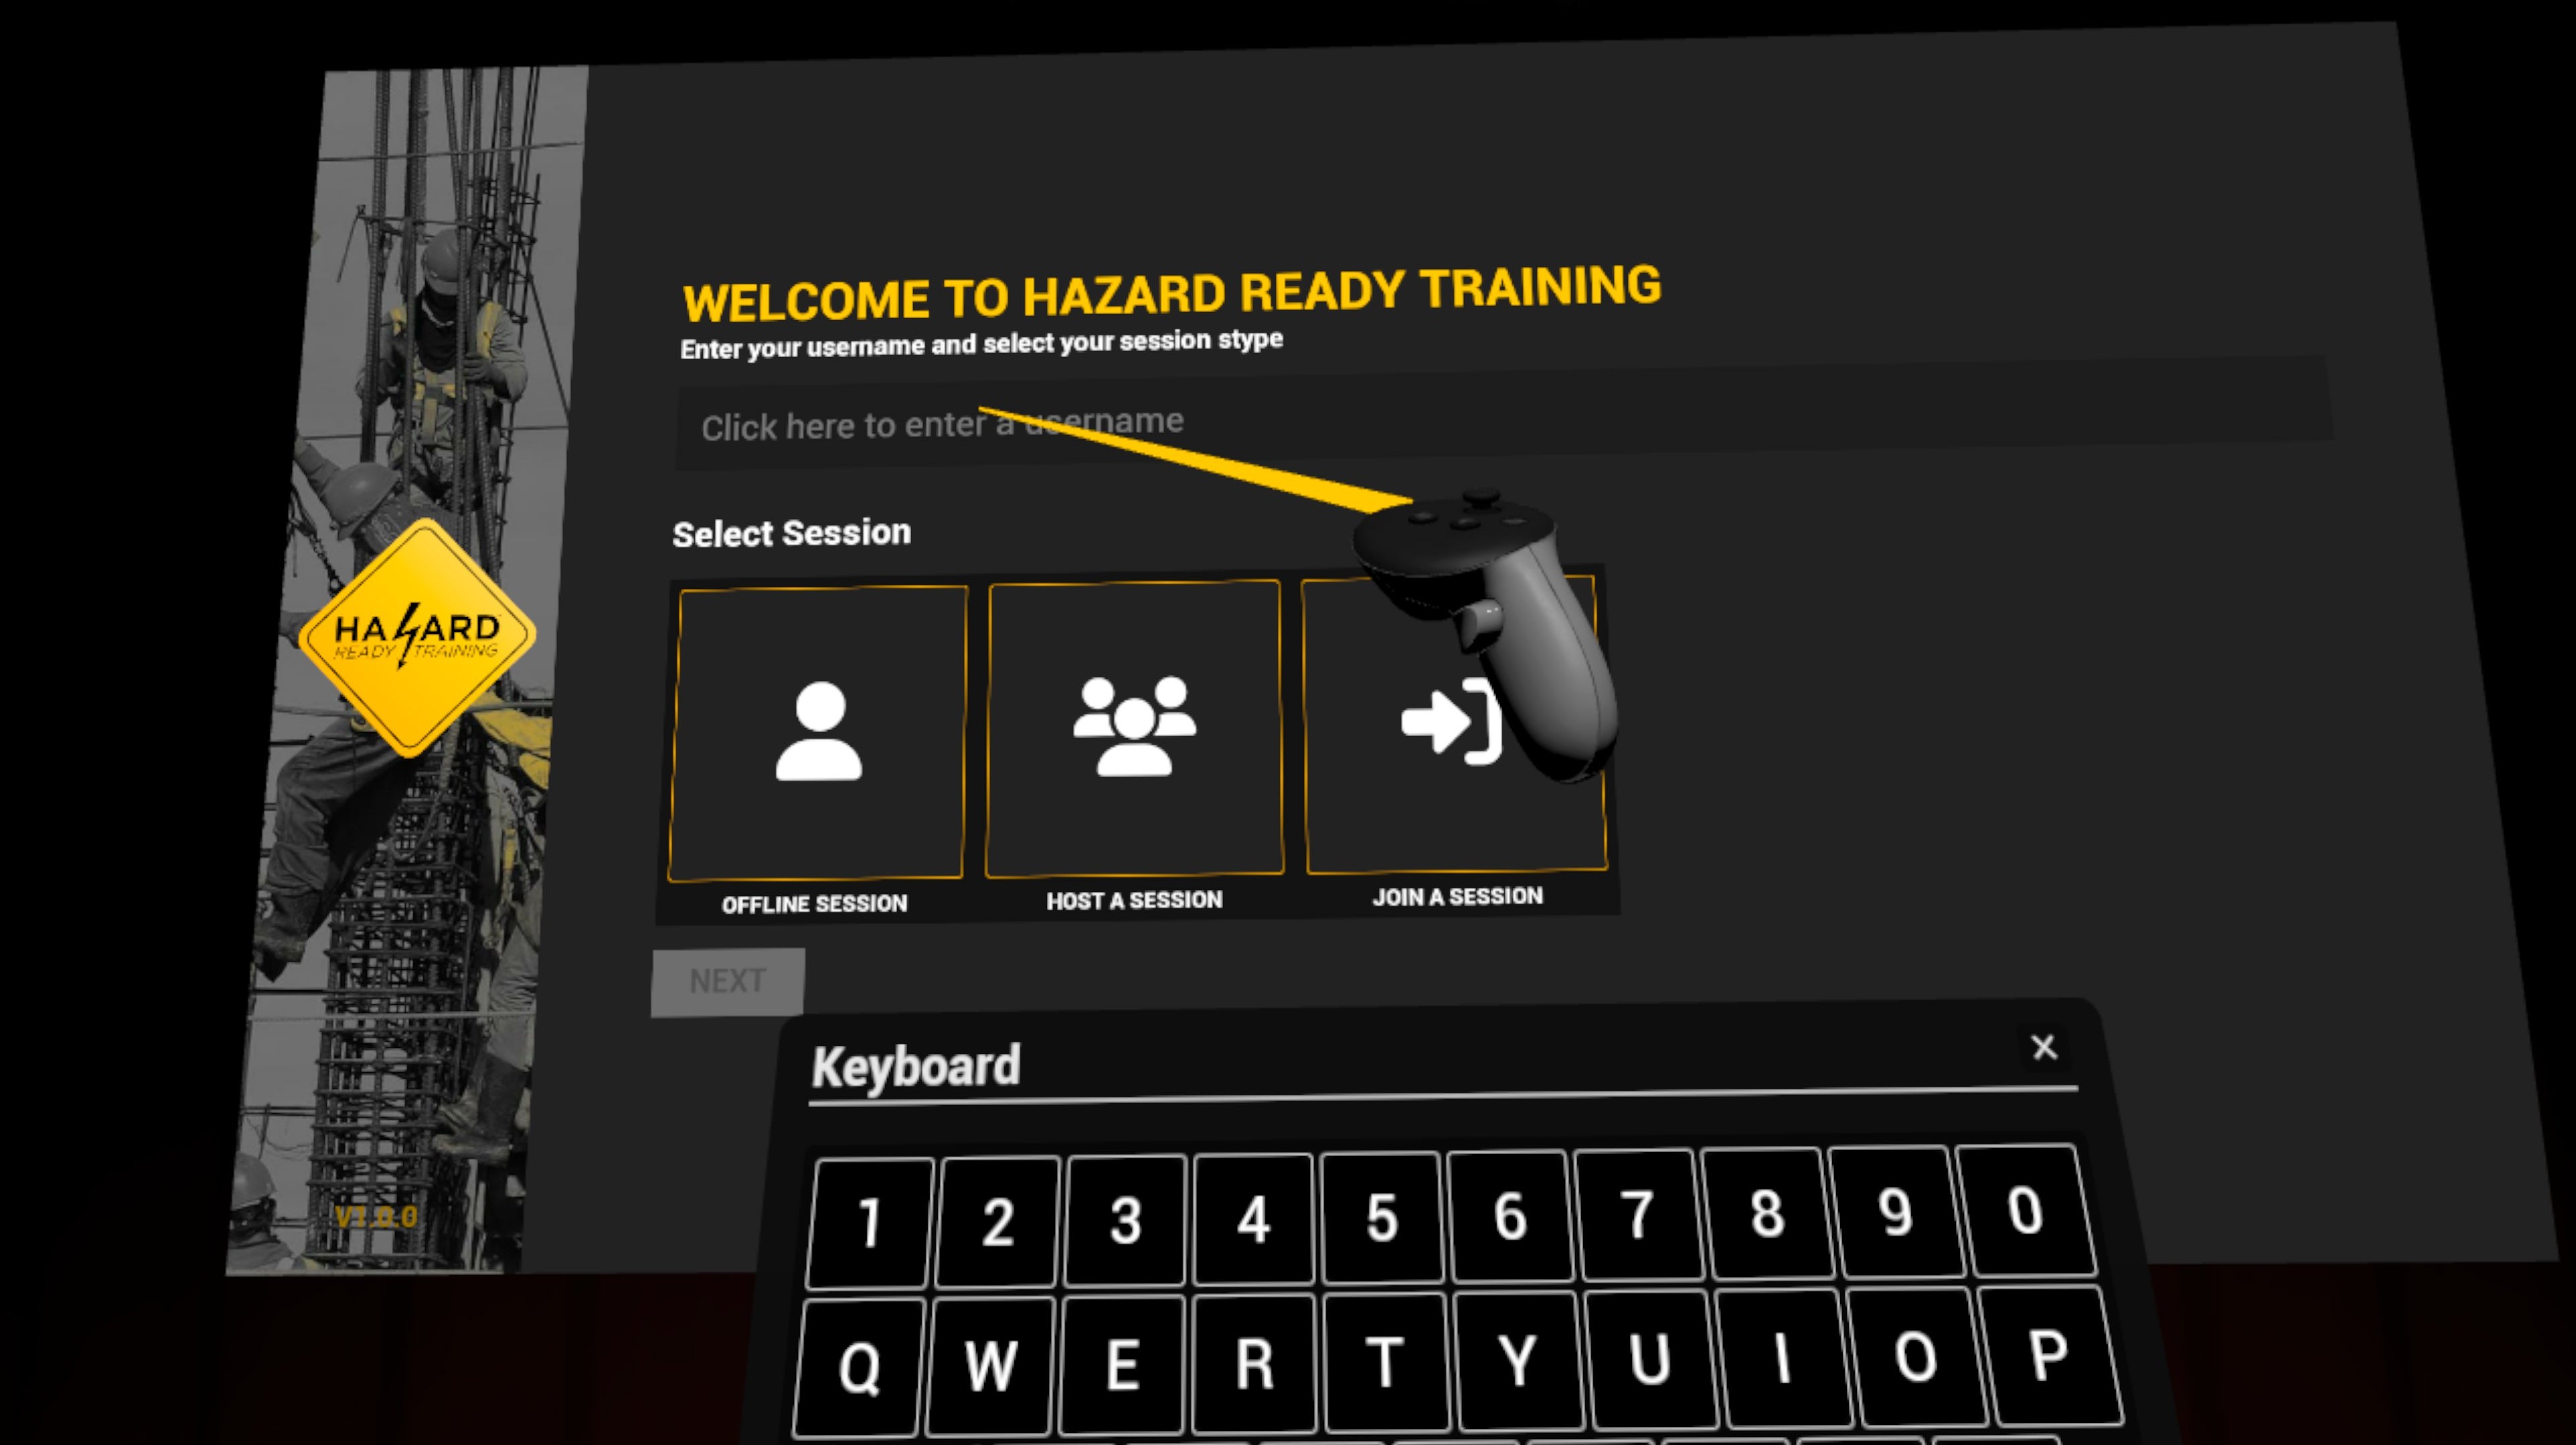
Environments you have access to on the account signed into the Meta Quest will appear a orange boardered squares, and those you do not have access to will appear as borderless circles.
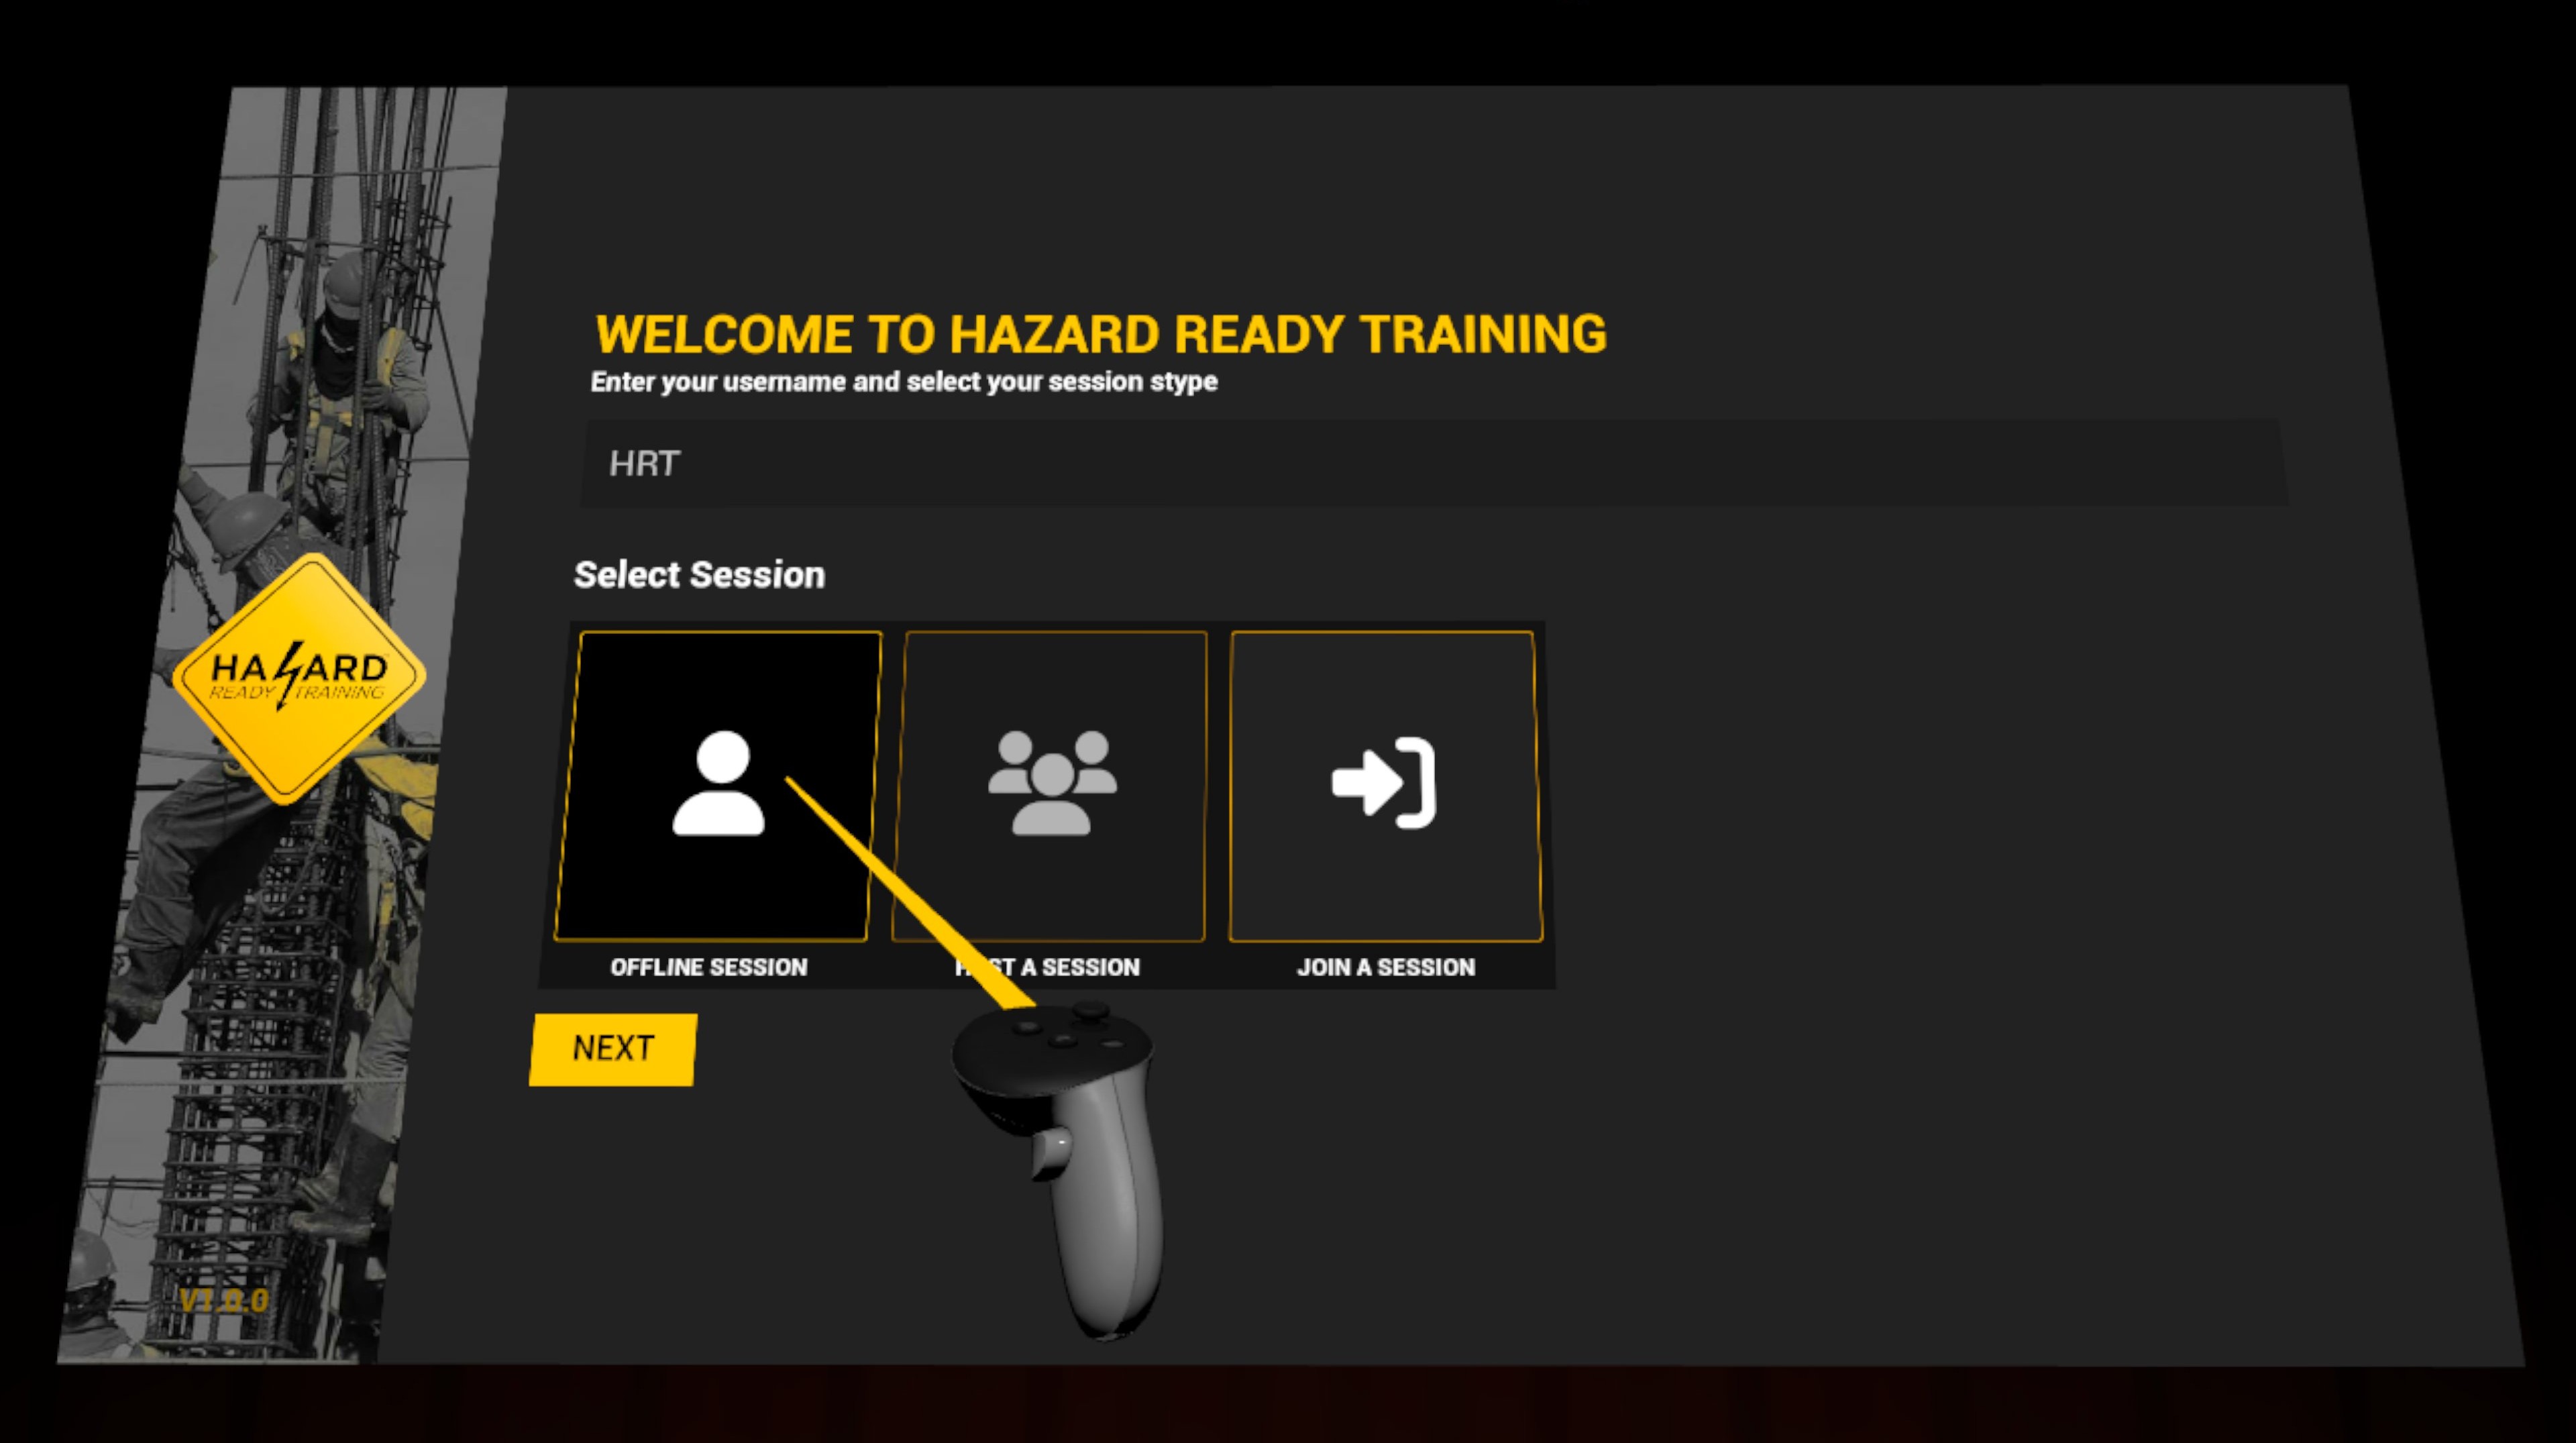
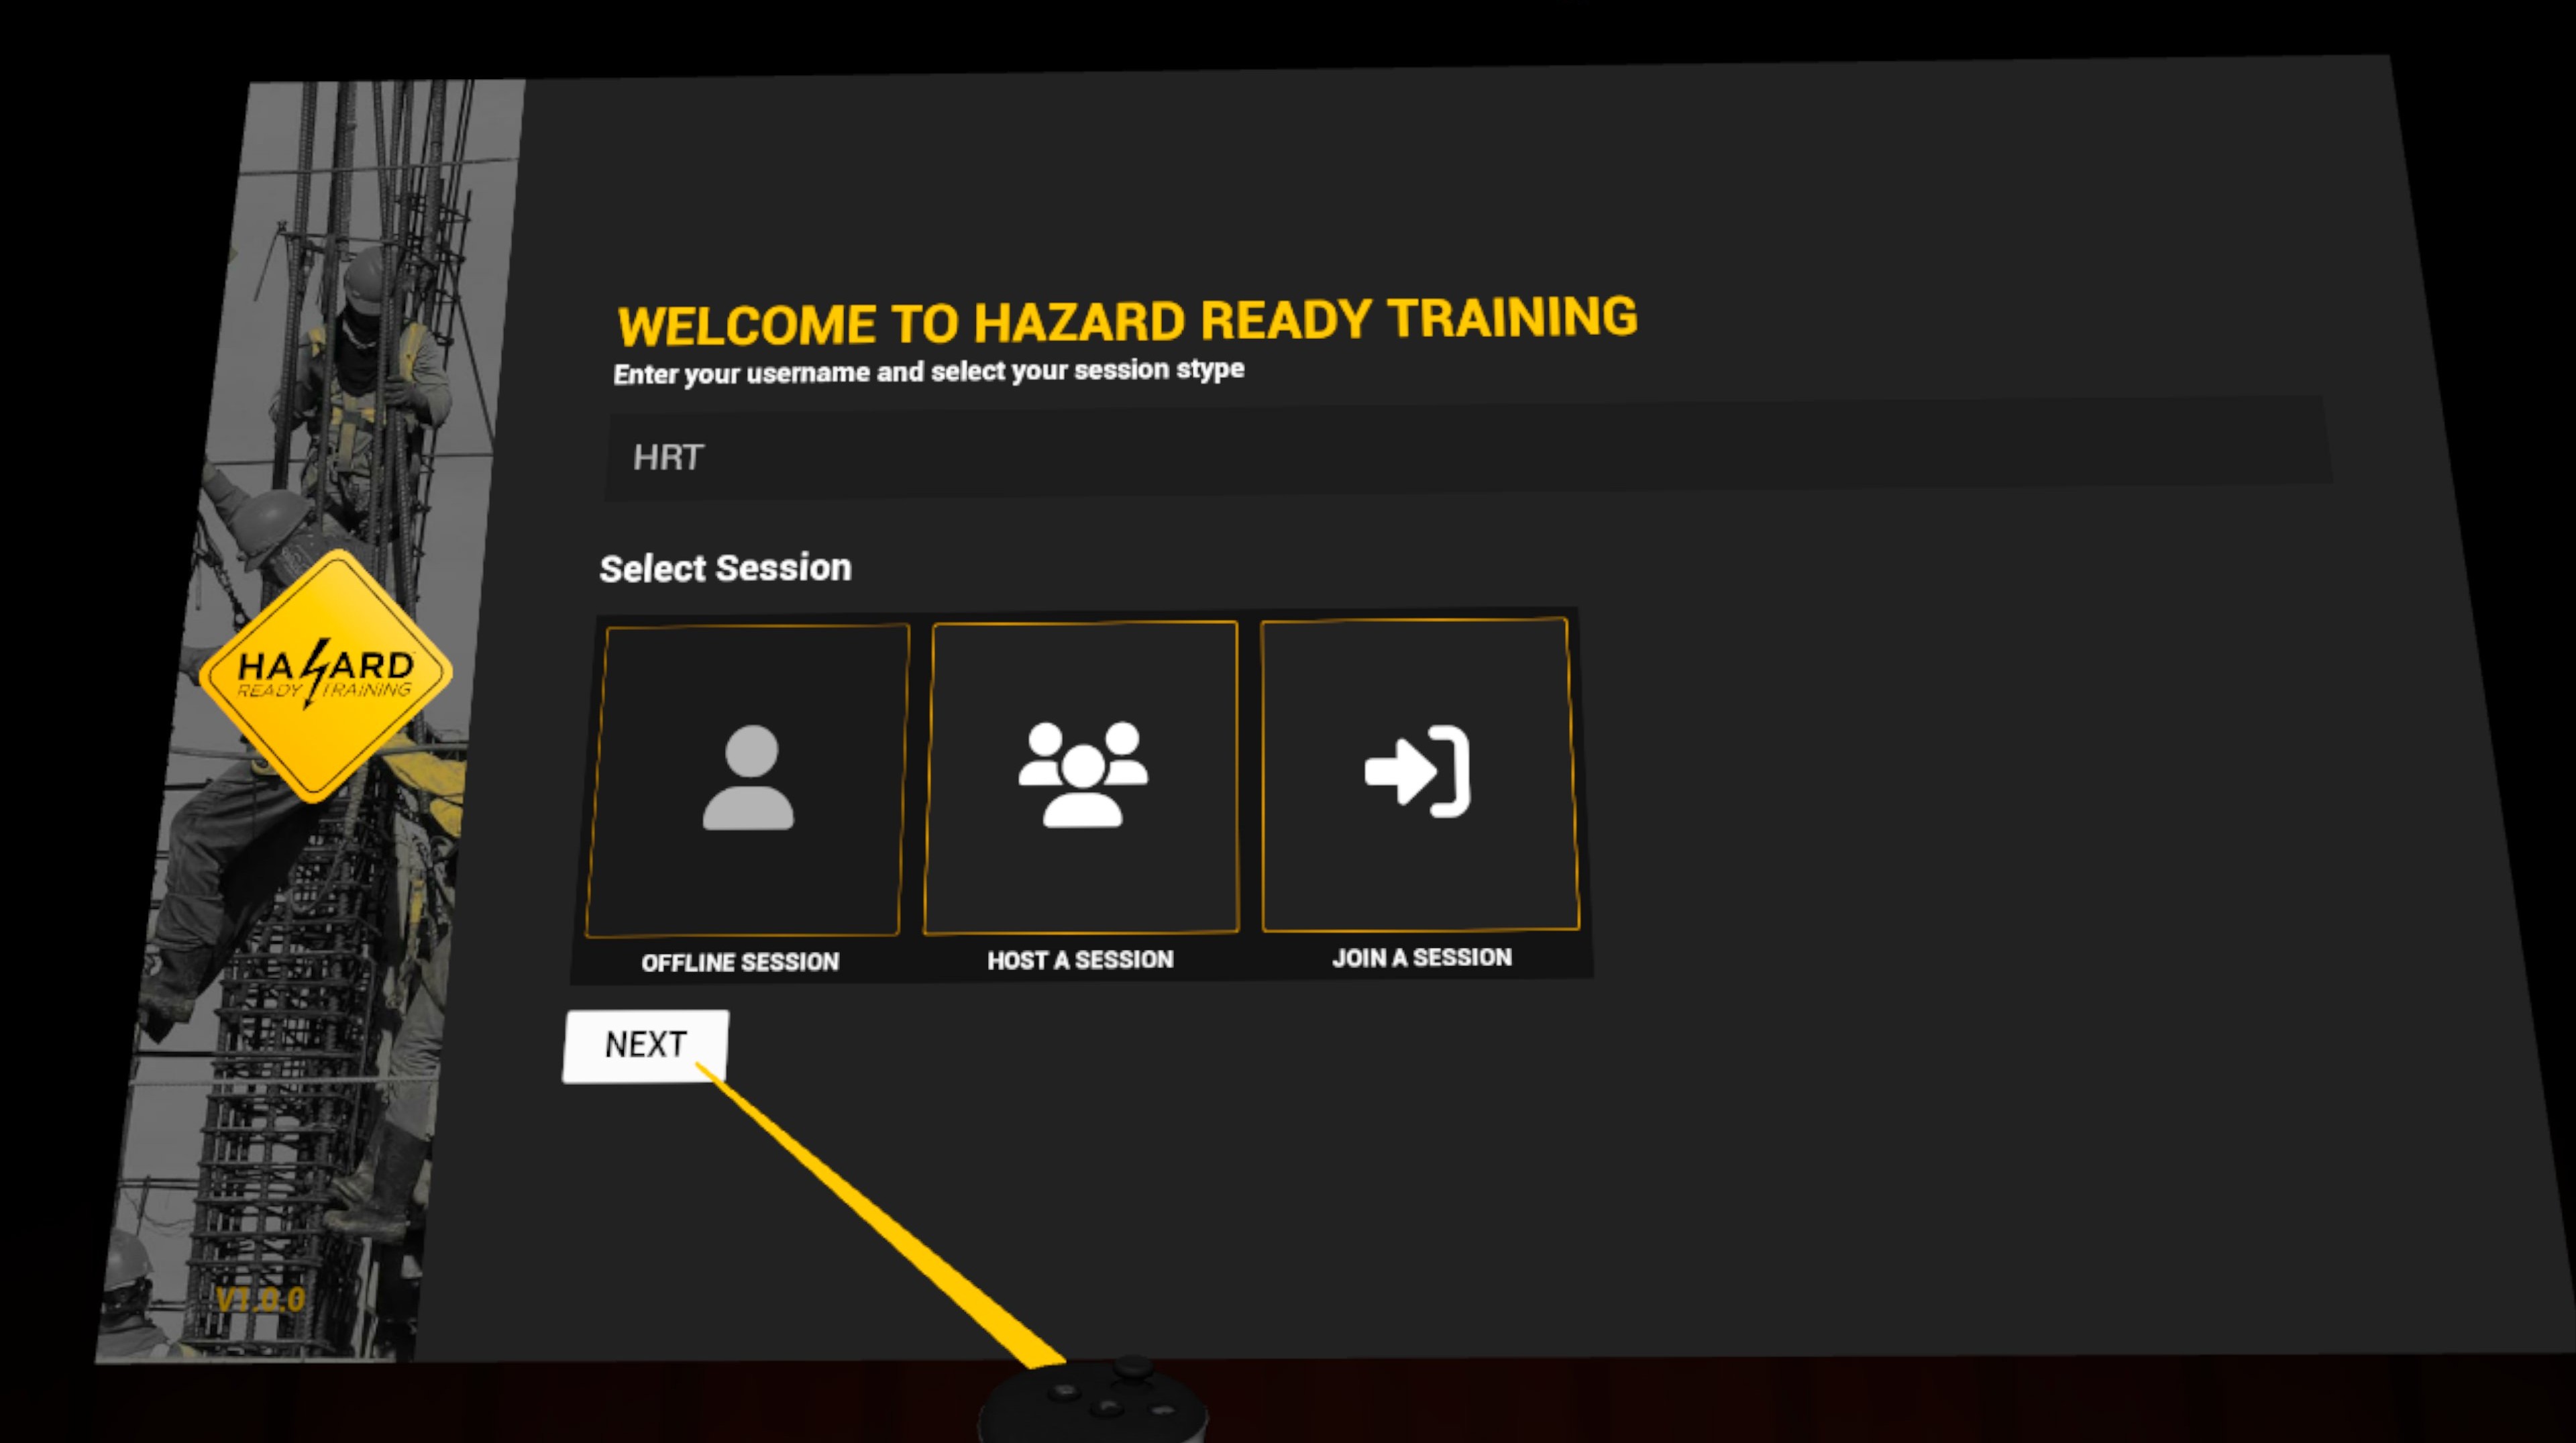
To load into an environment in offline mode or as a networked session host:
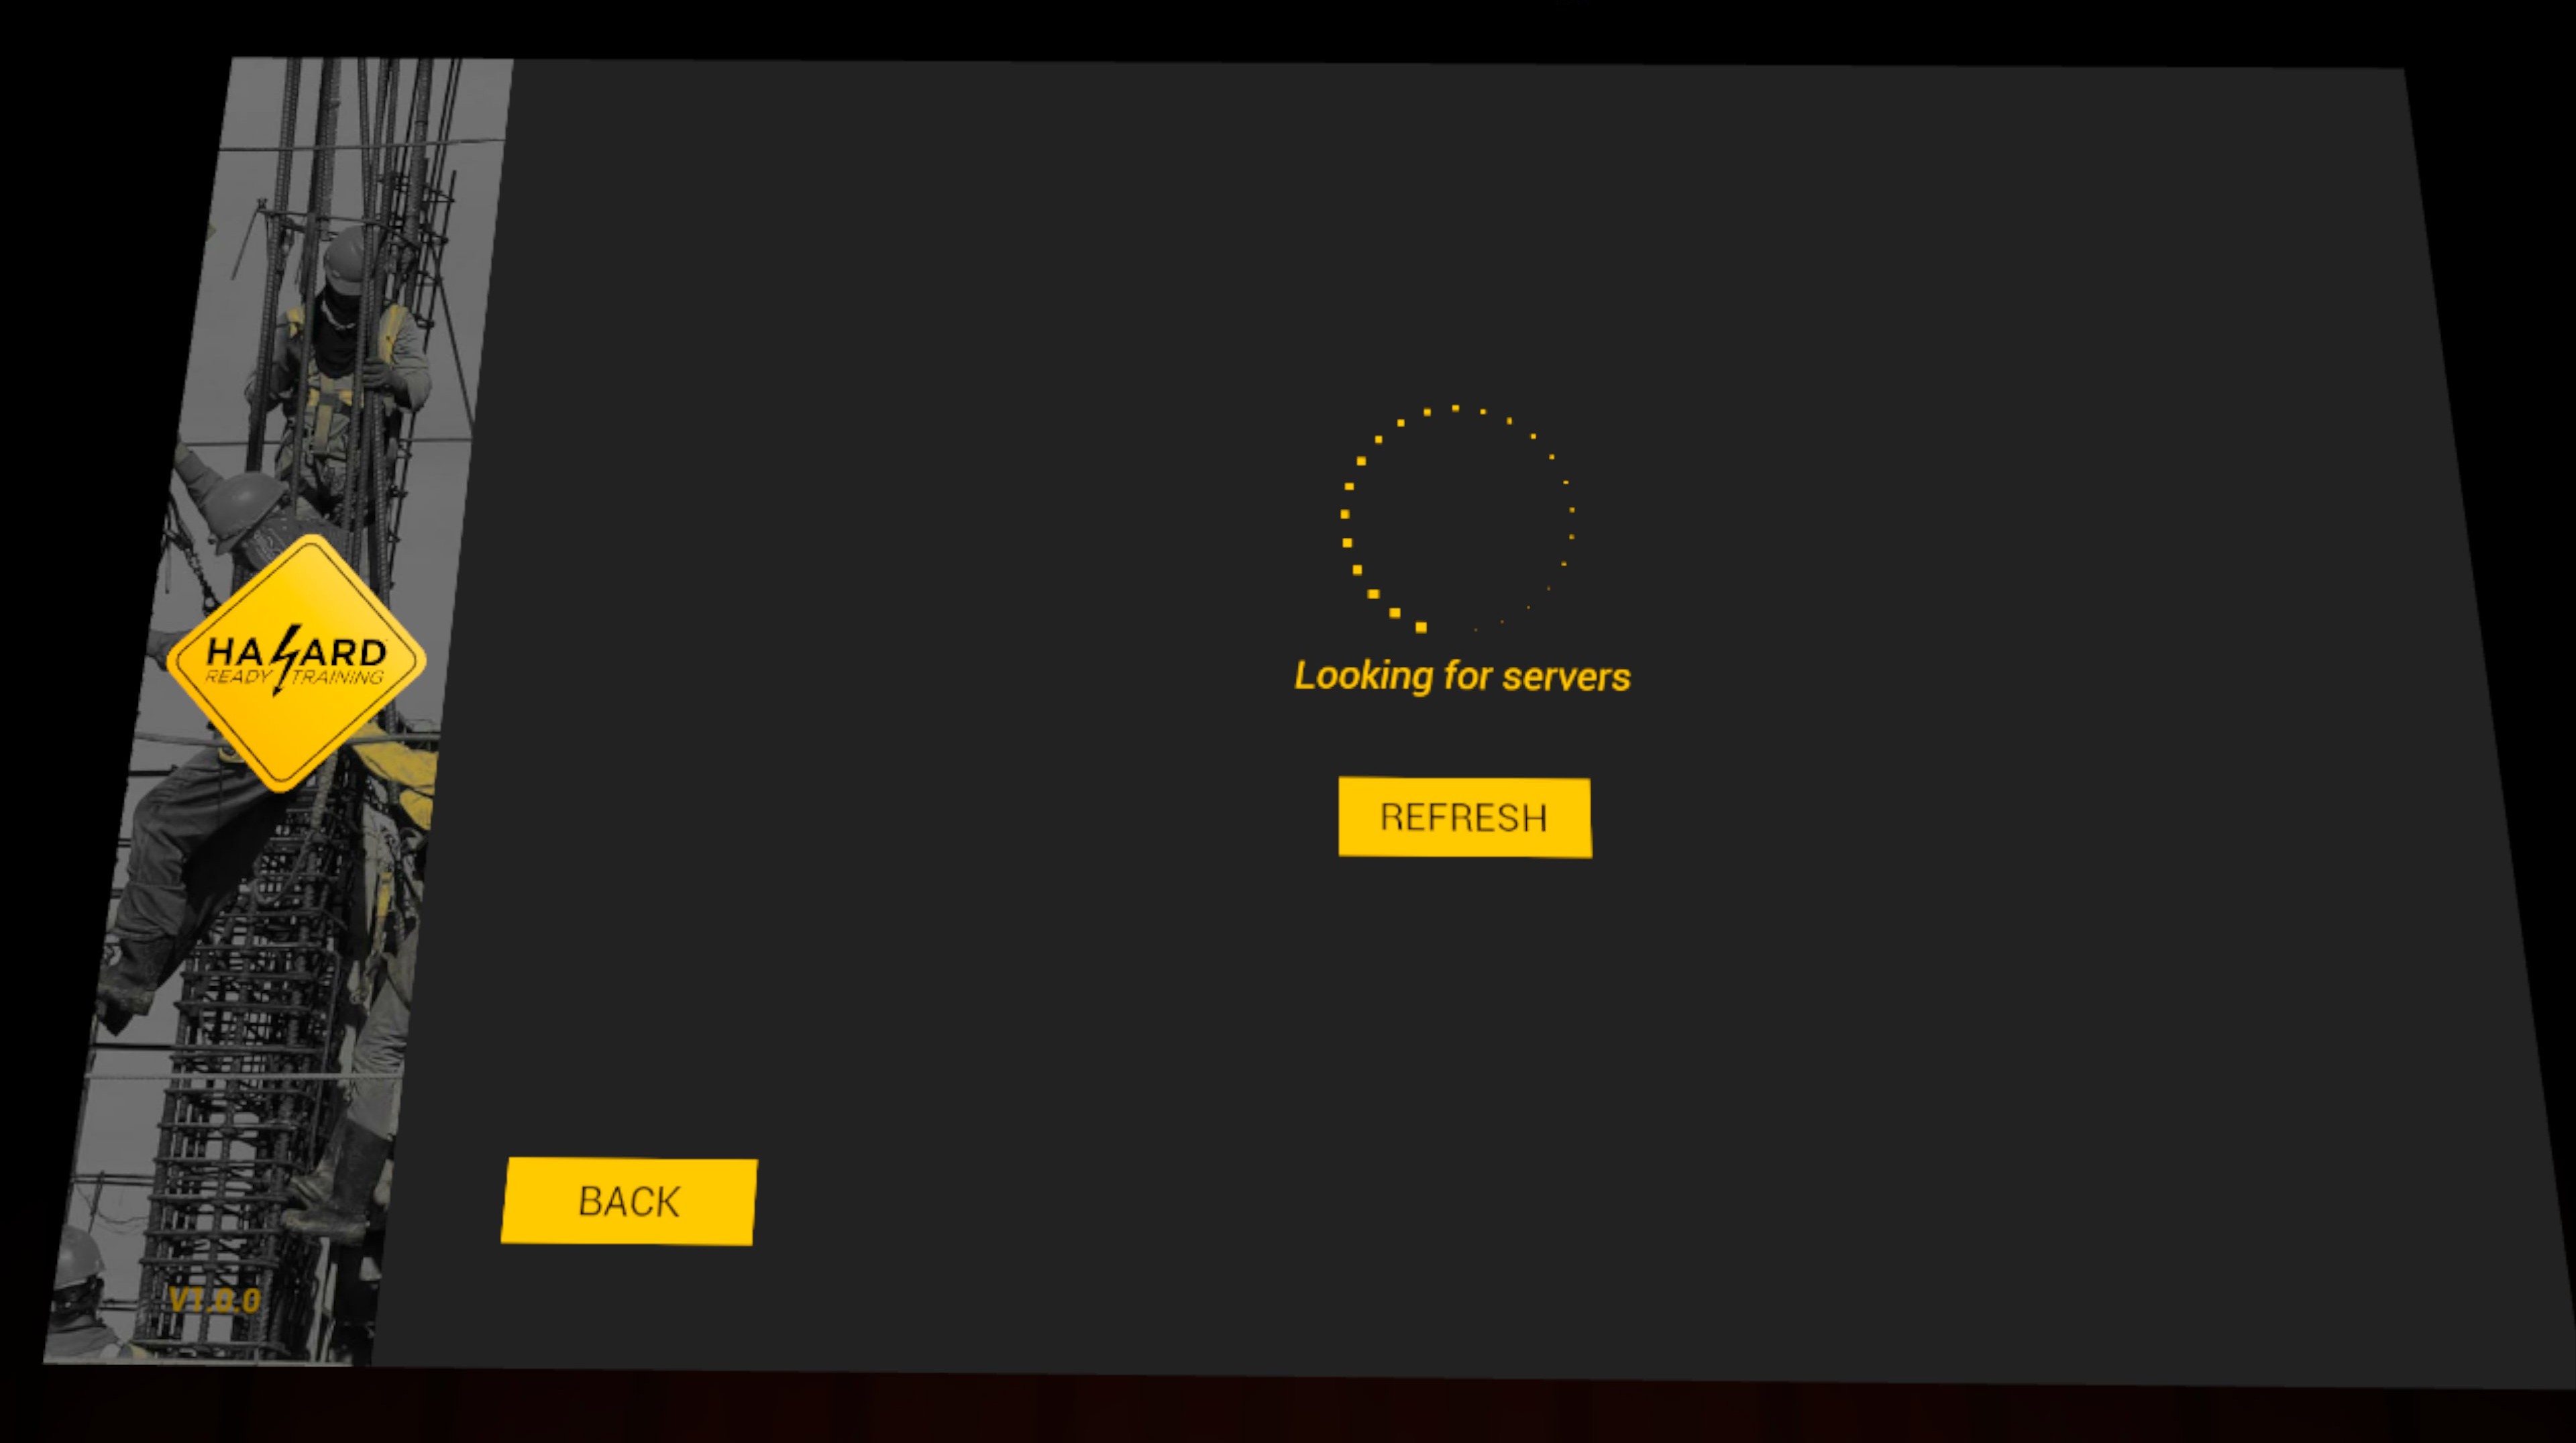
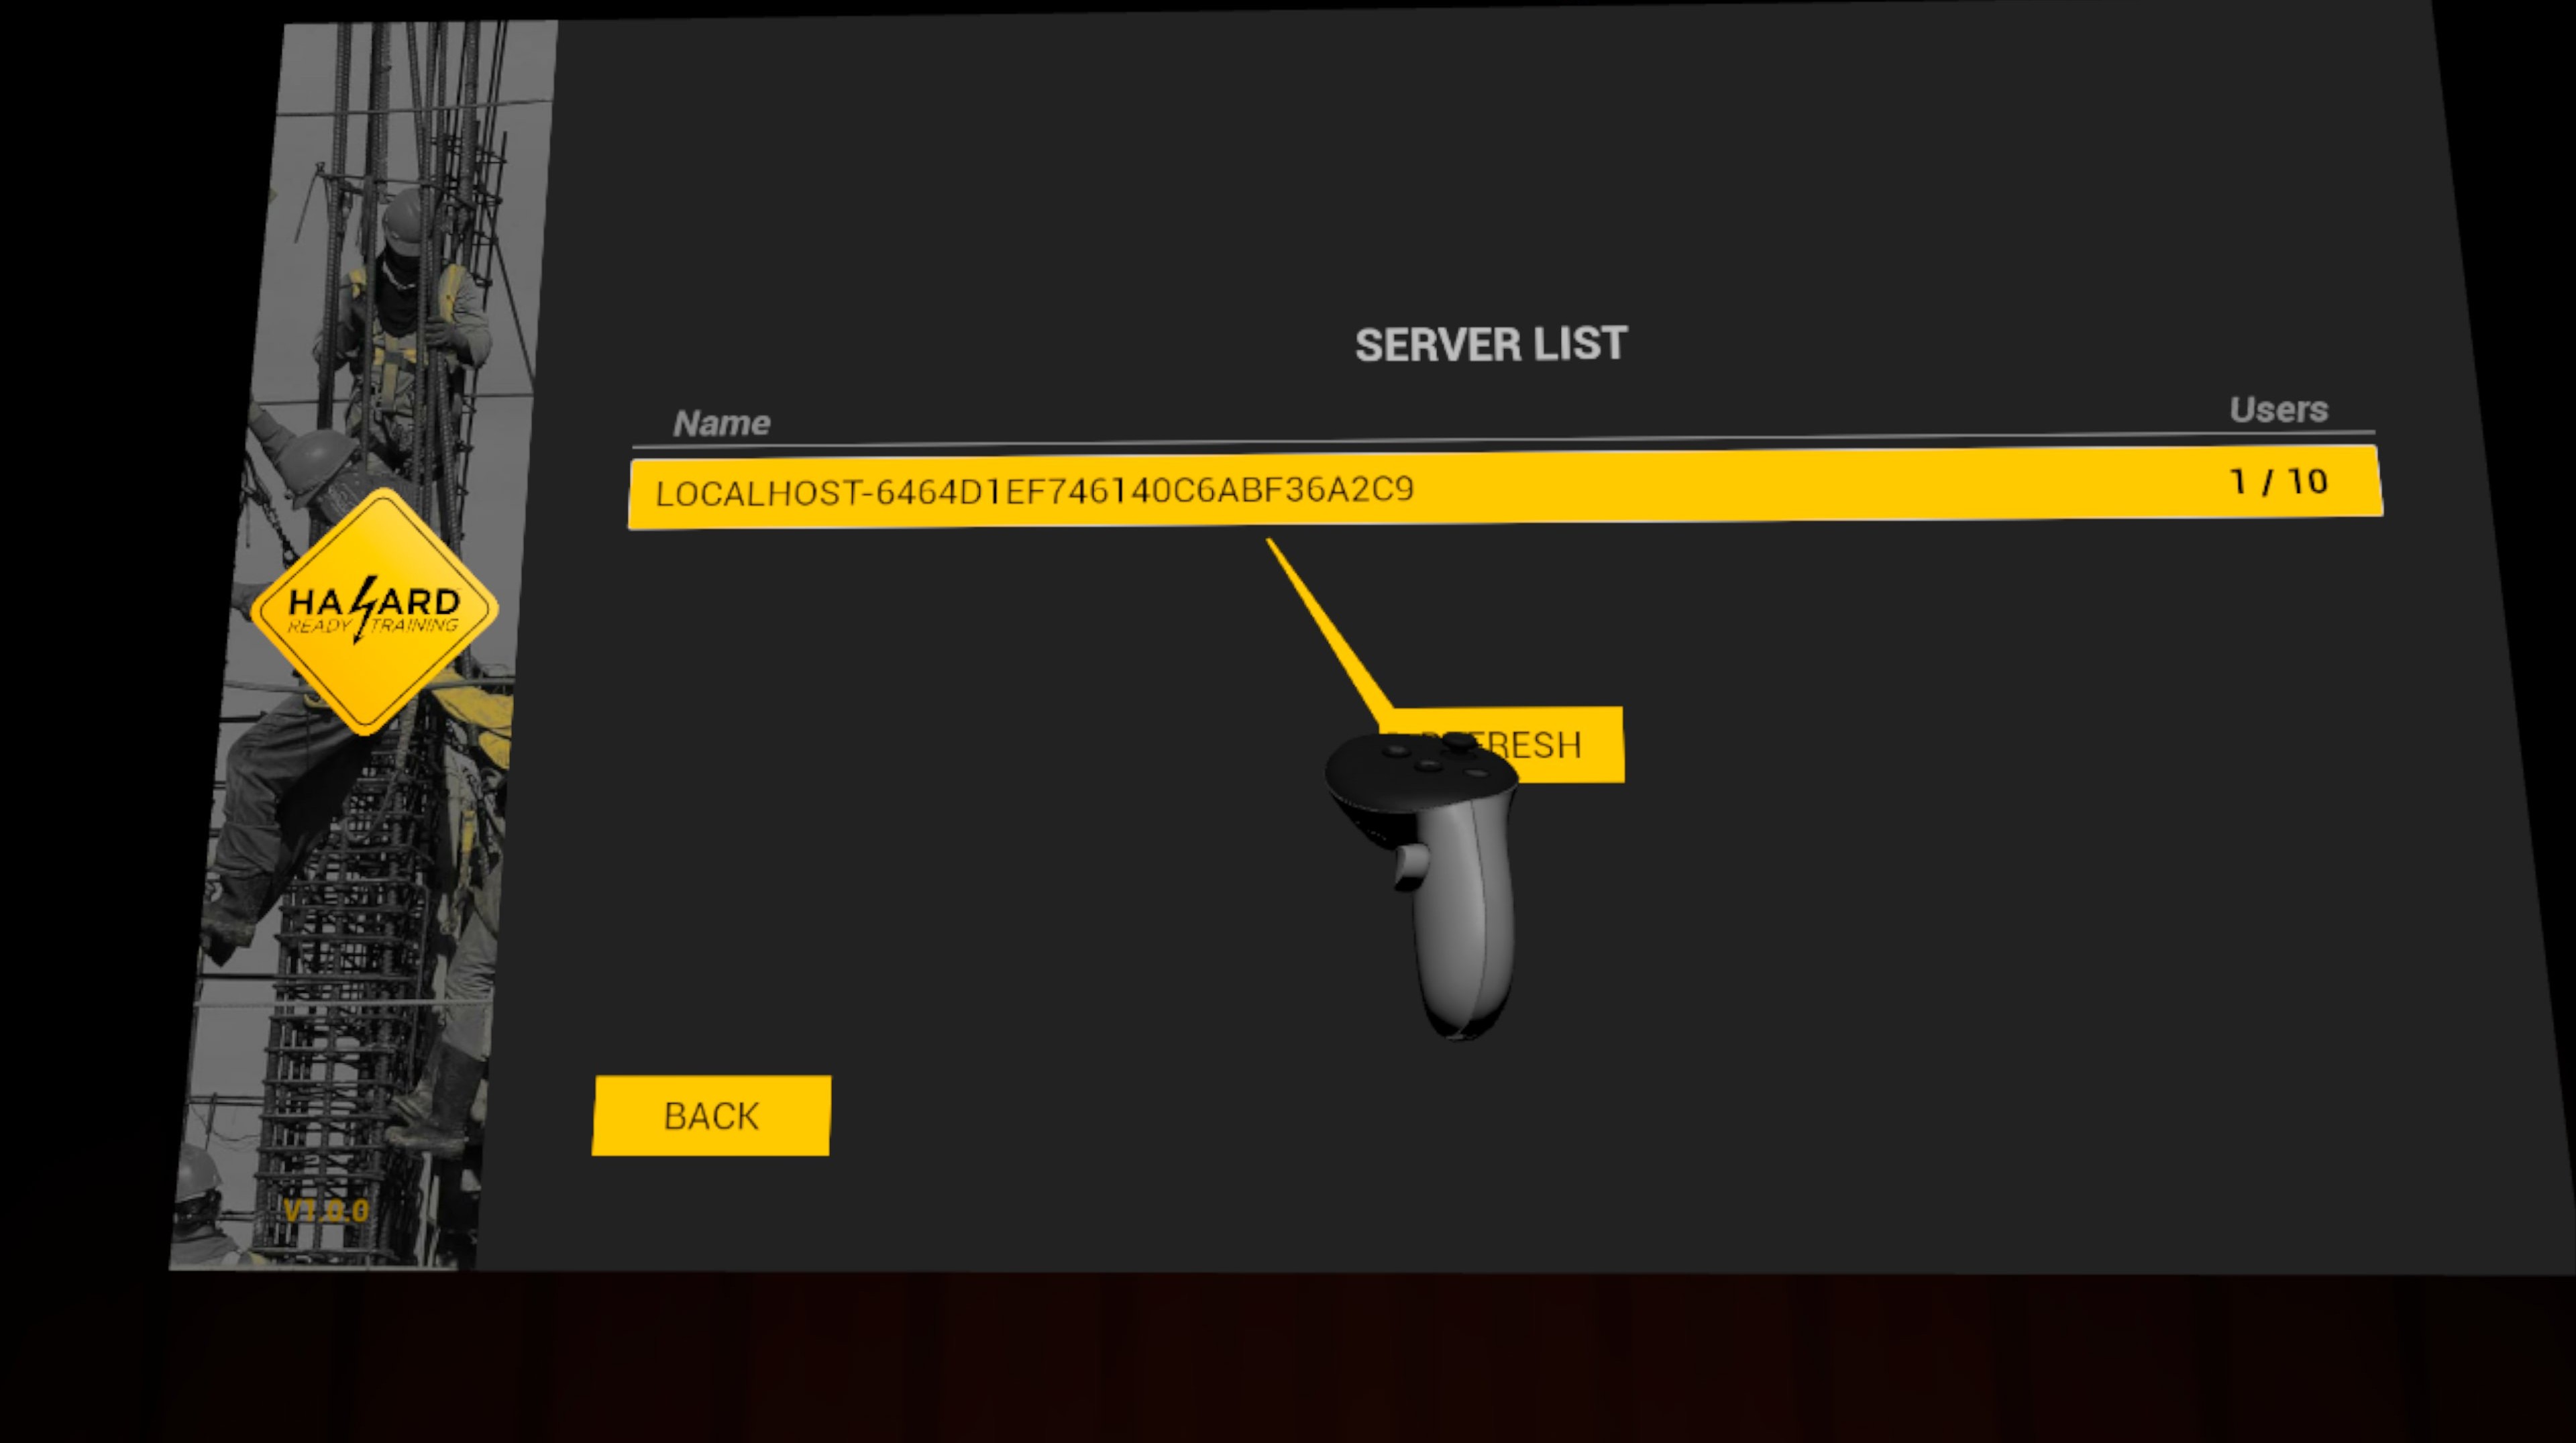
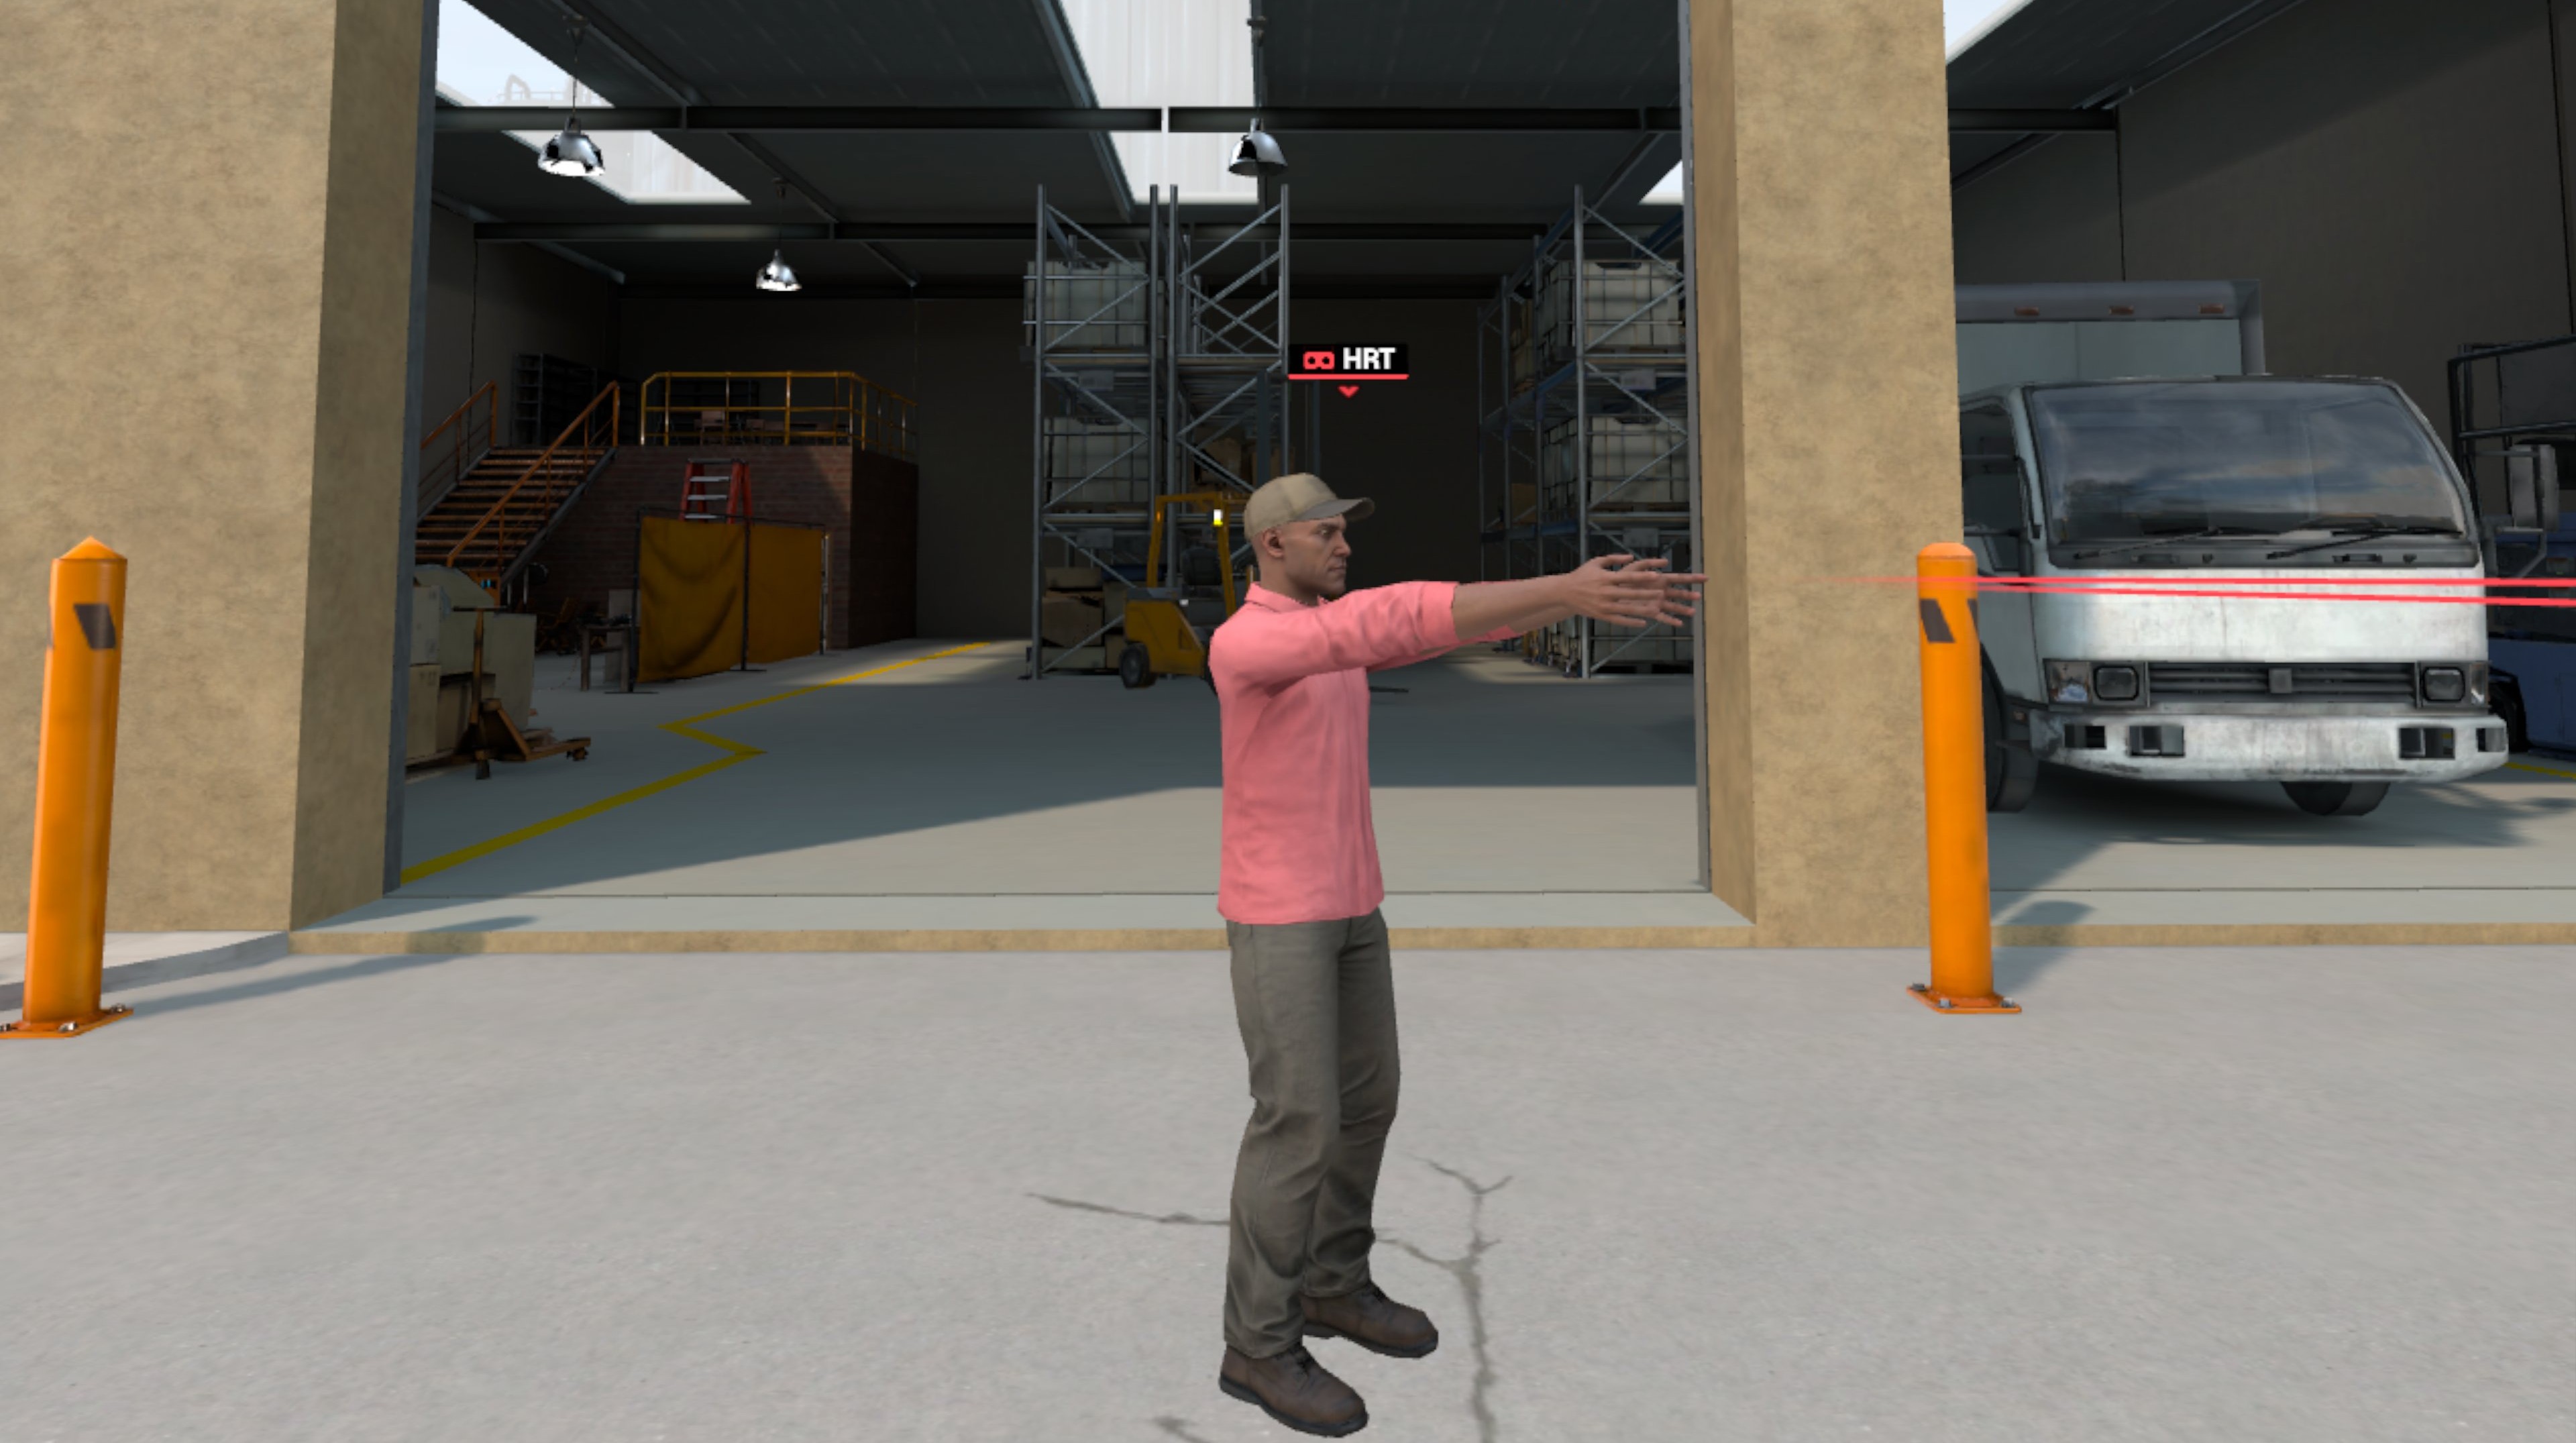
To join a networked session:

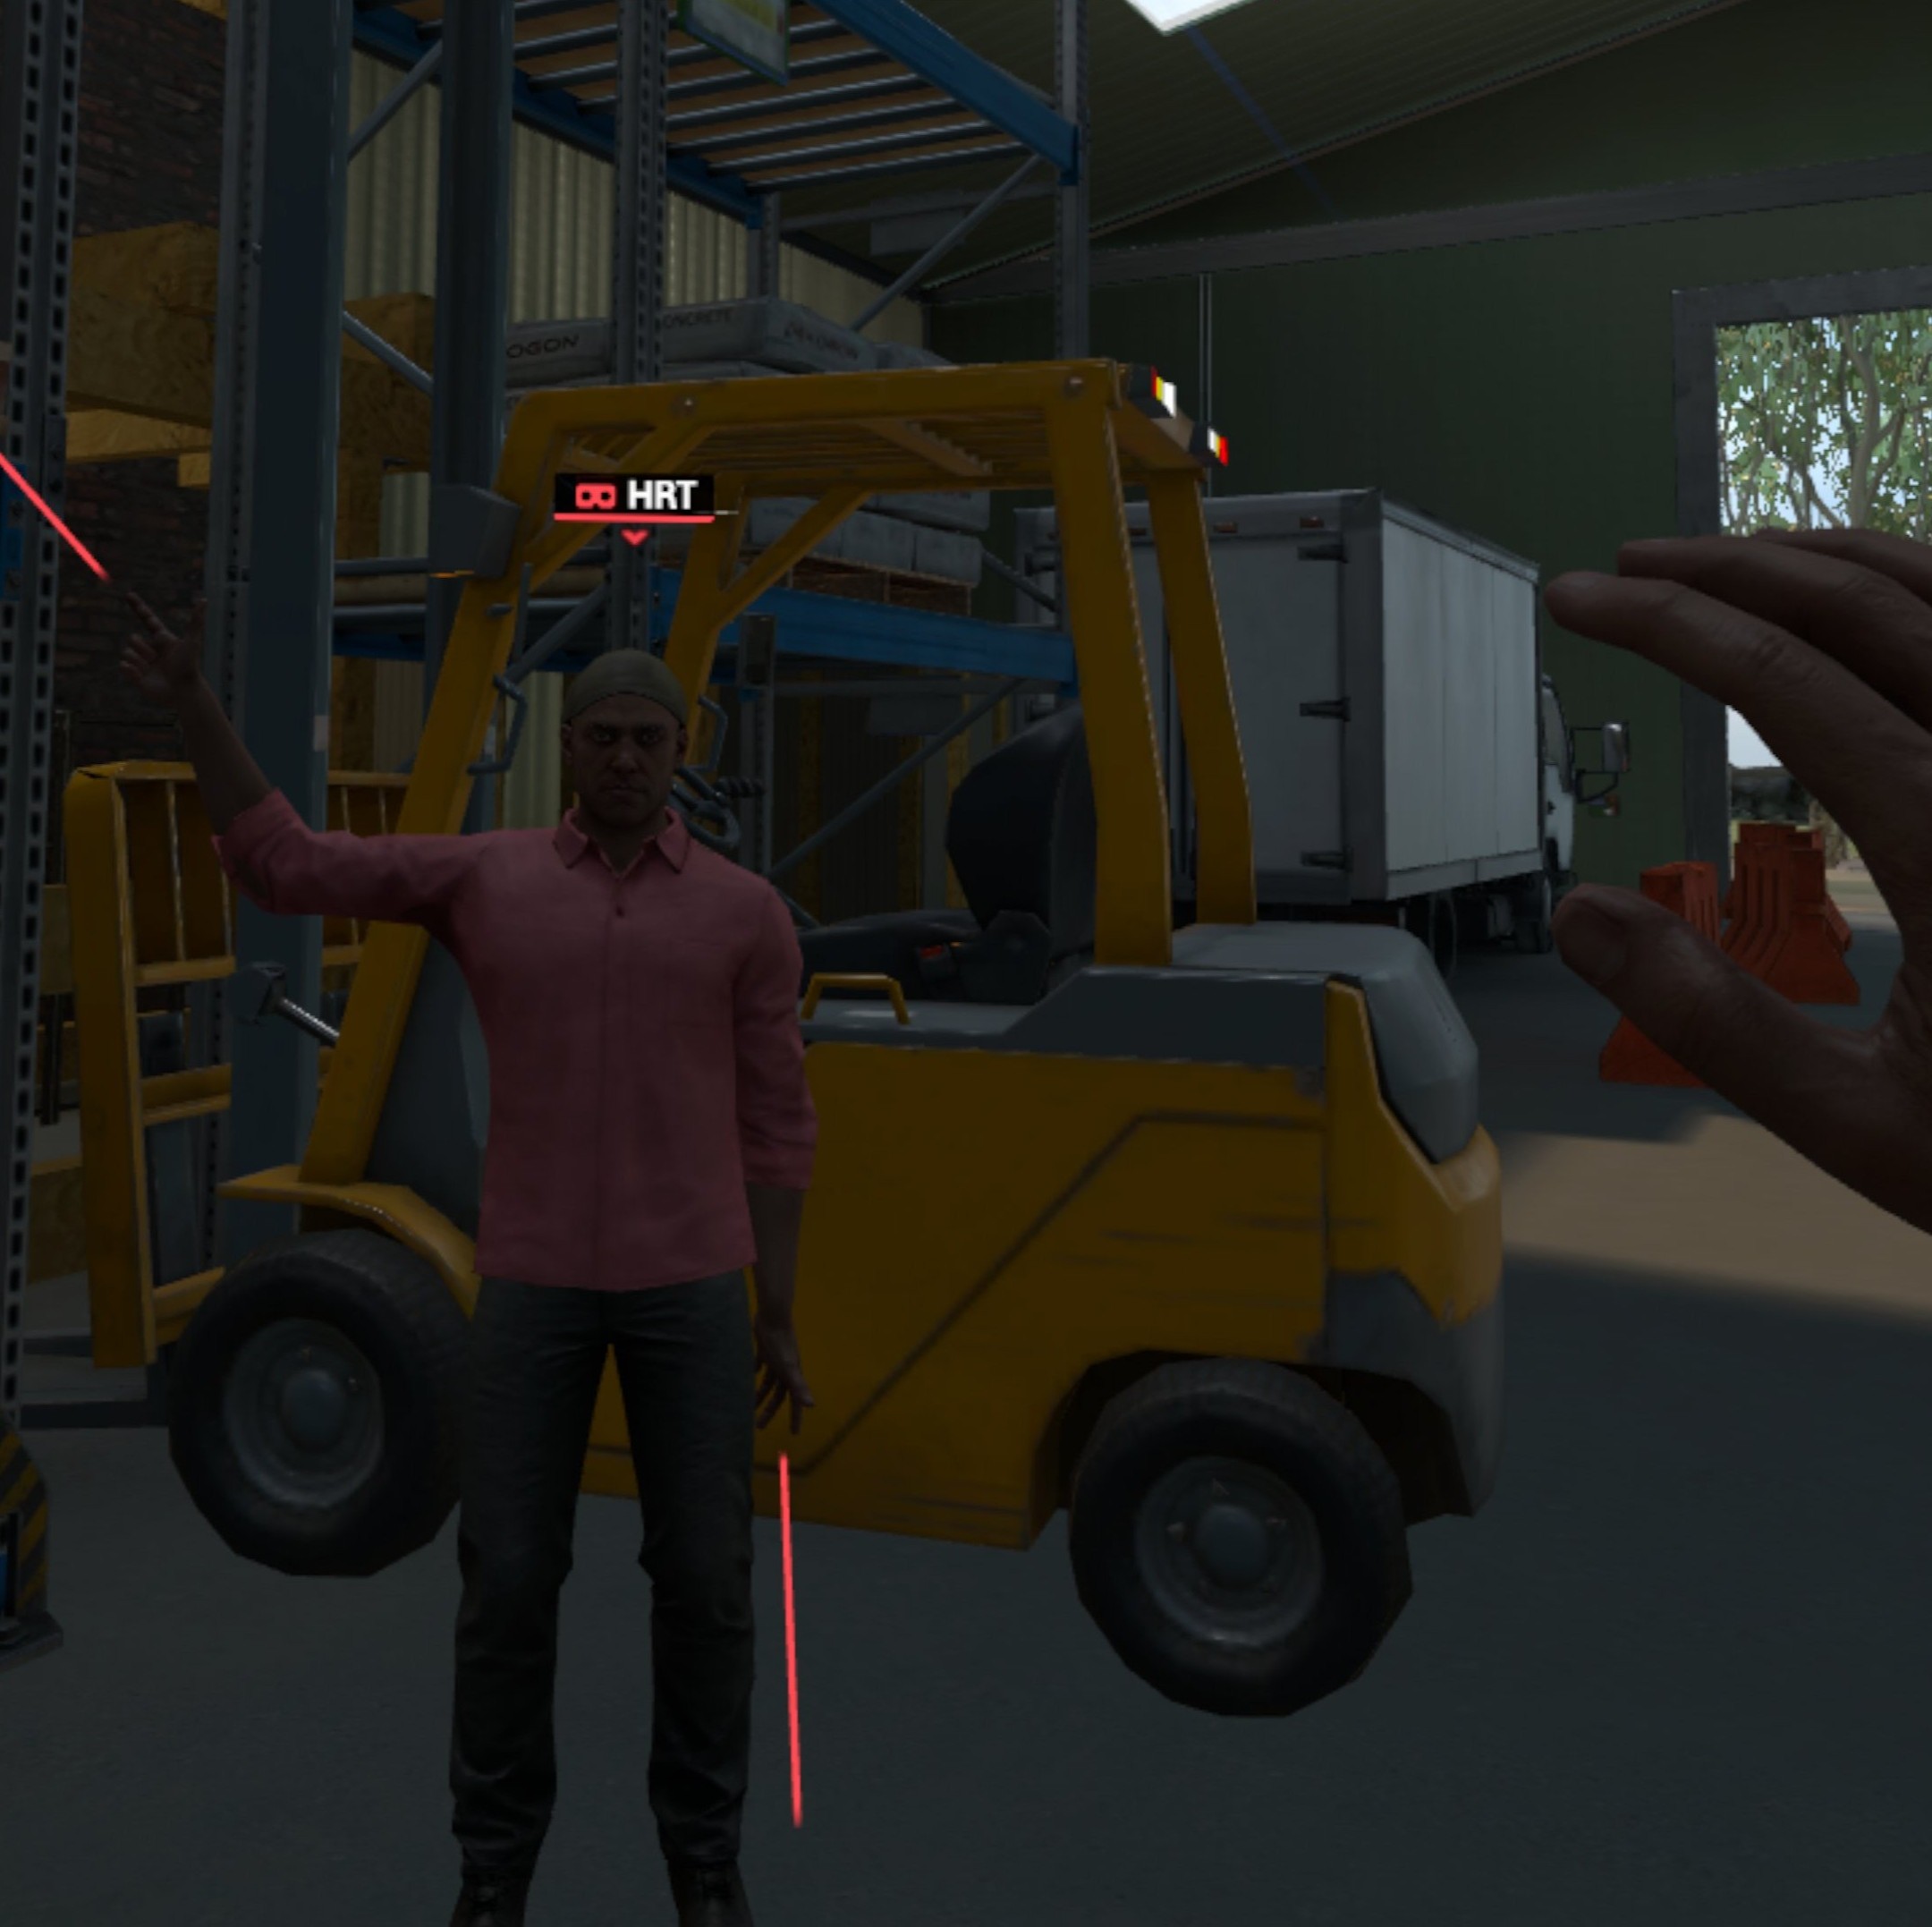
Below is a step-by-step guide to help you navigate within the different environments and interact with the player menu options and commands.
To recenter your headset view, and realign the environment's forward orientation to align with current HMD physical orientation:

To calibrate your avatar height:

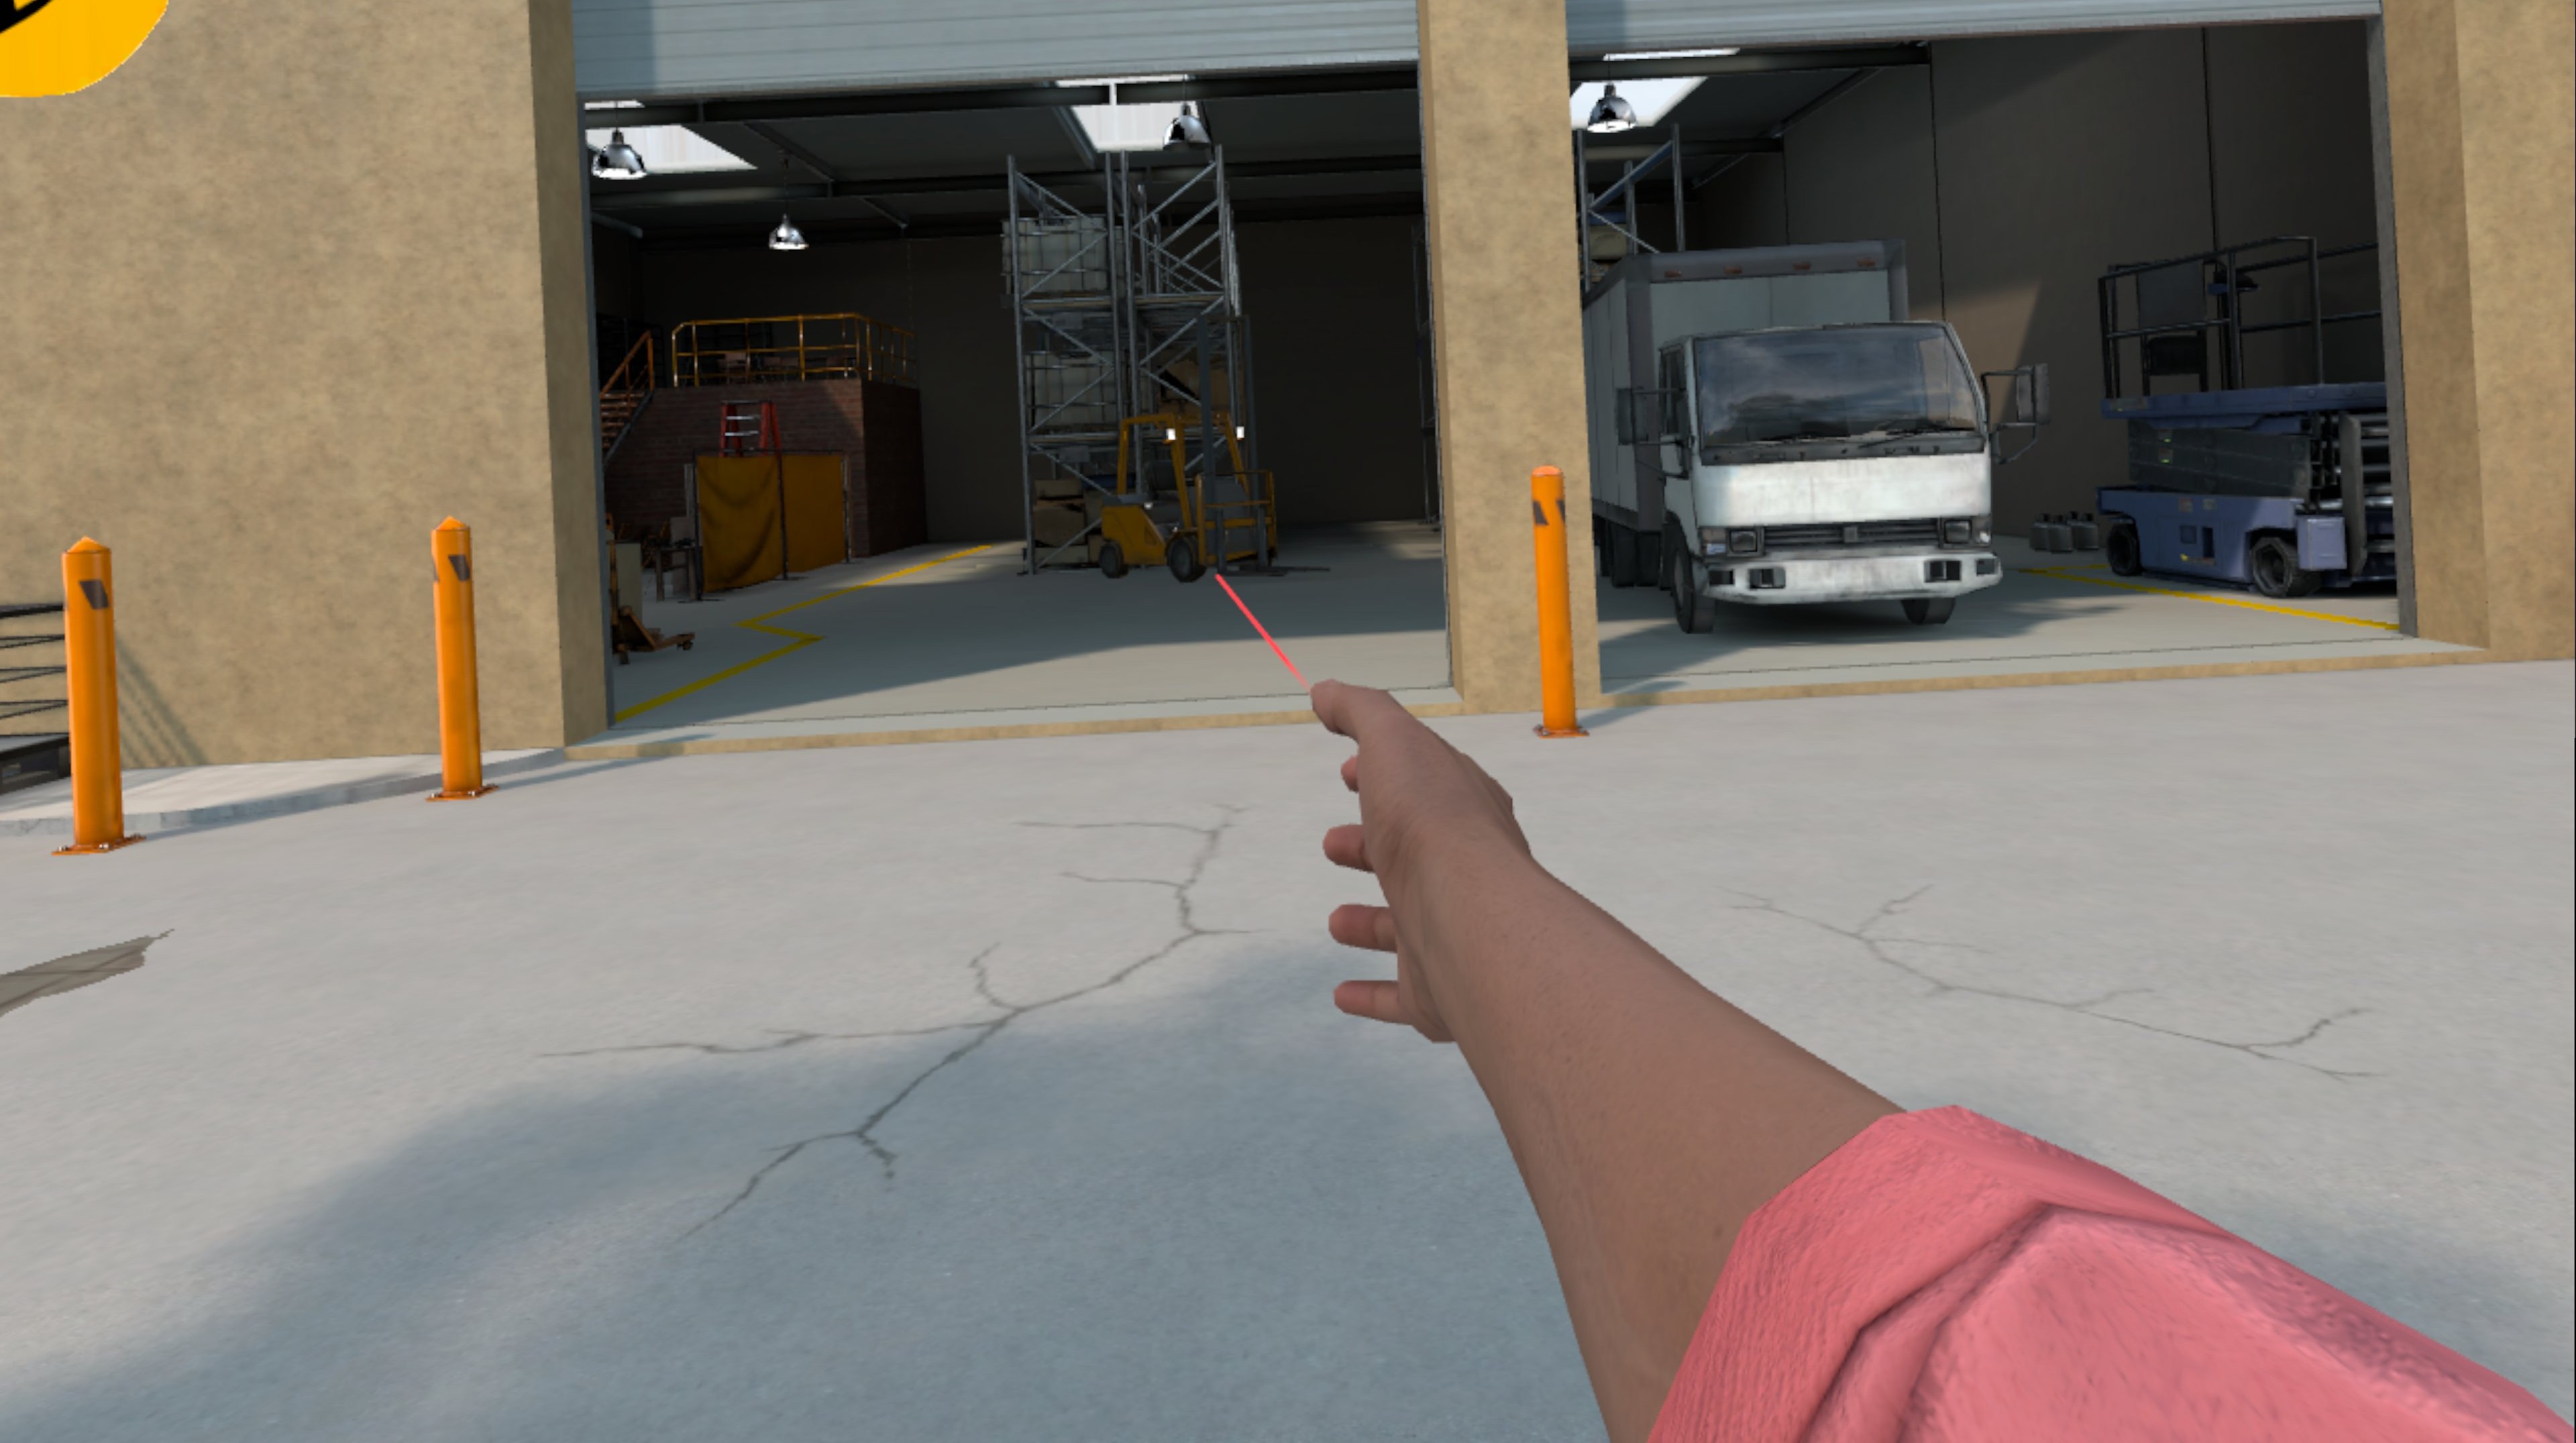
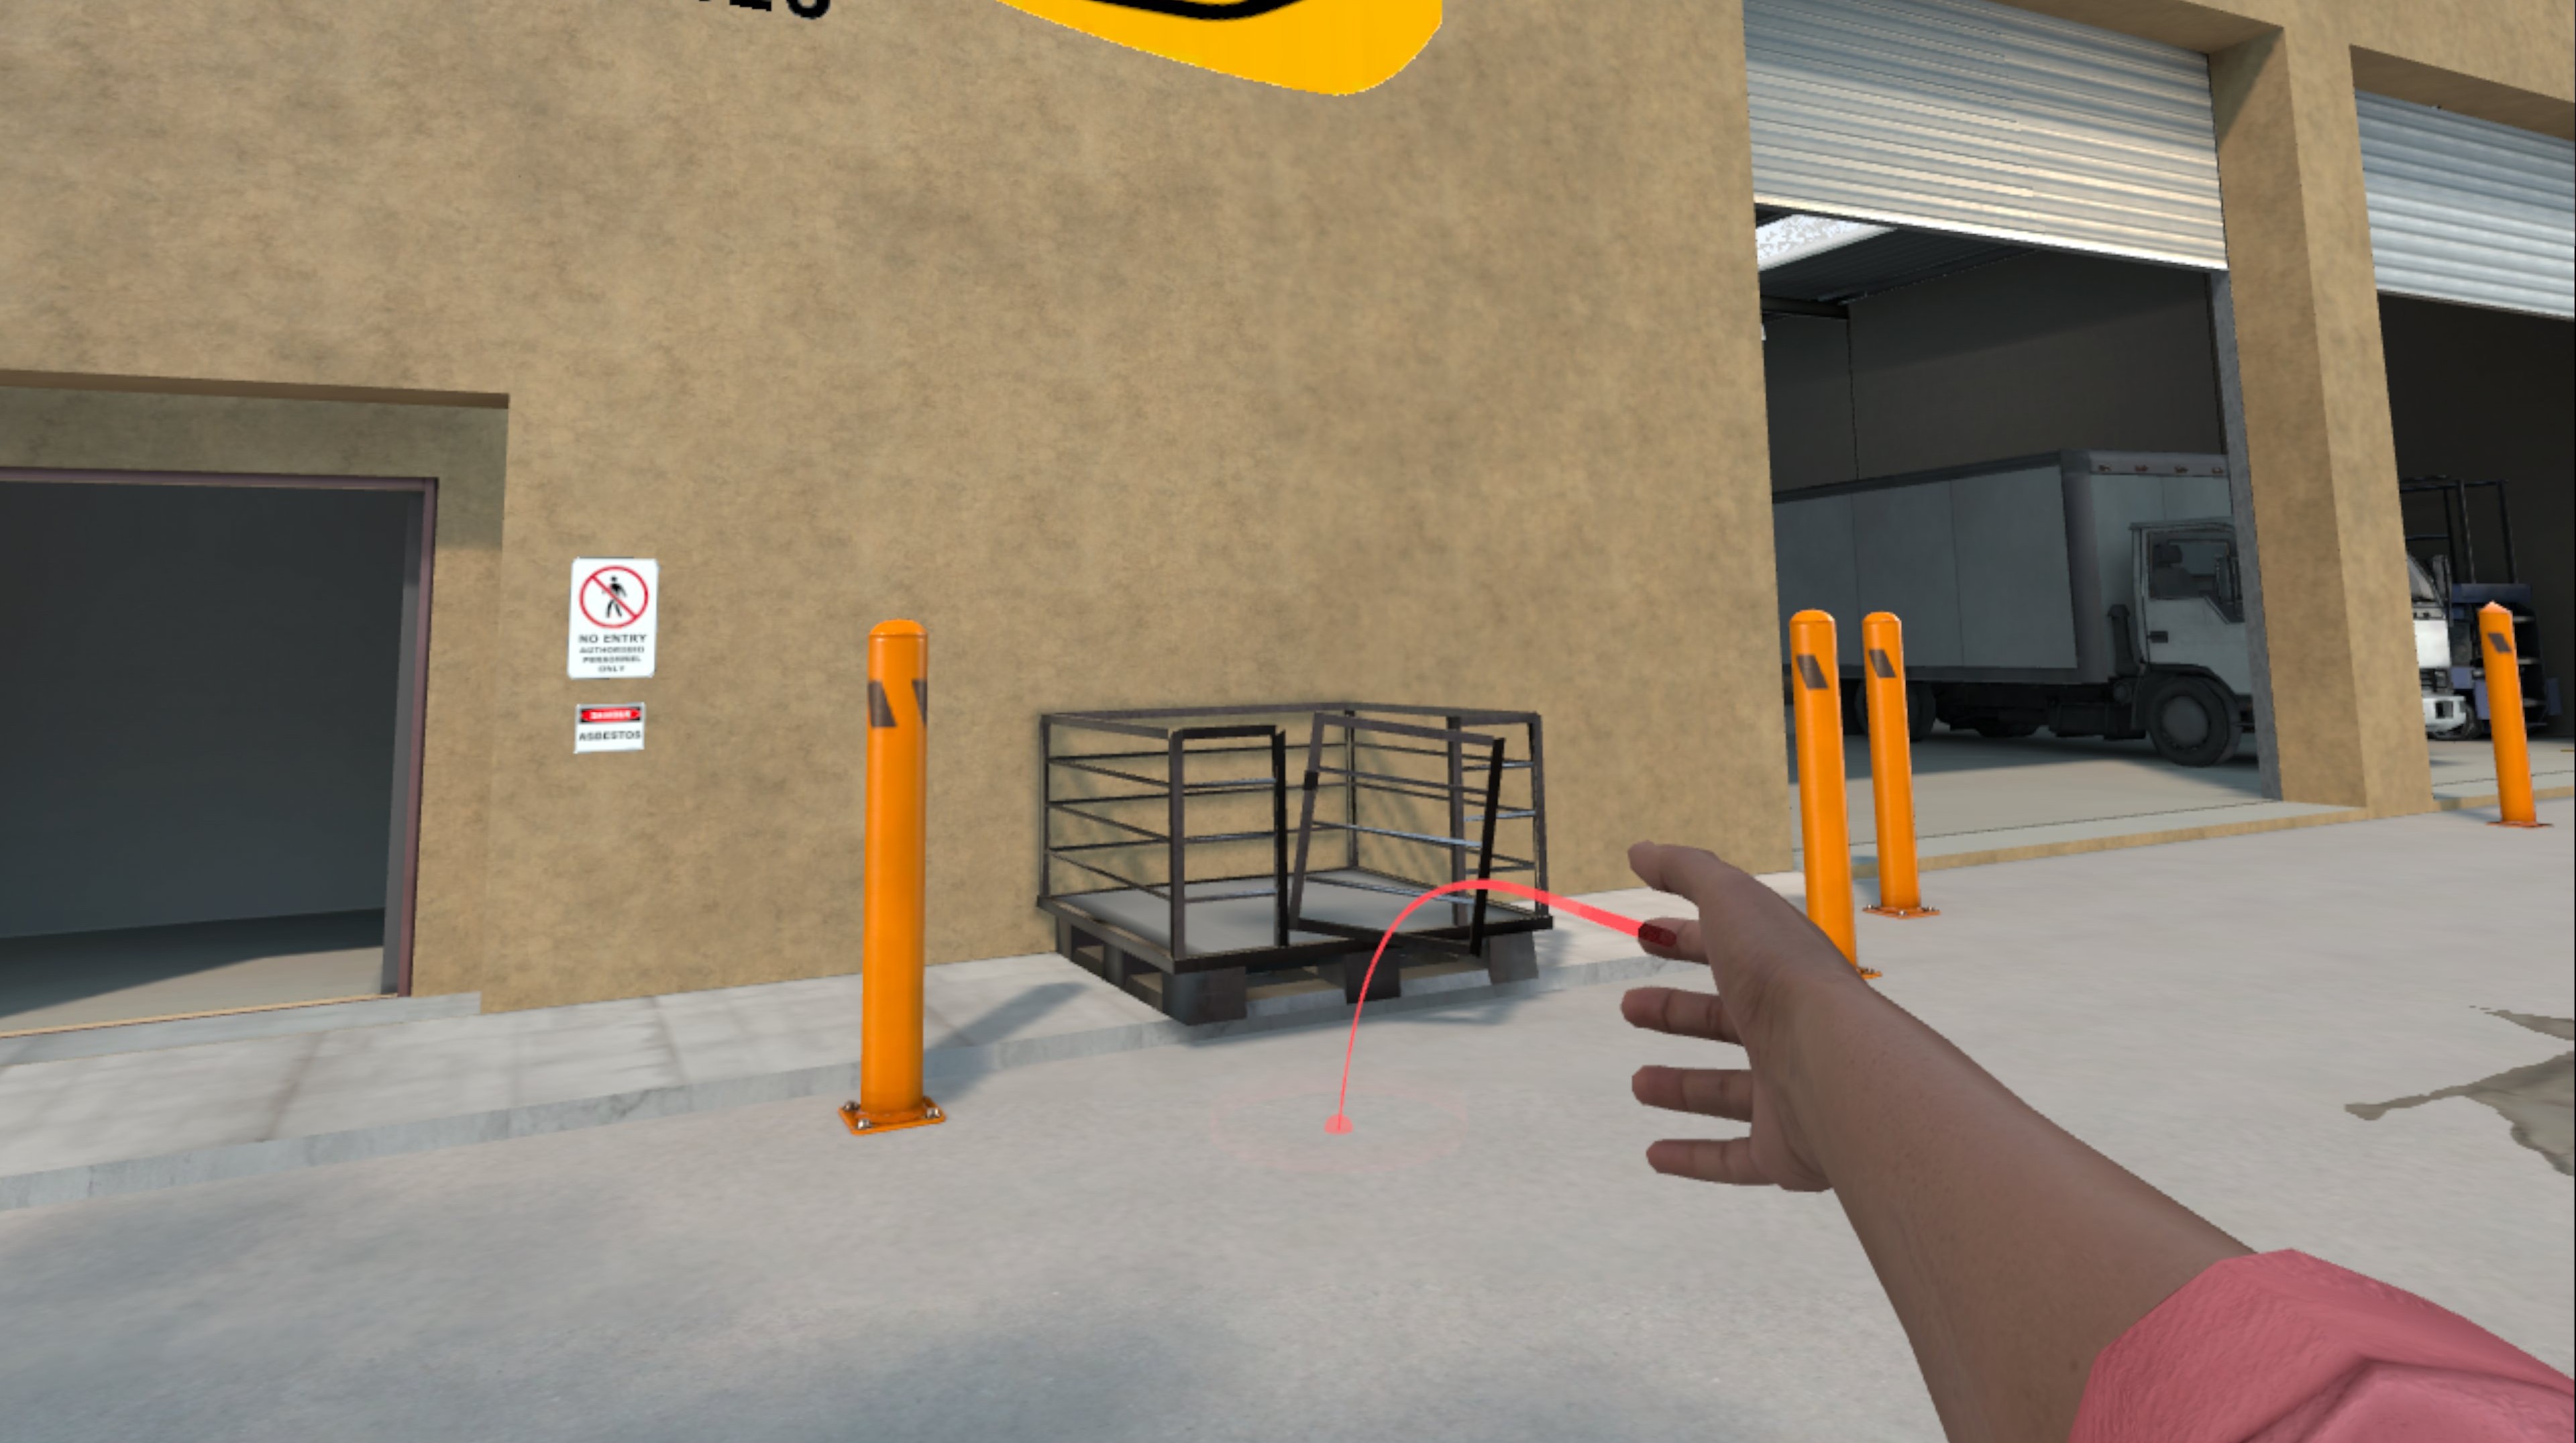
To teleport around the environment:
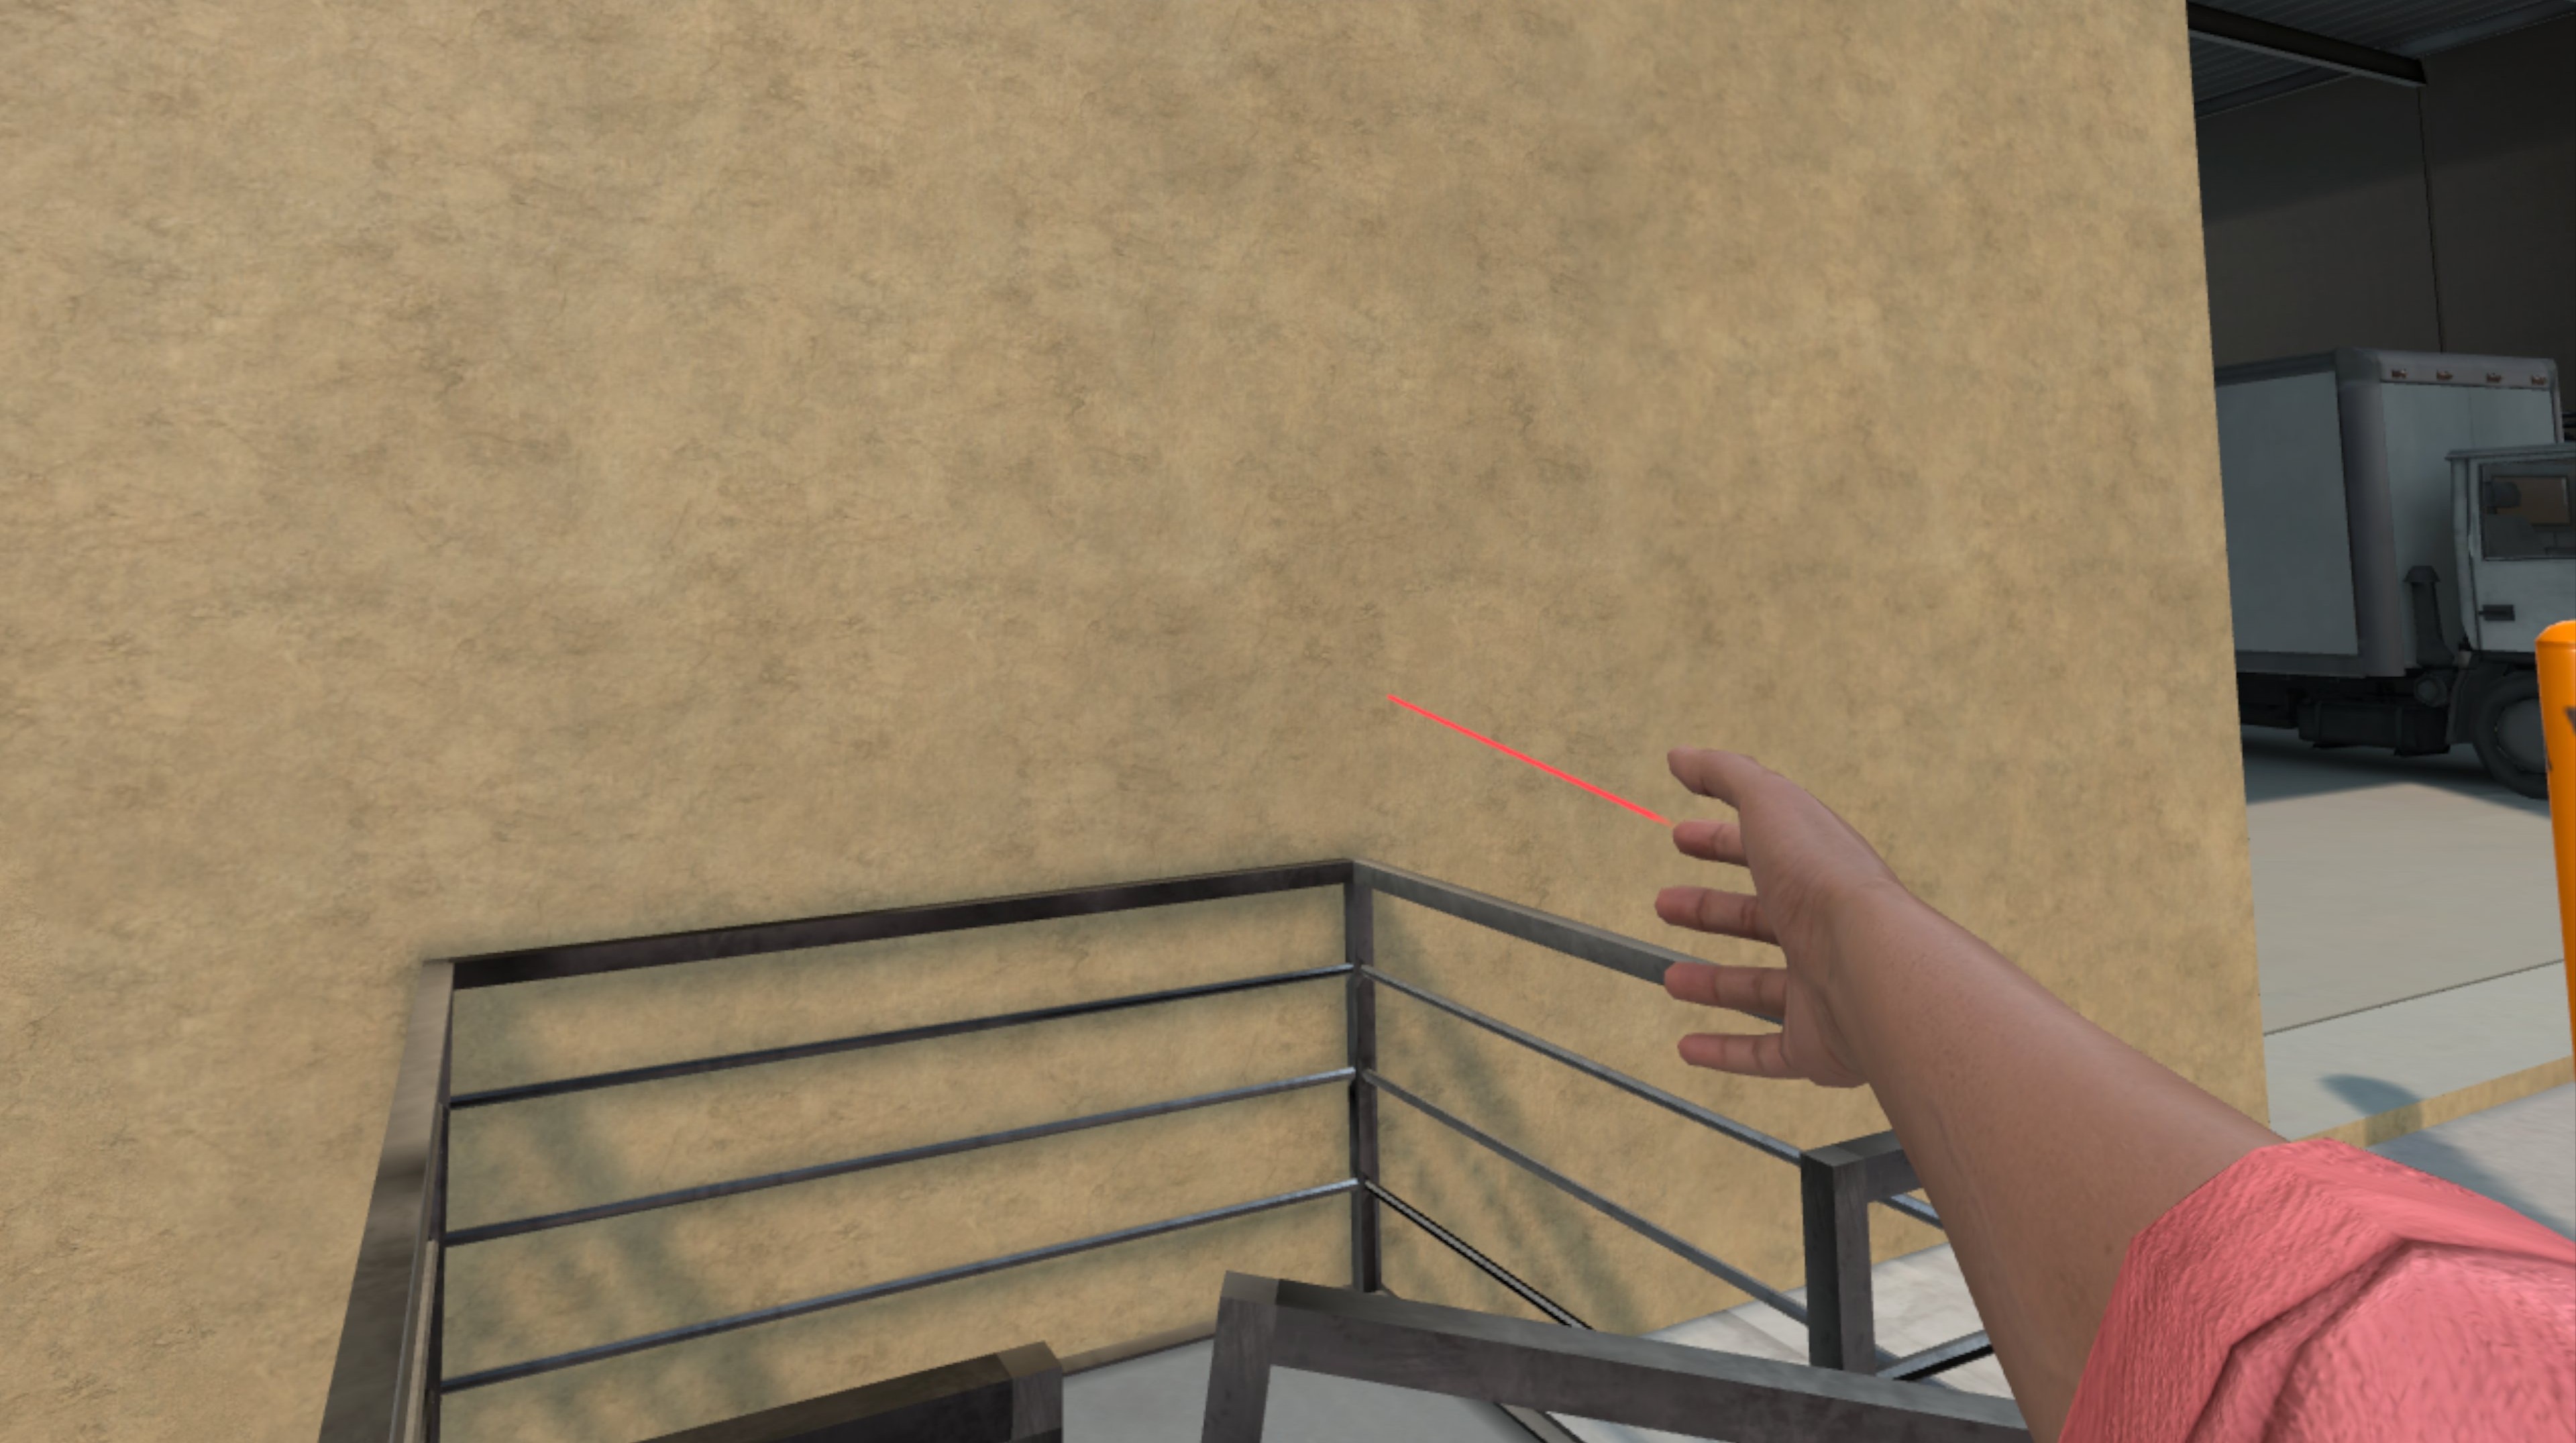
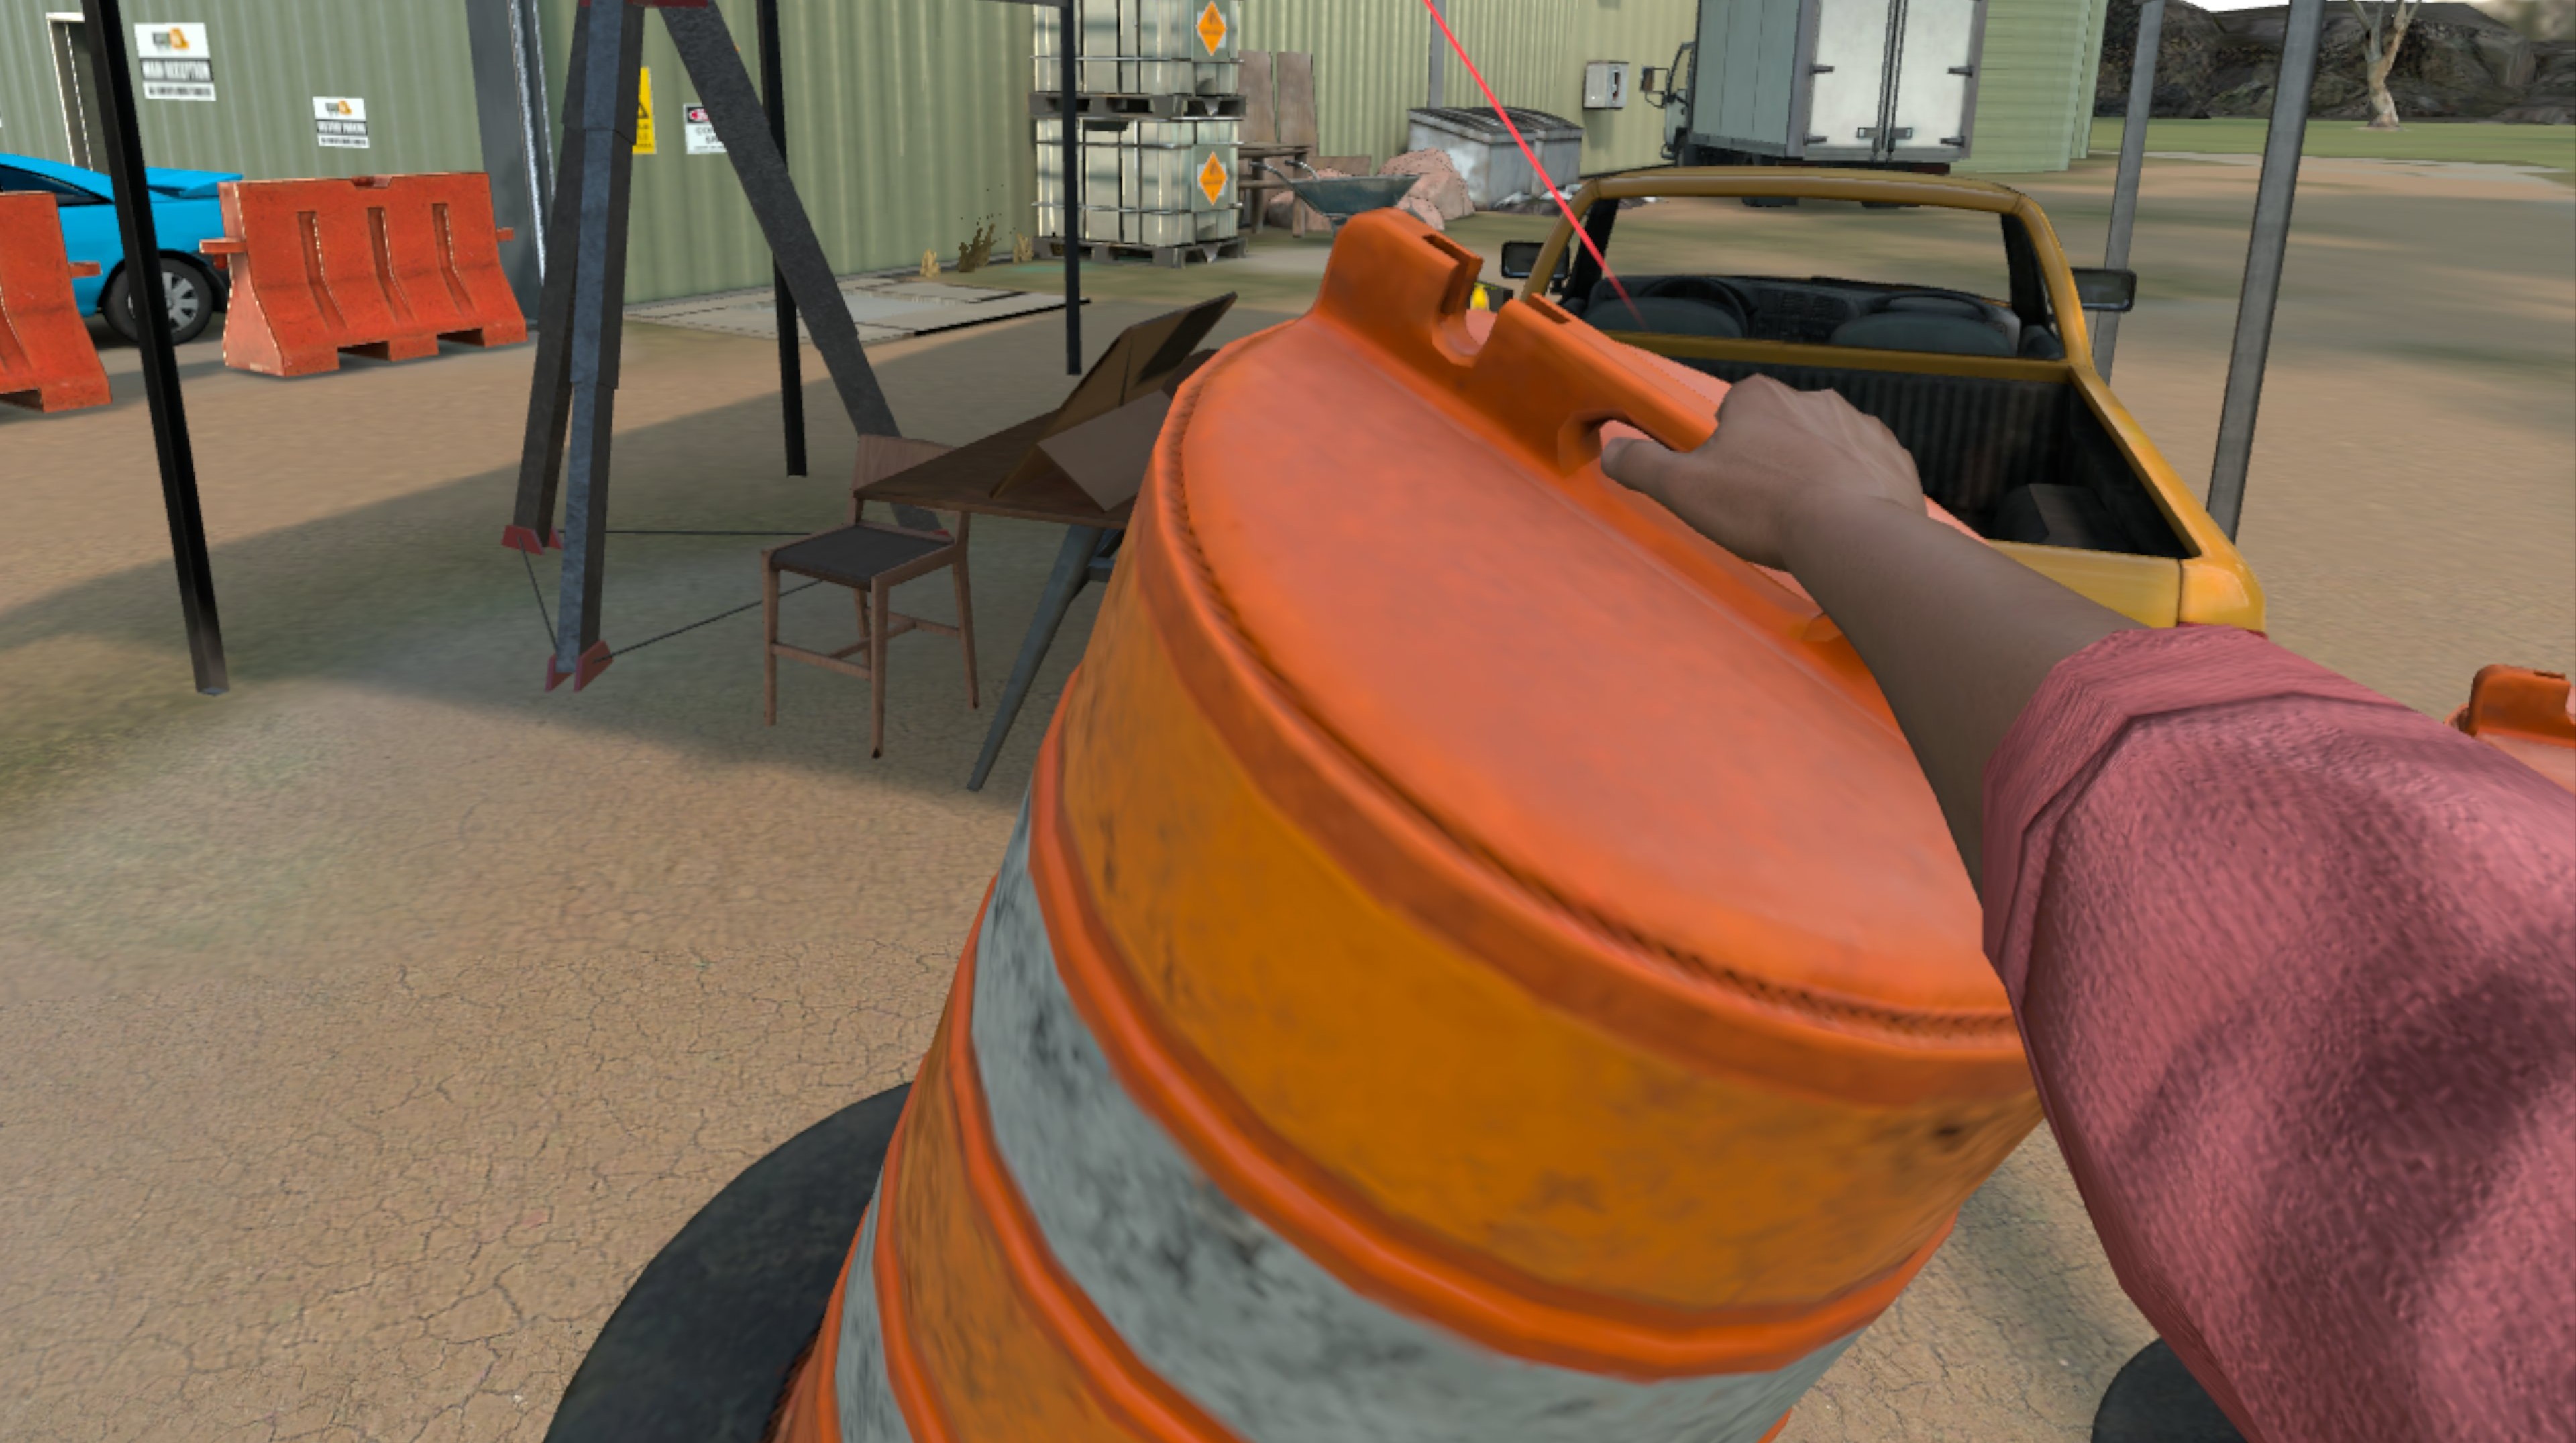
To grip certain objects around the environment:

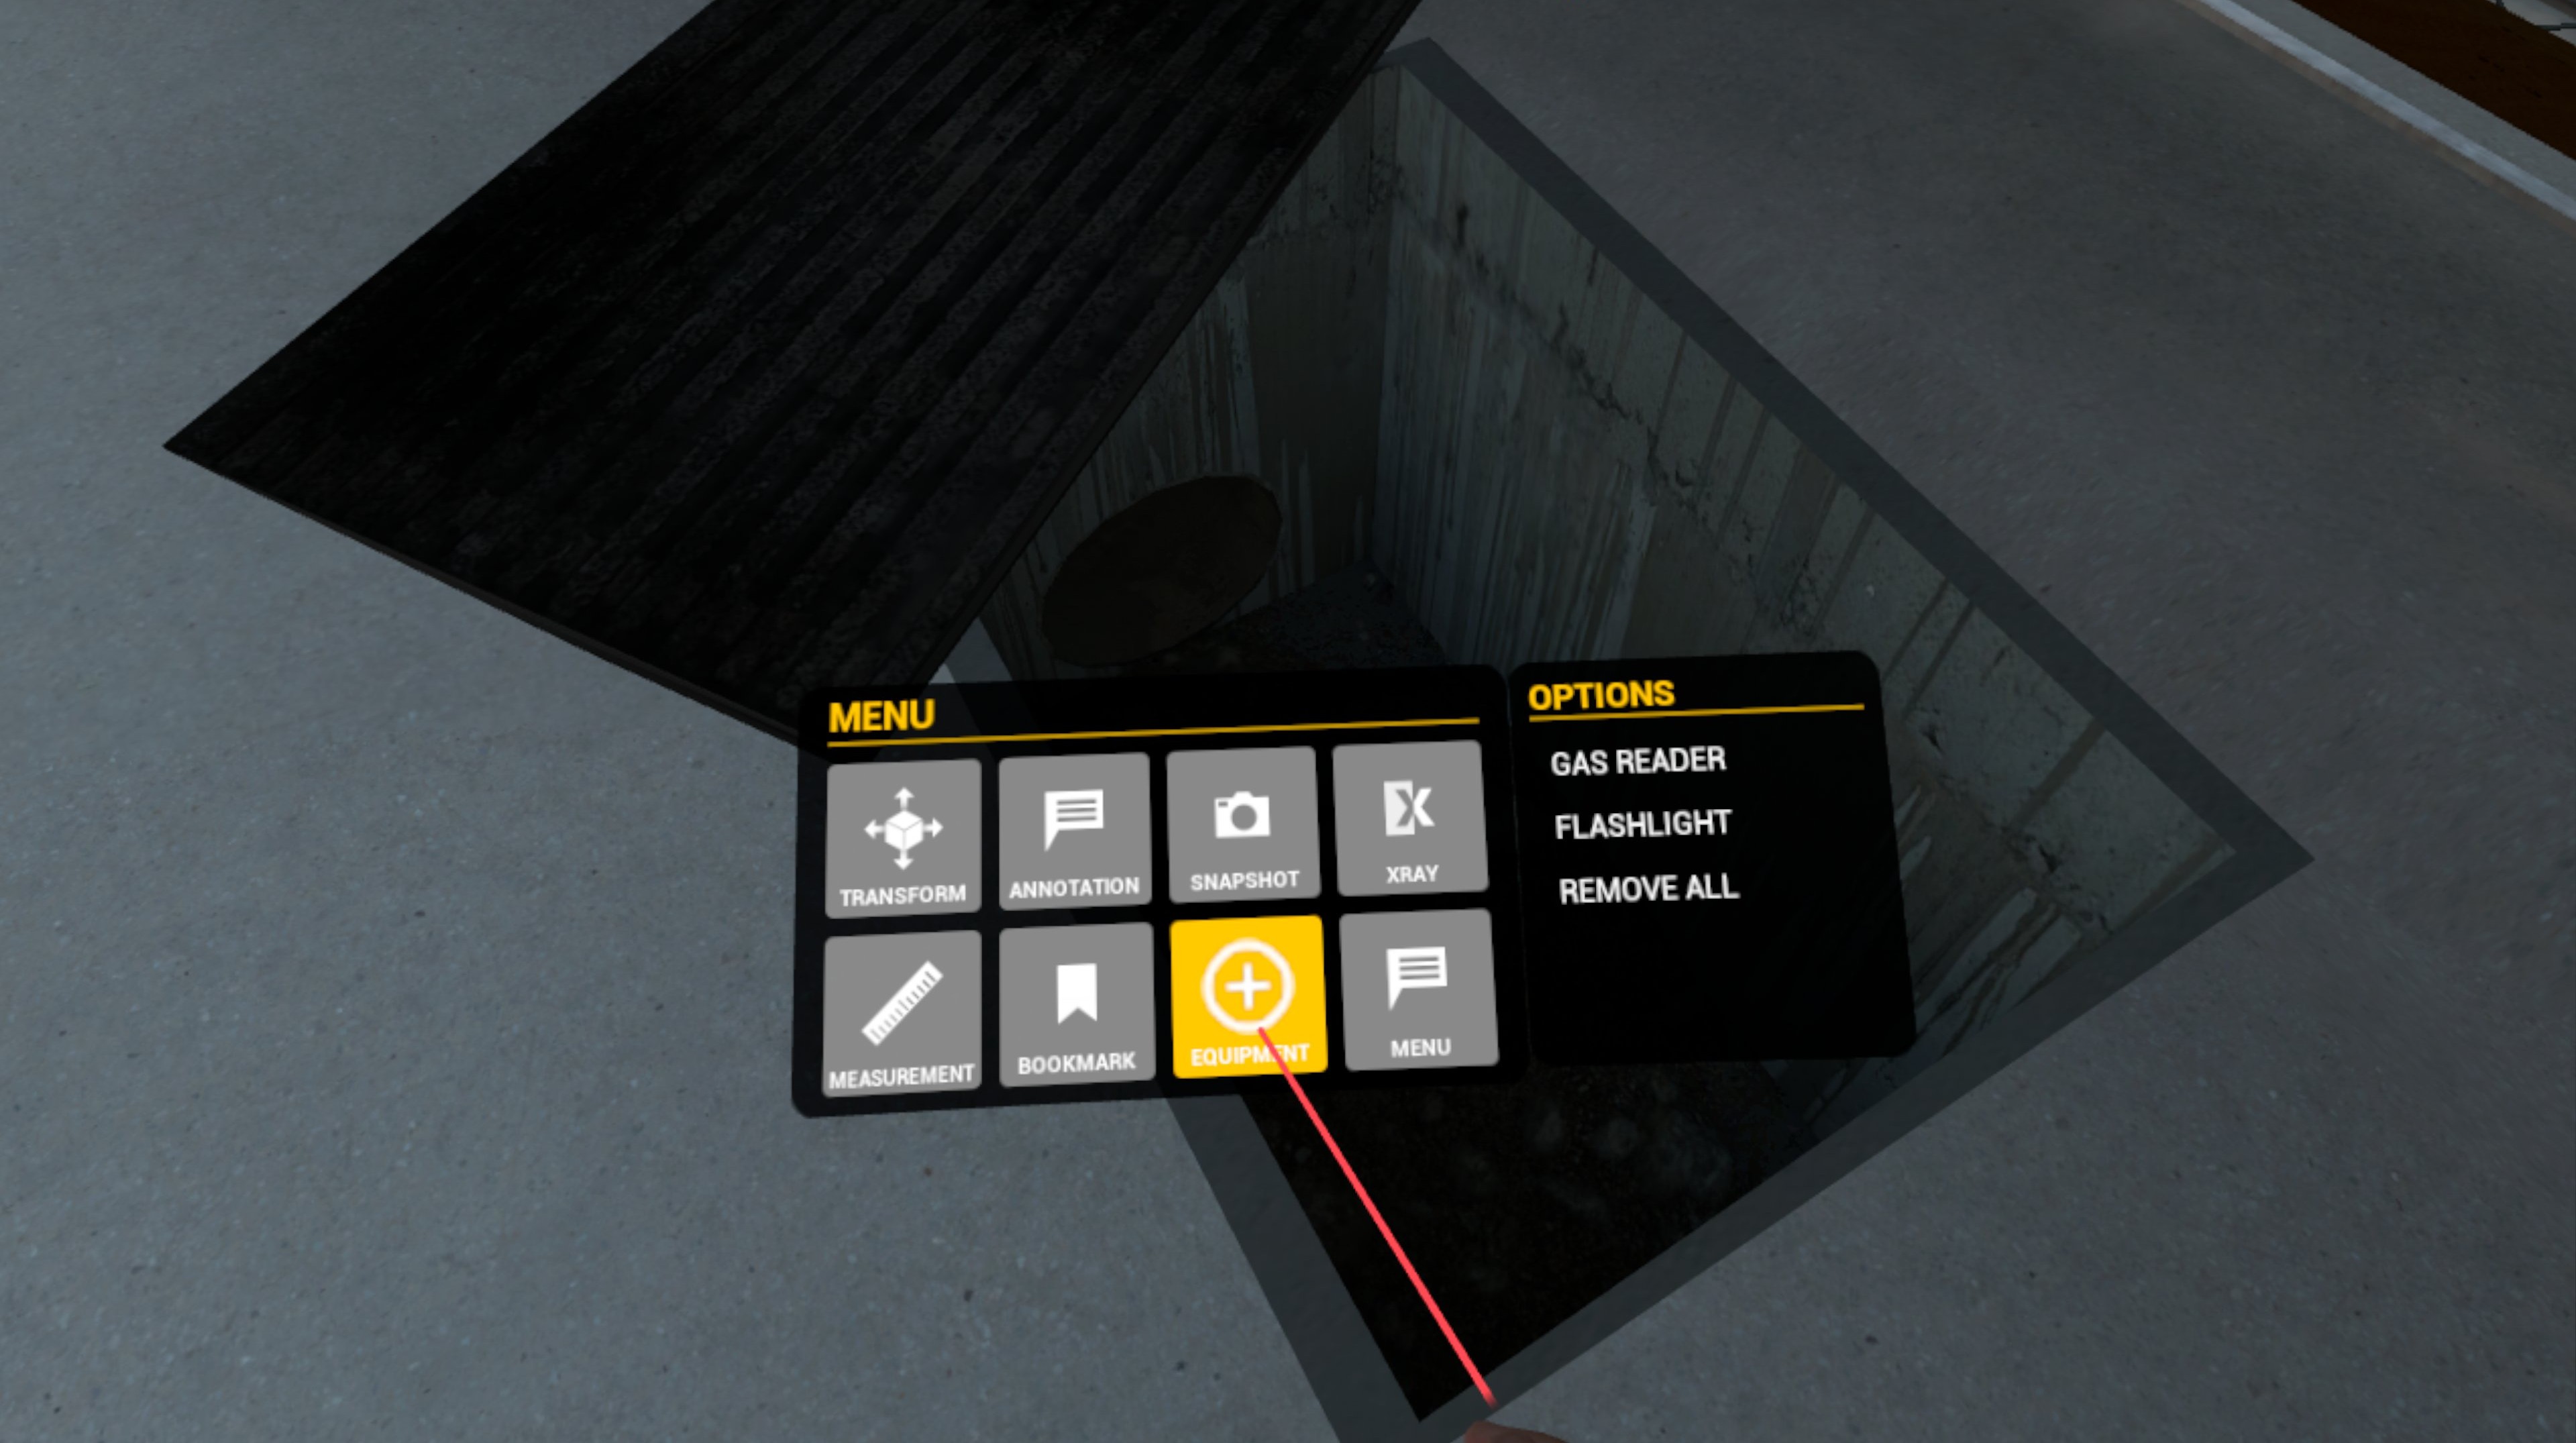
To open the player menu press the "A" button on the right controller or the "X" button on the left controller.
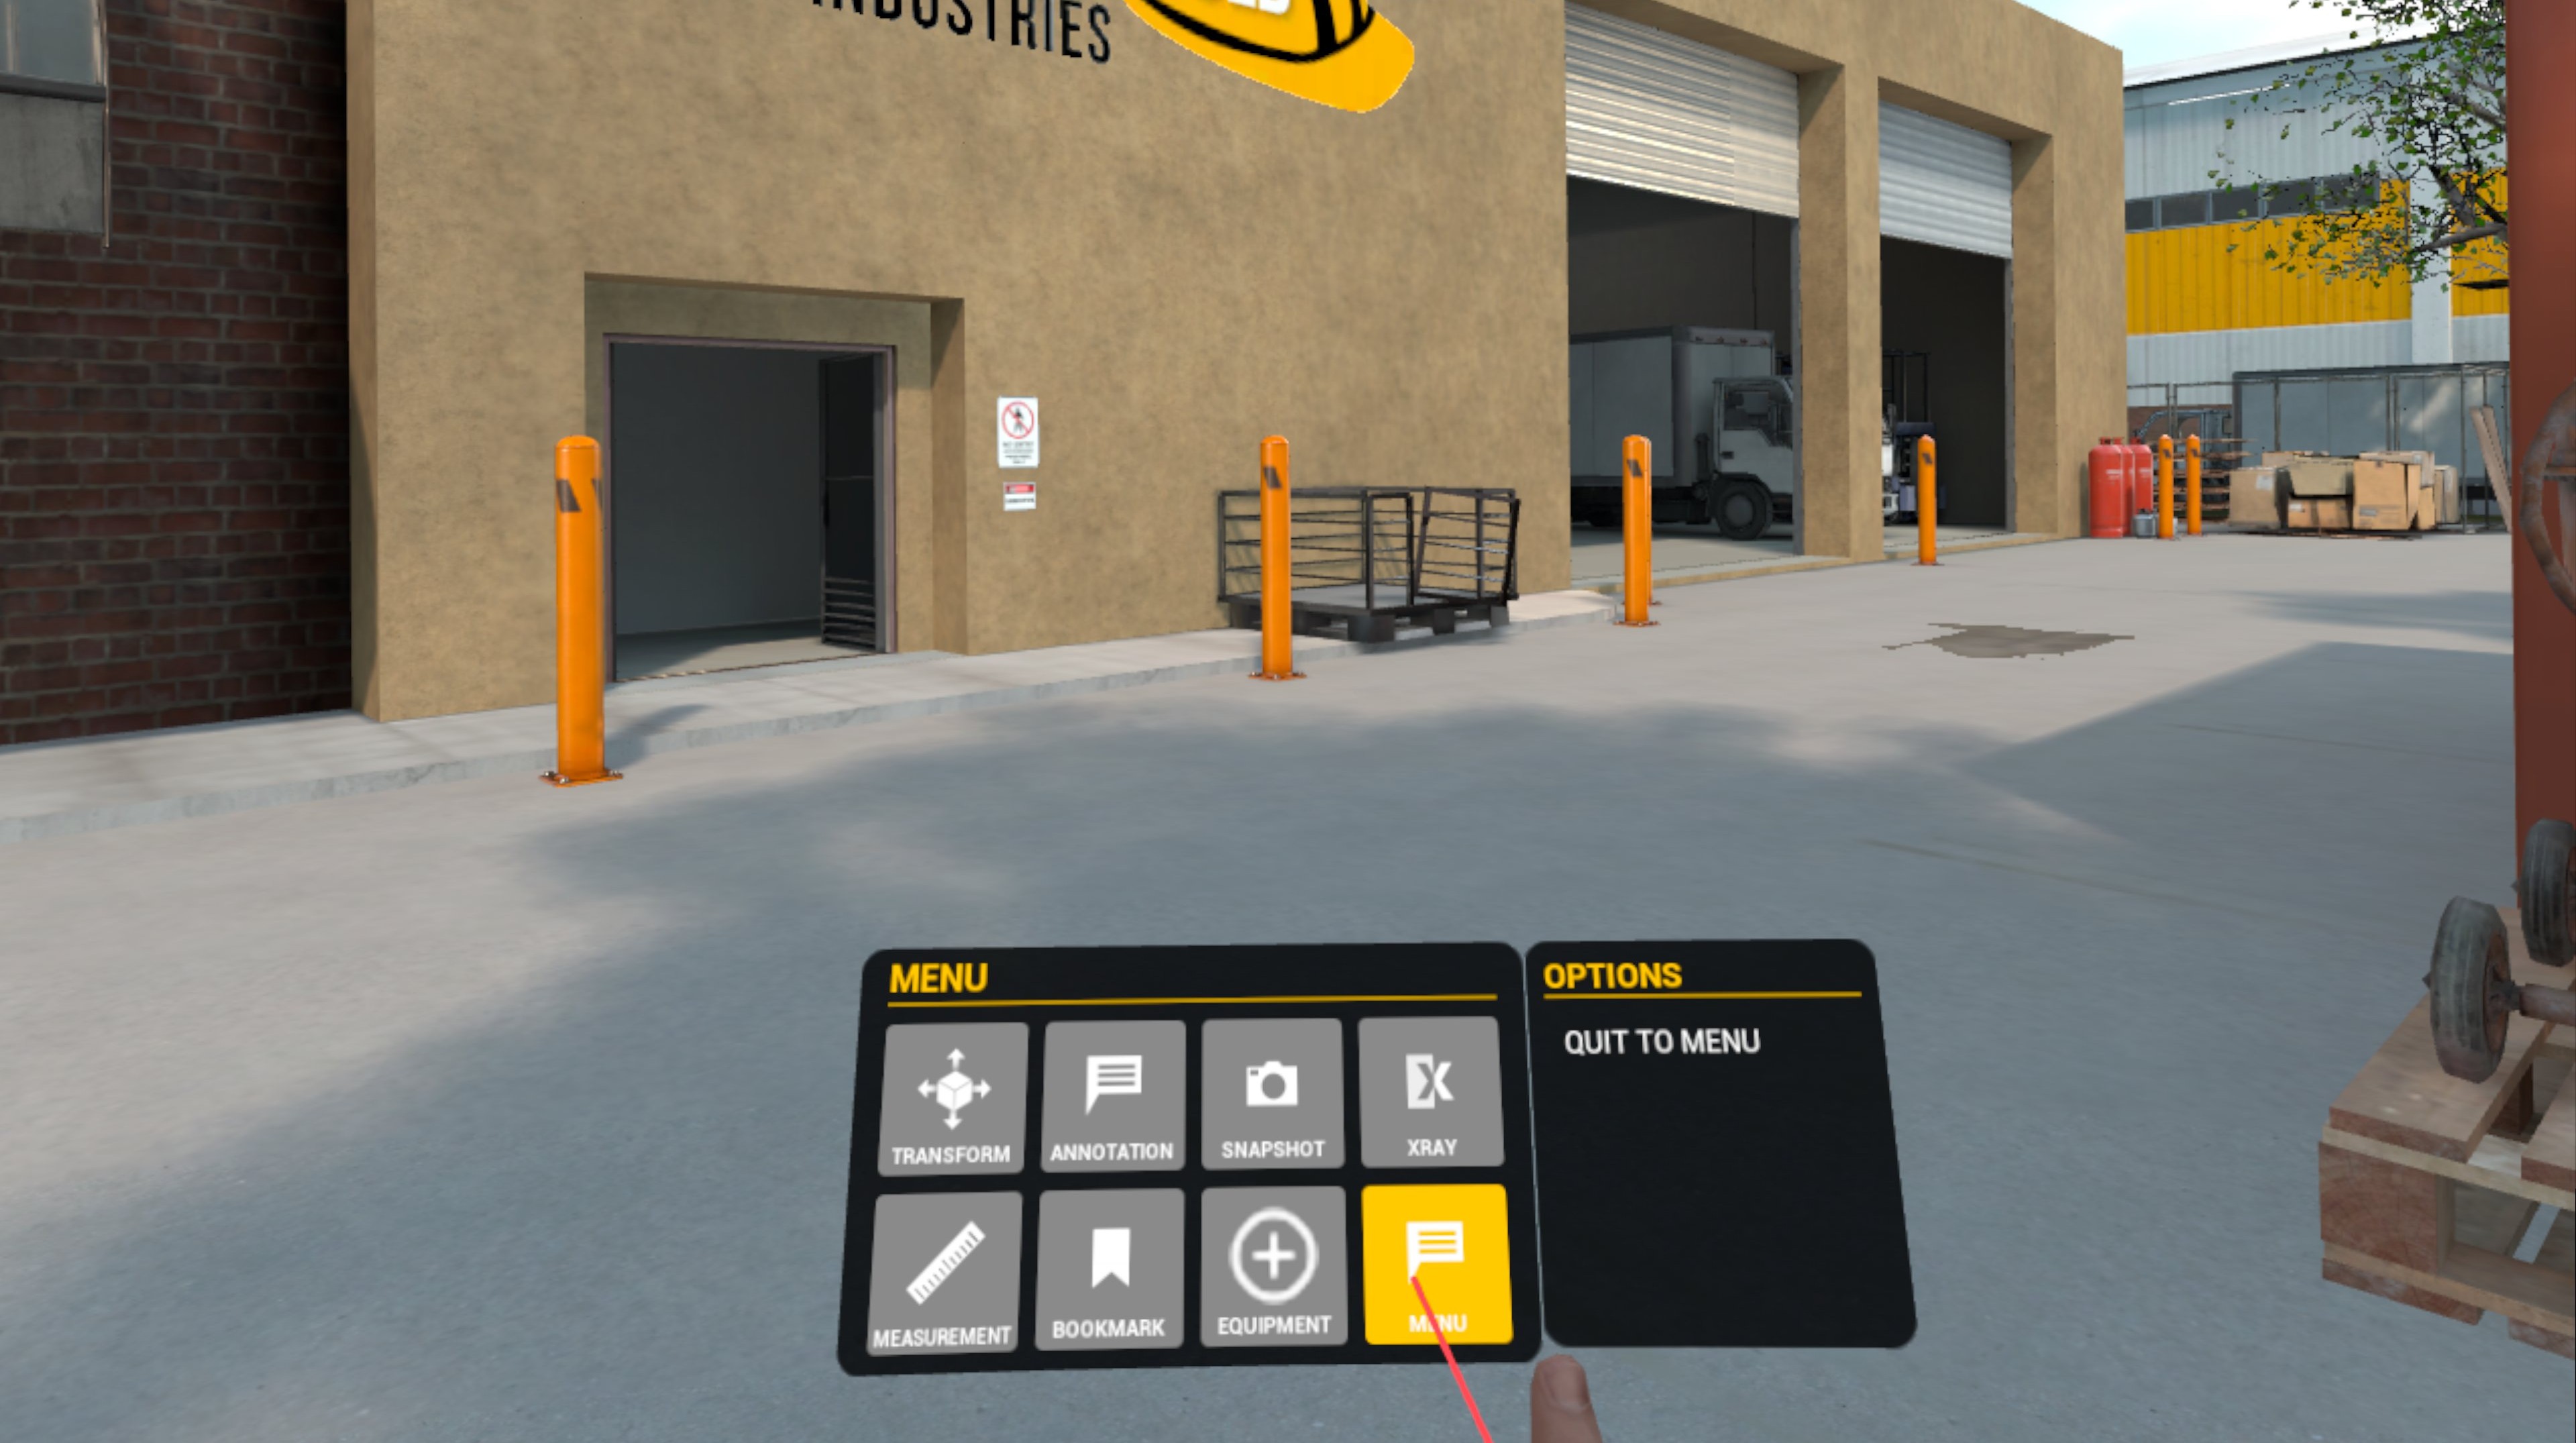
There are several command items in this menu that can be selected by positioning the pointer over them and squeezing the trigger. Doing so will open their sub menus:
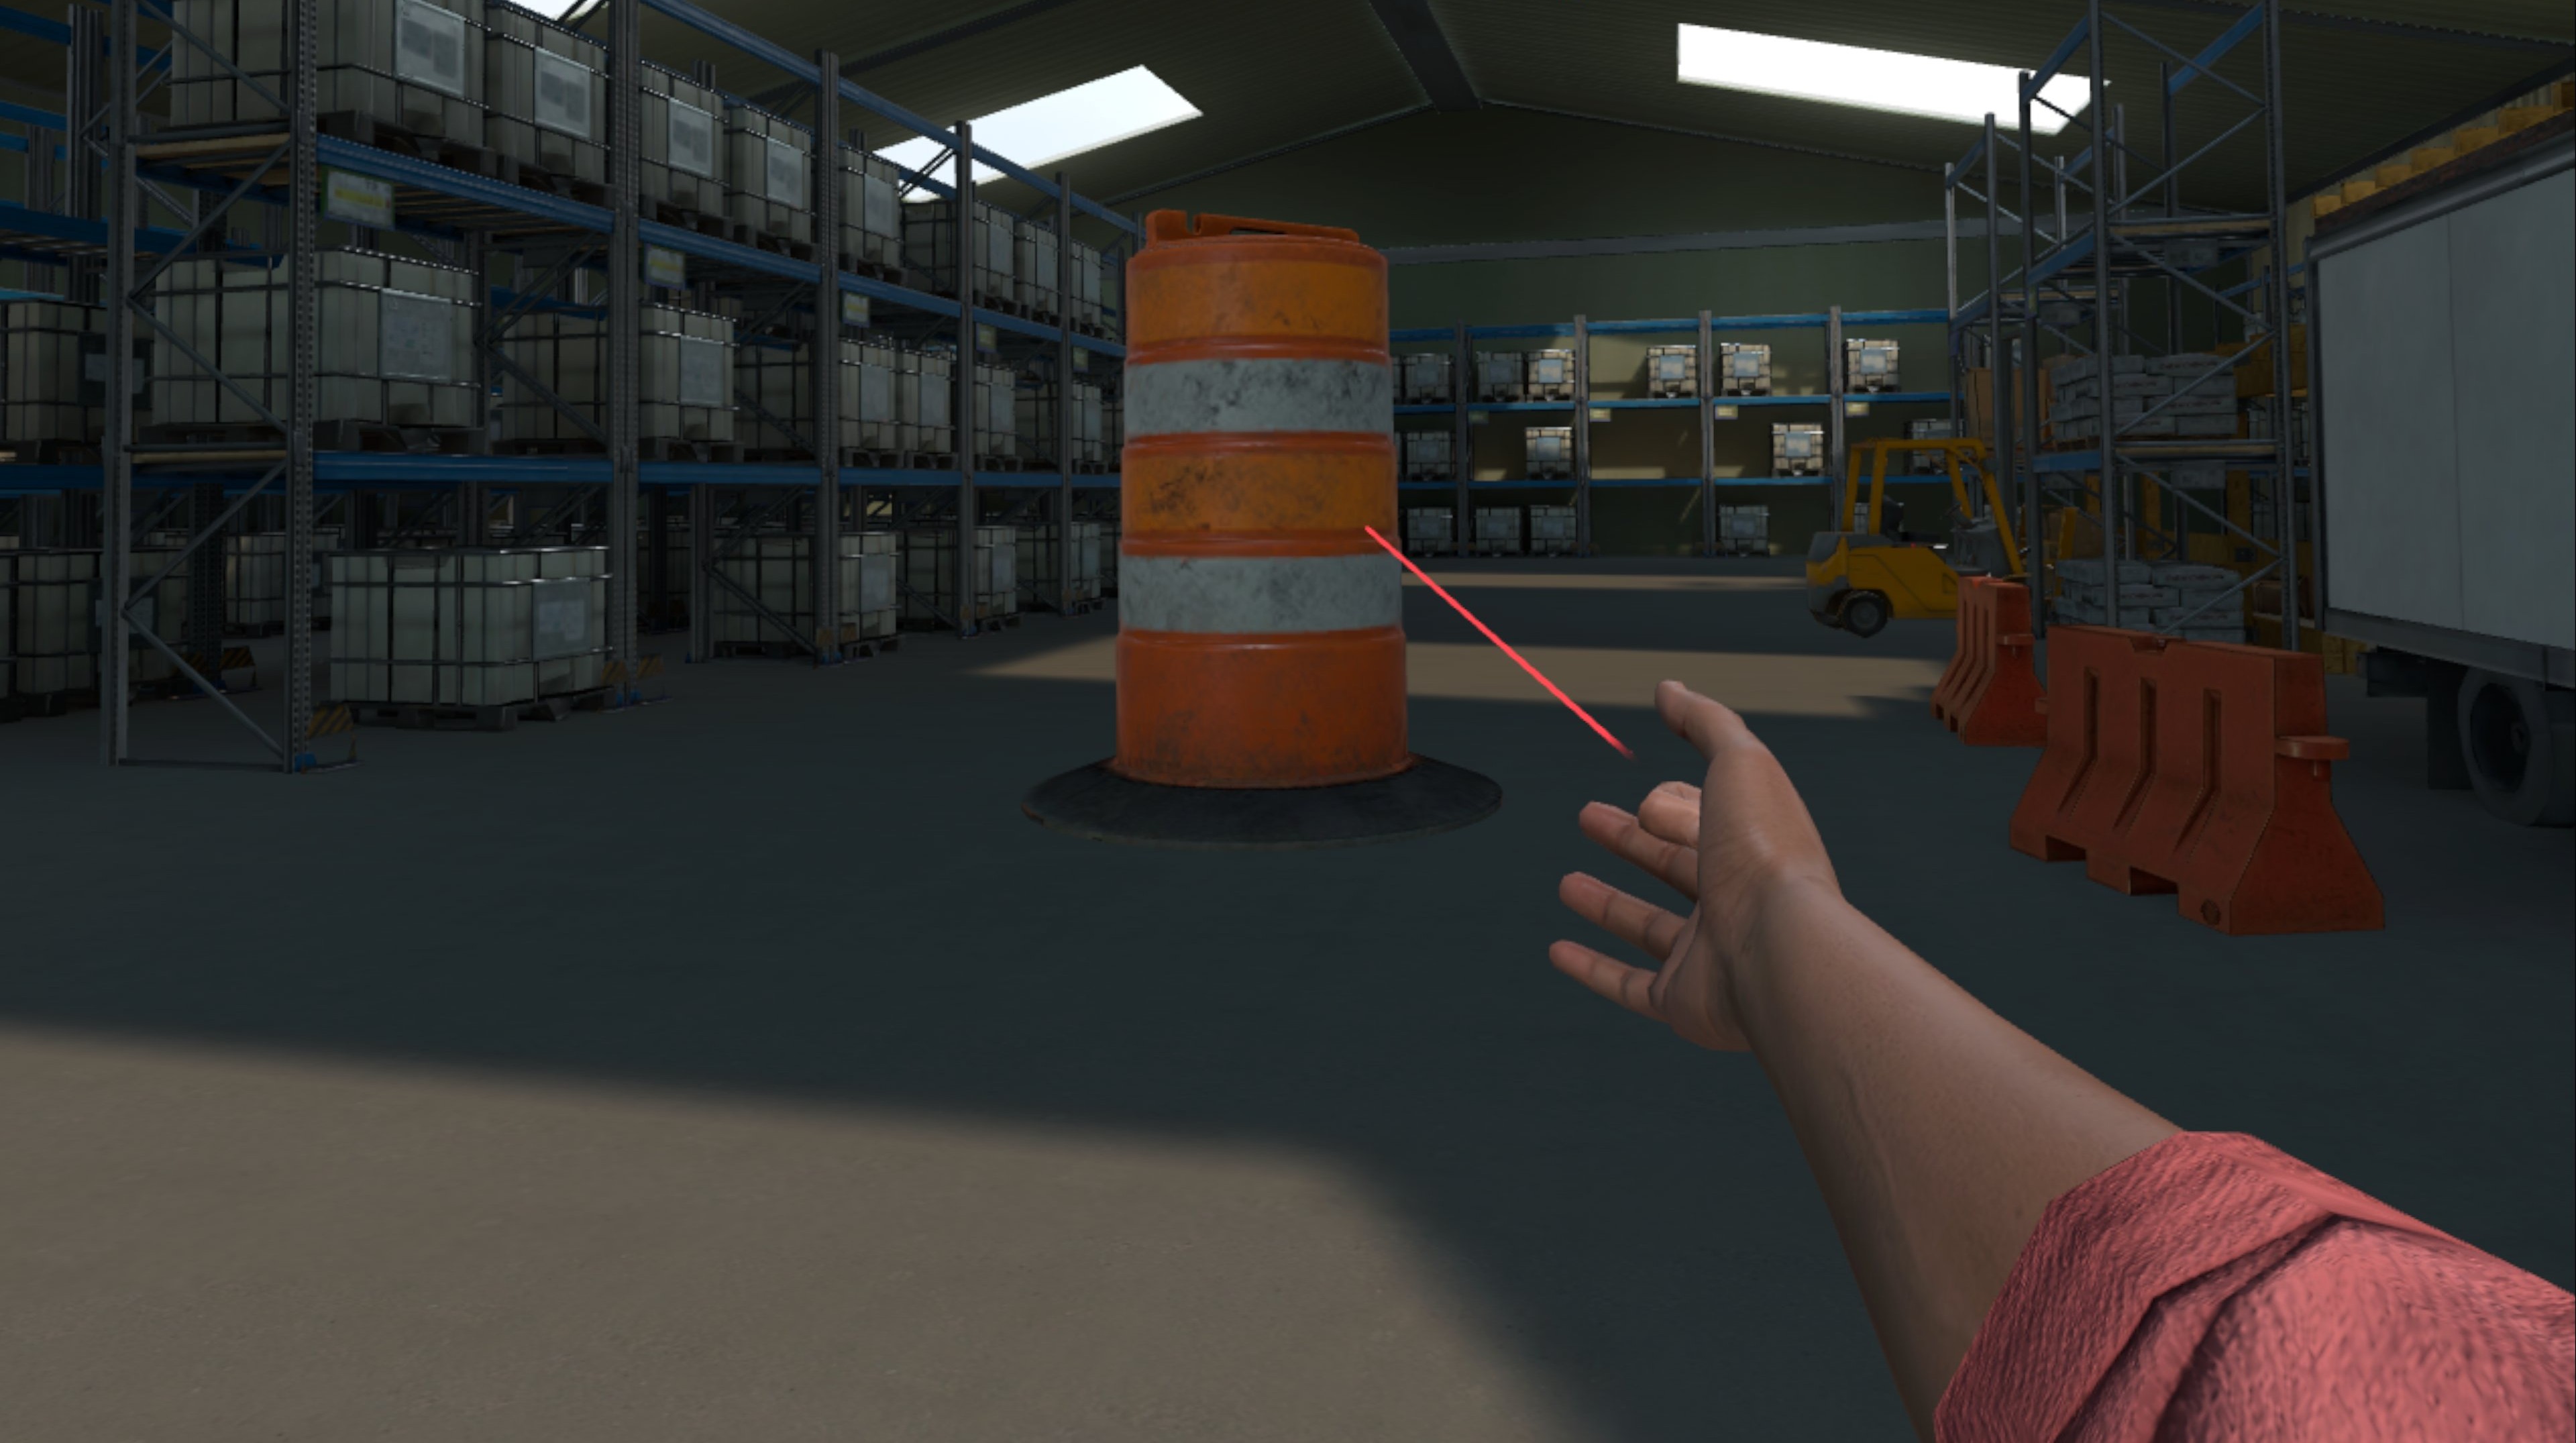
Allows the user to move certain objects in the environment from a distance.
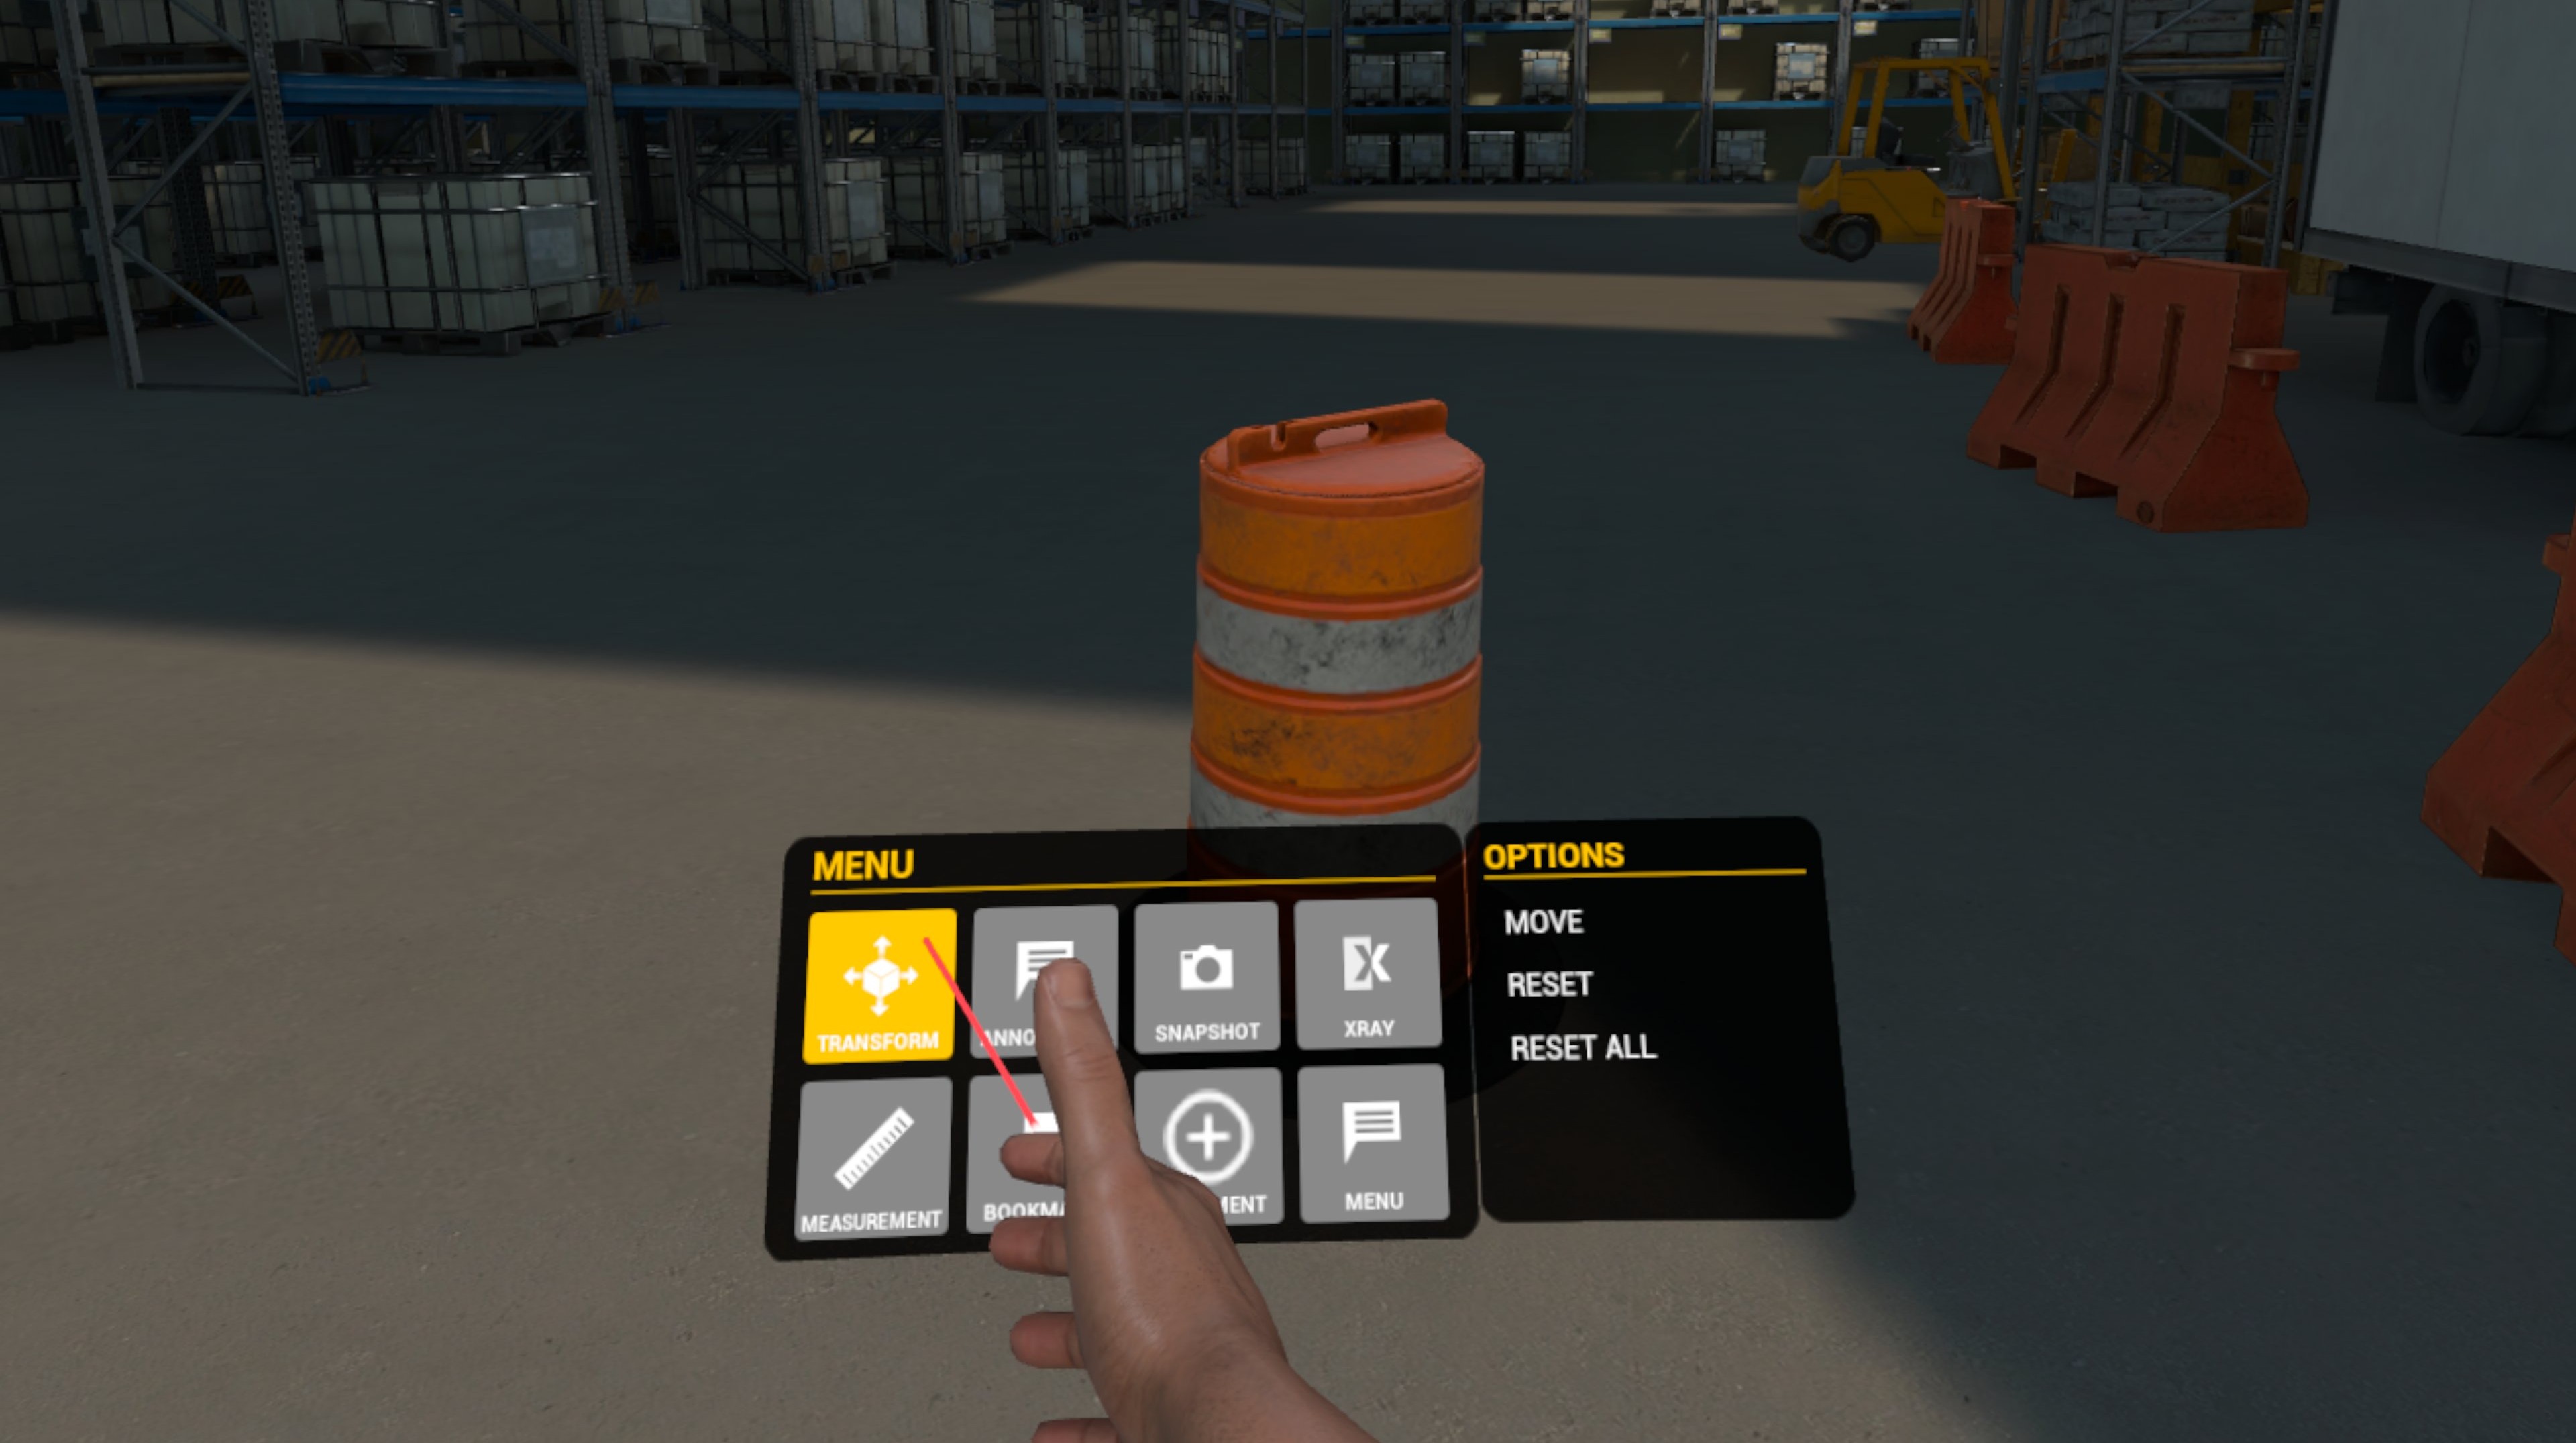
There are several sub items in this menu that can be selected by positioning the pointer over them and squeezing the trigger:
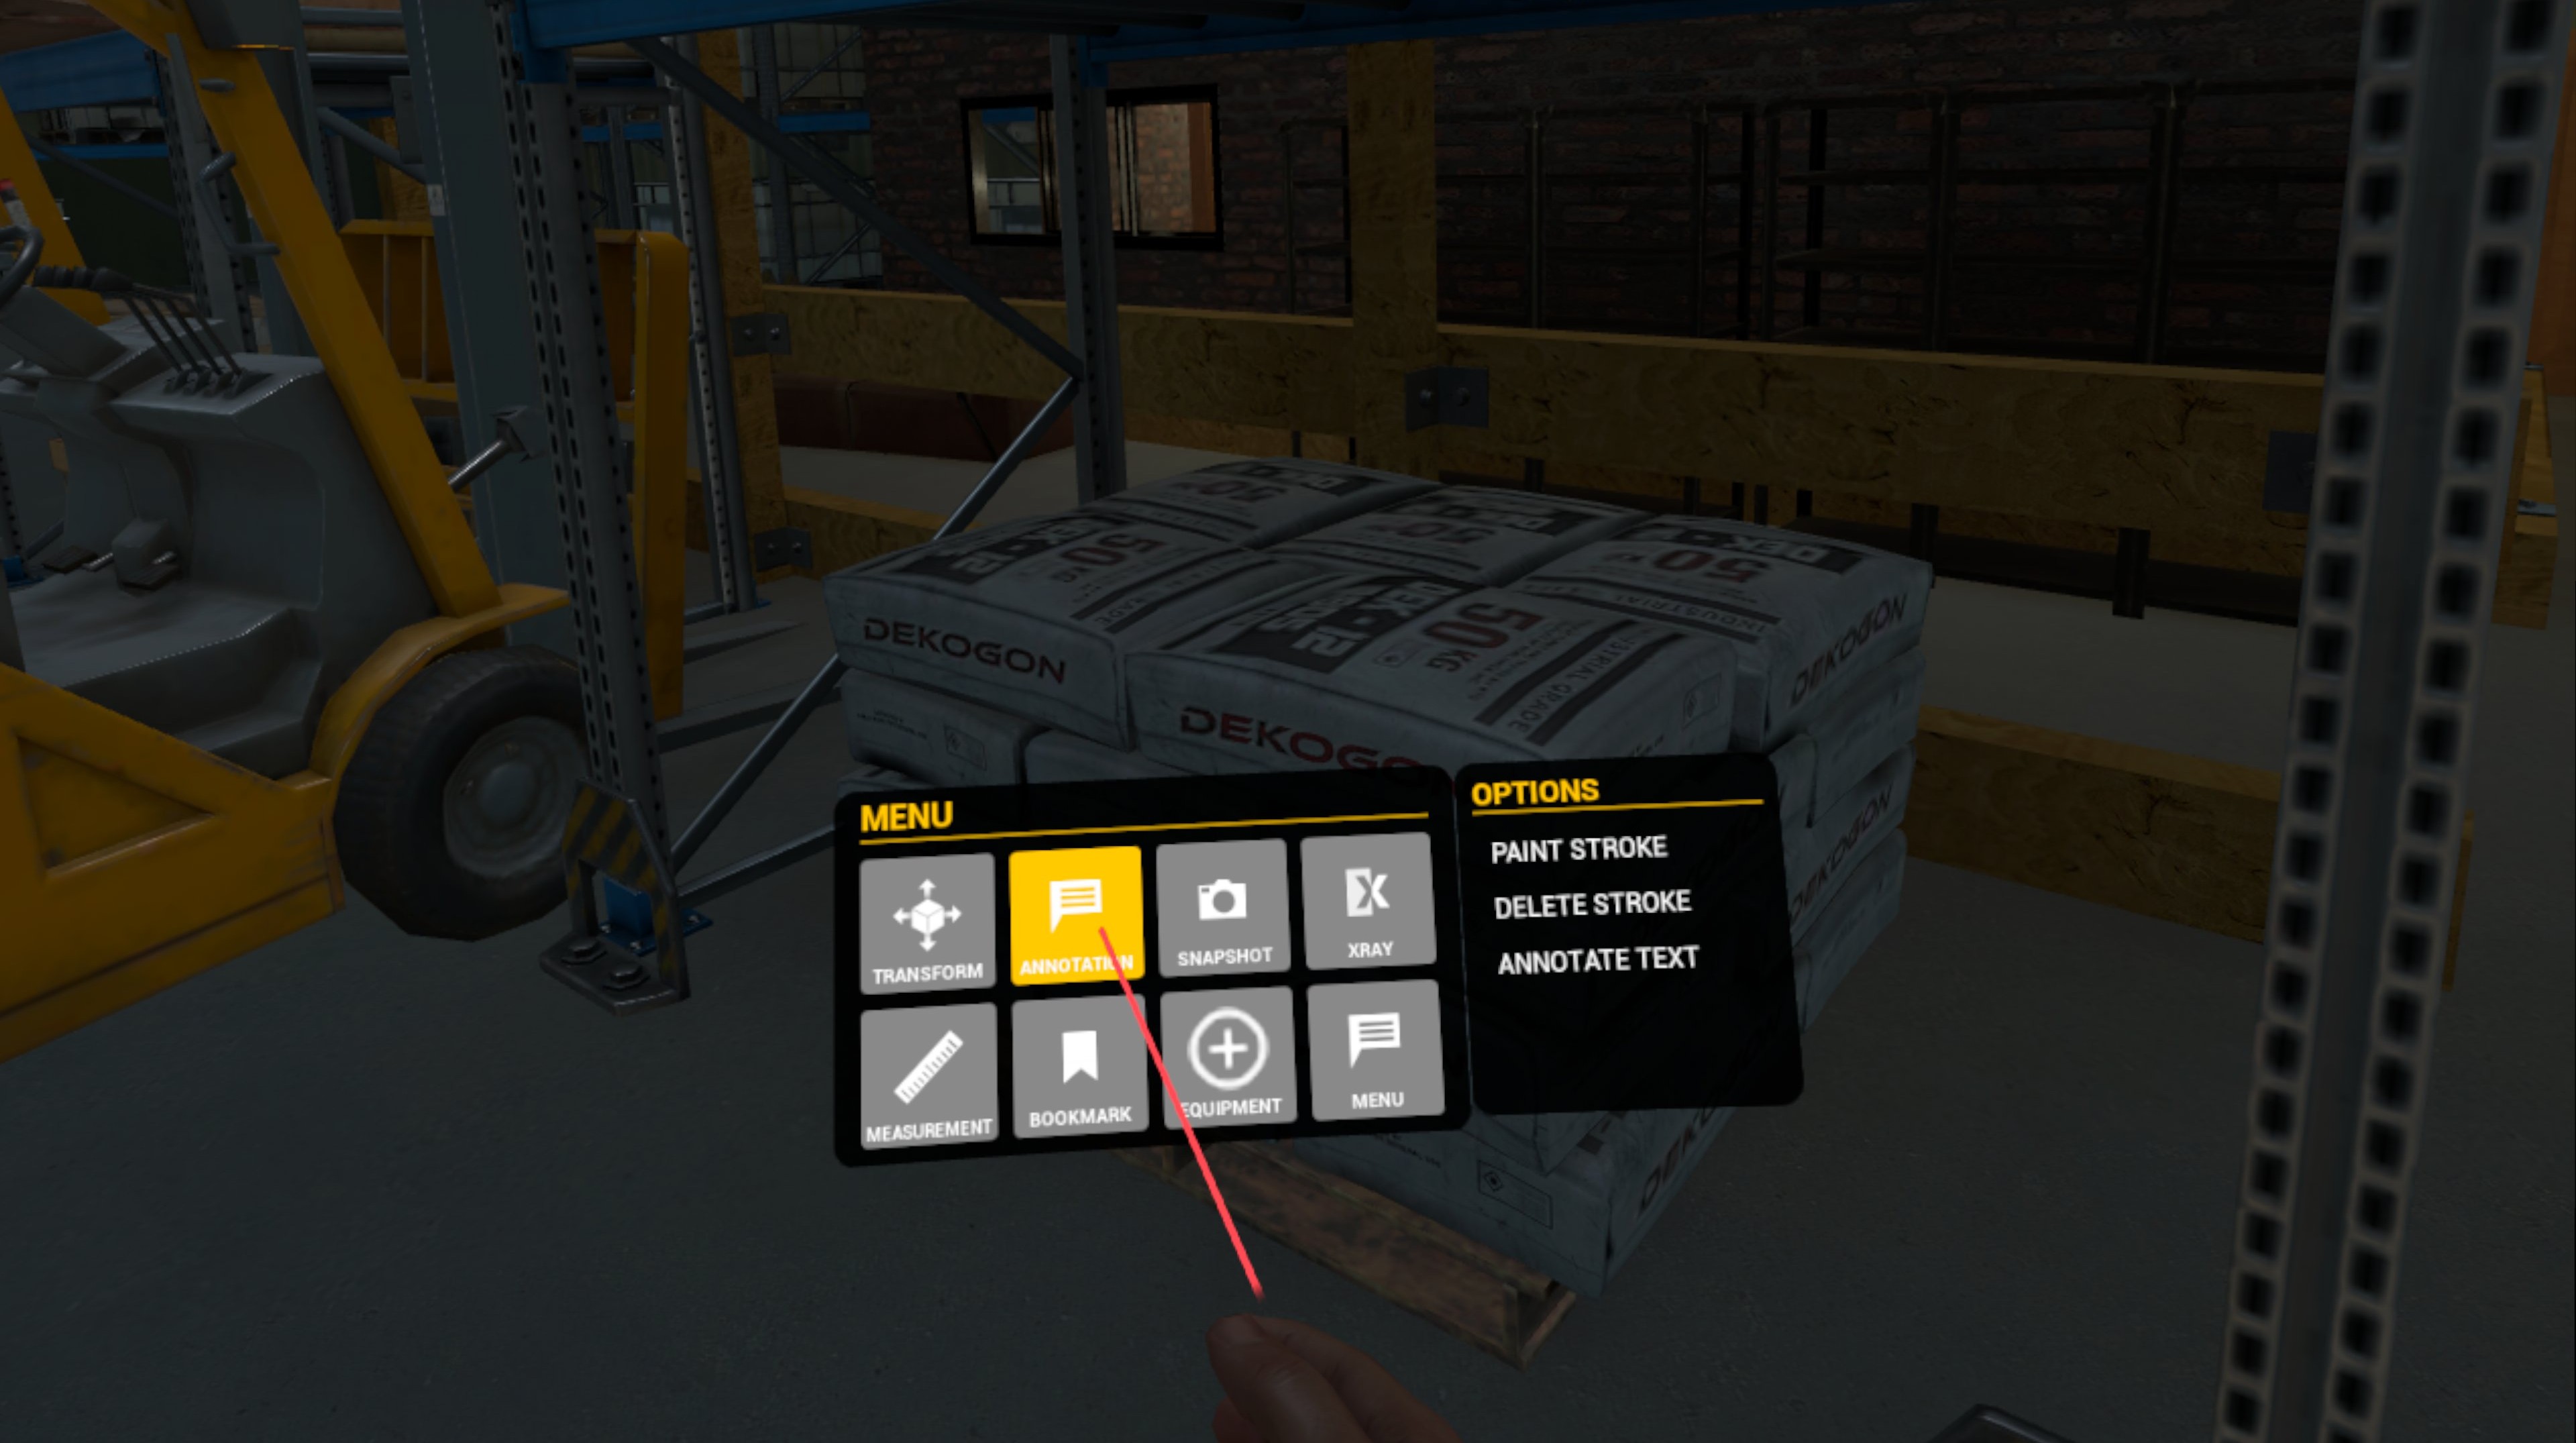
Allows the user to create text or hand drawn annotations in the environment.
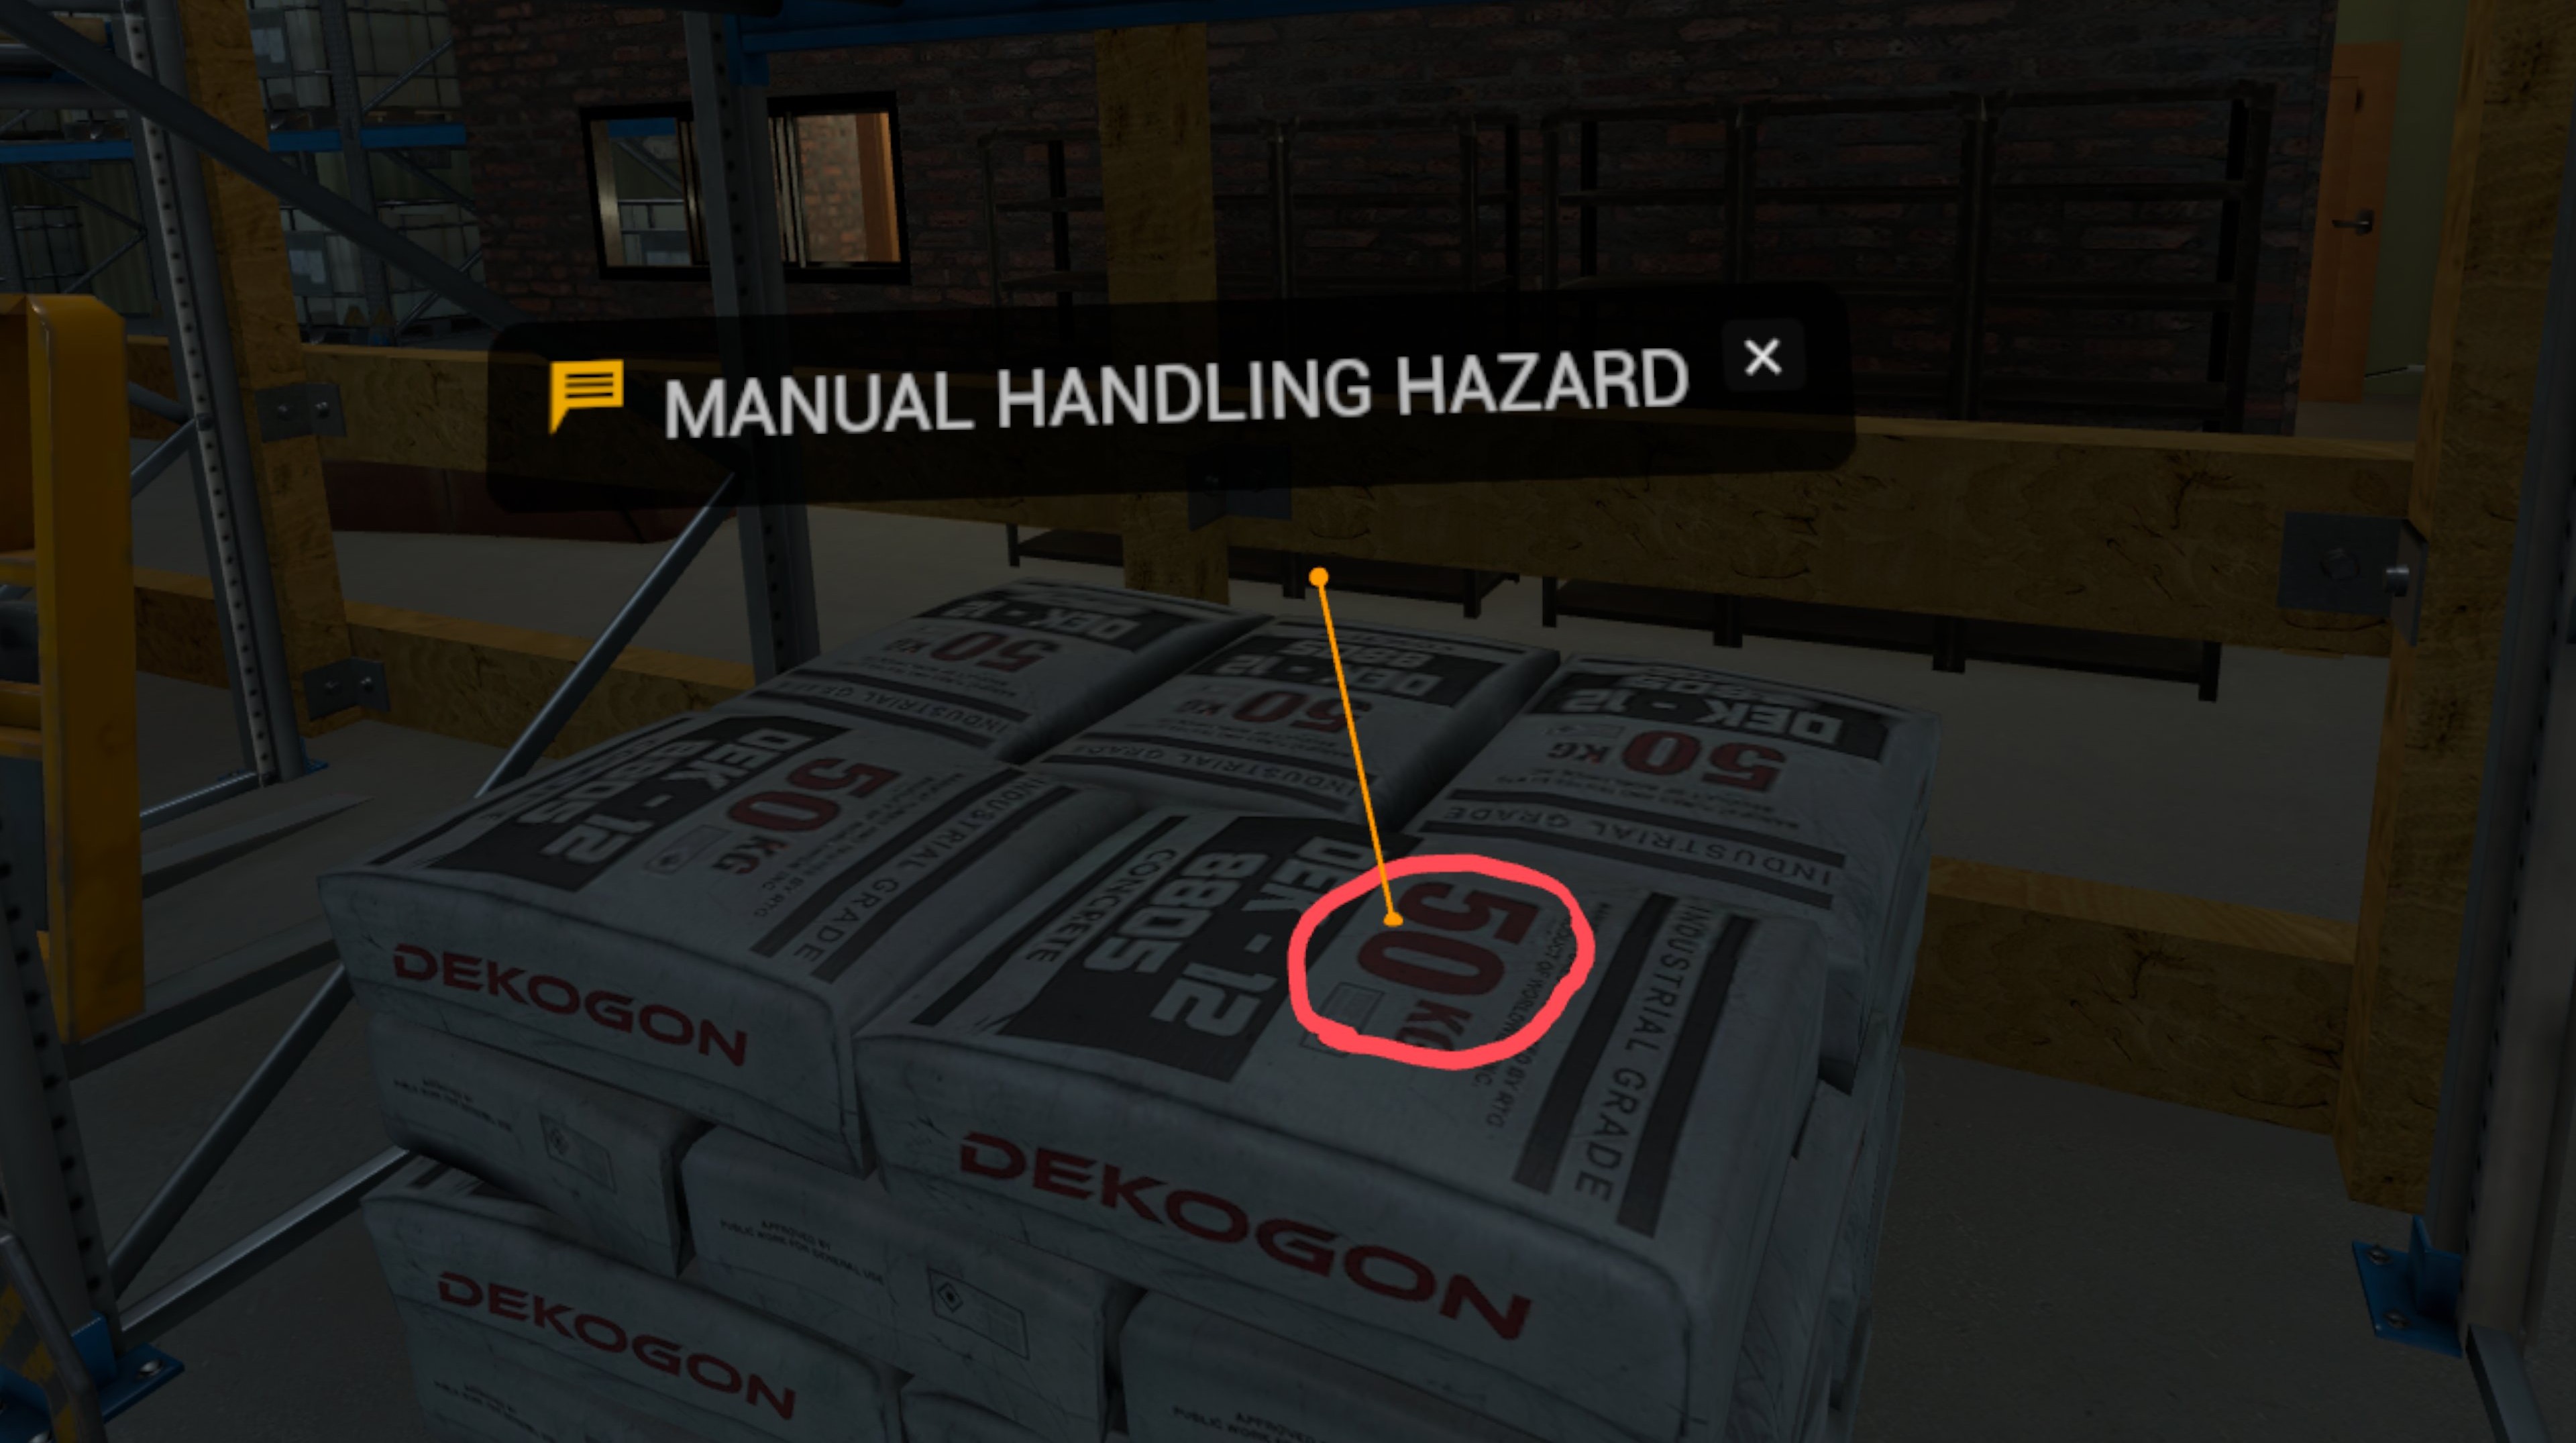
There are several sub items in this menu that can be selected by positioning the pointer over them and squeezing the trigger:
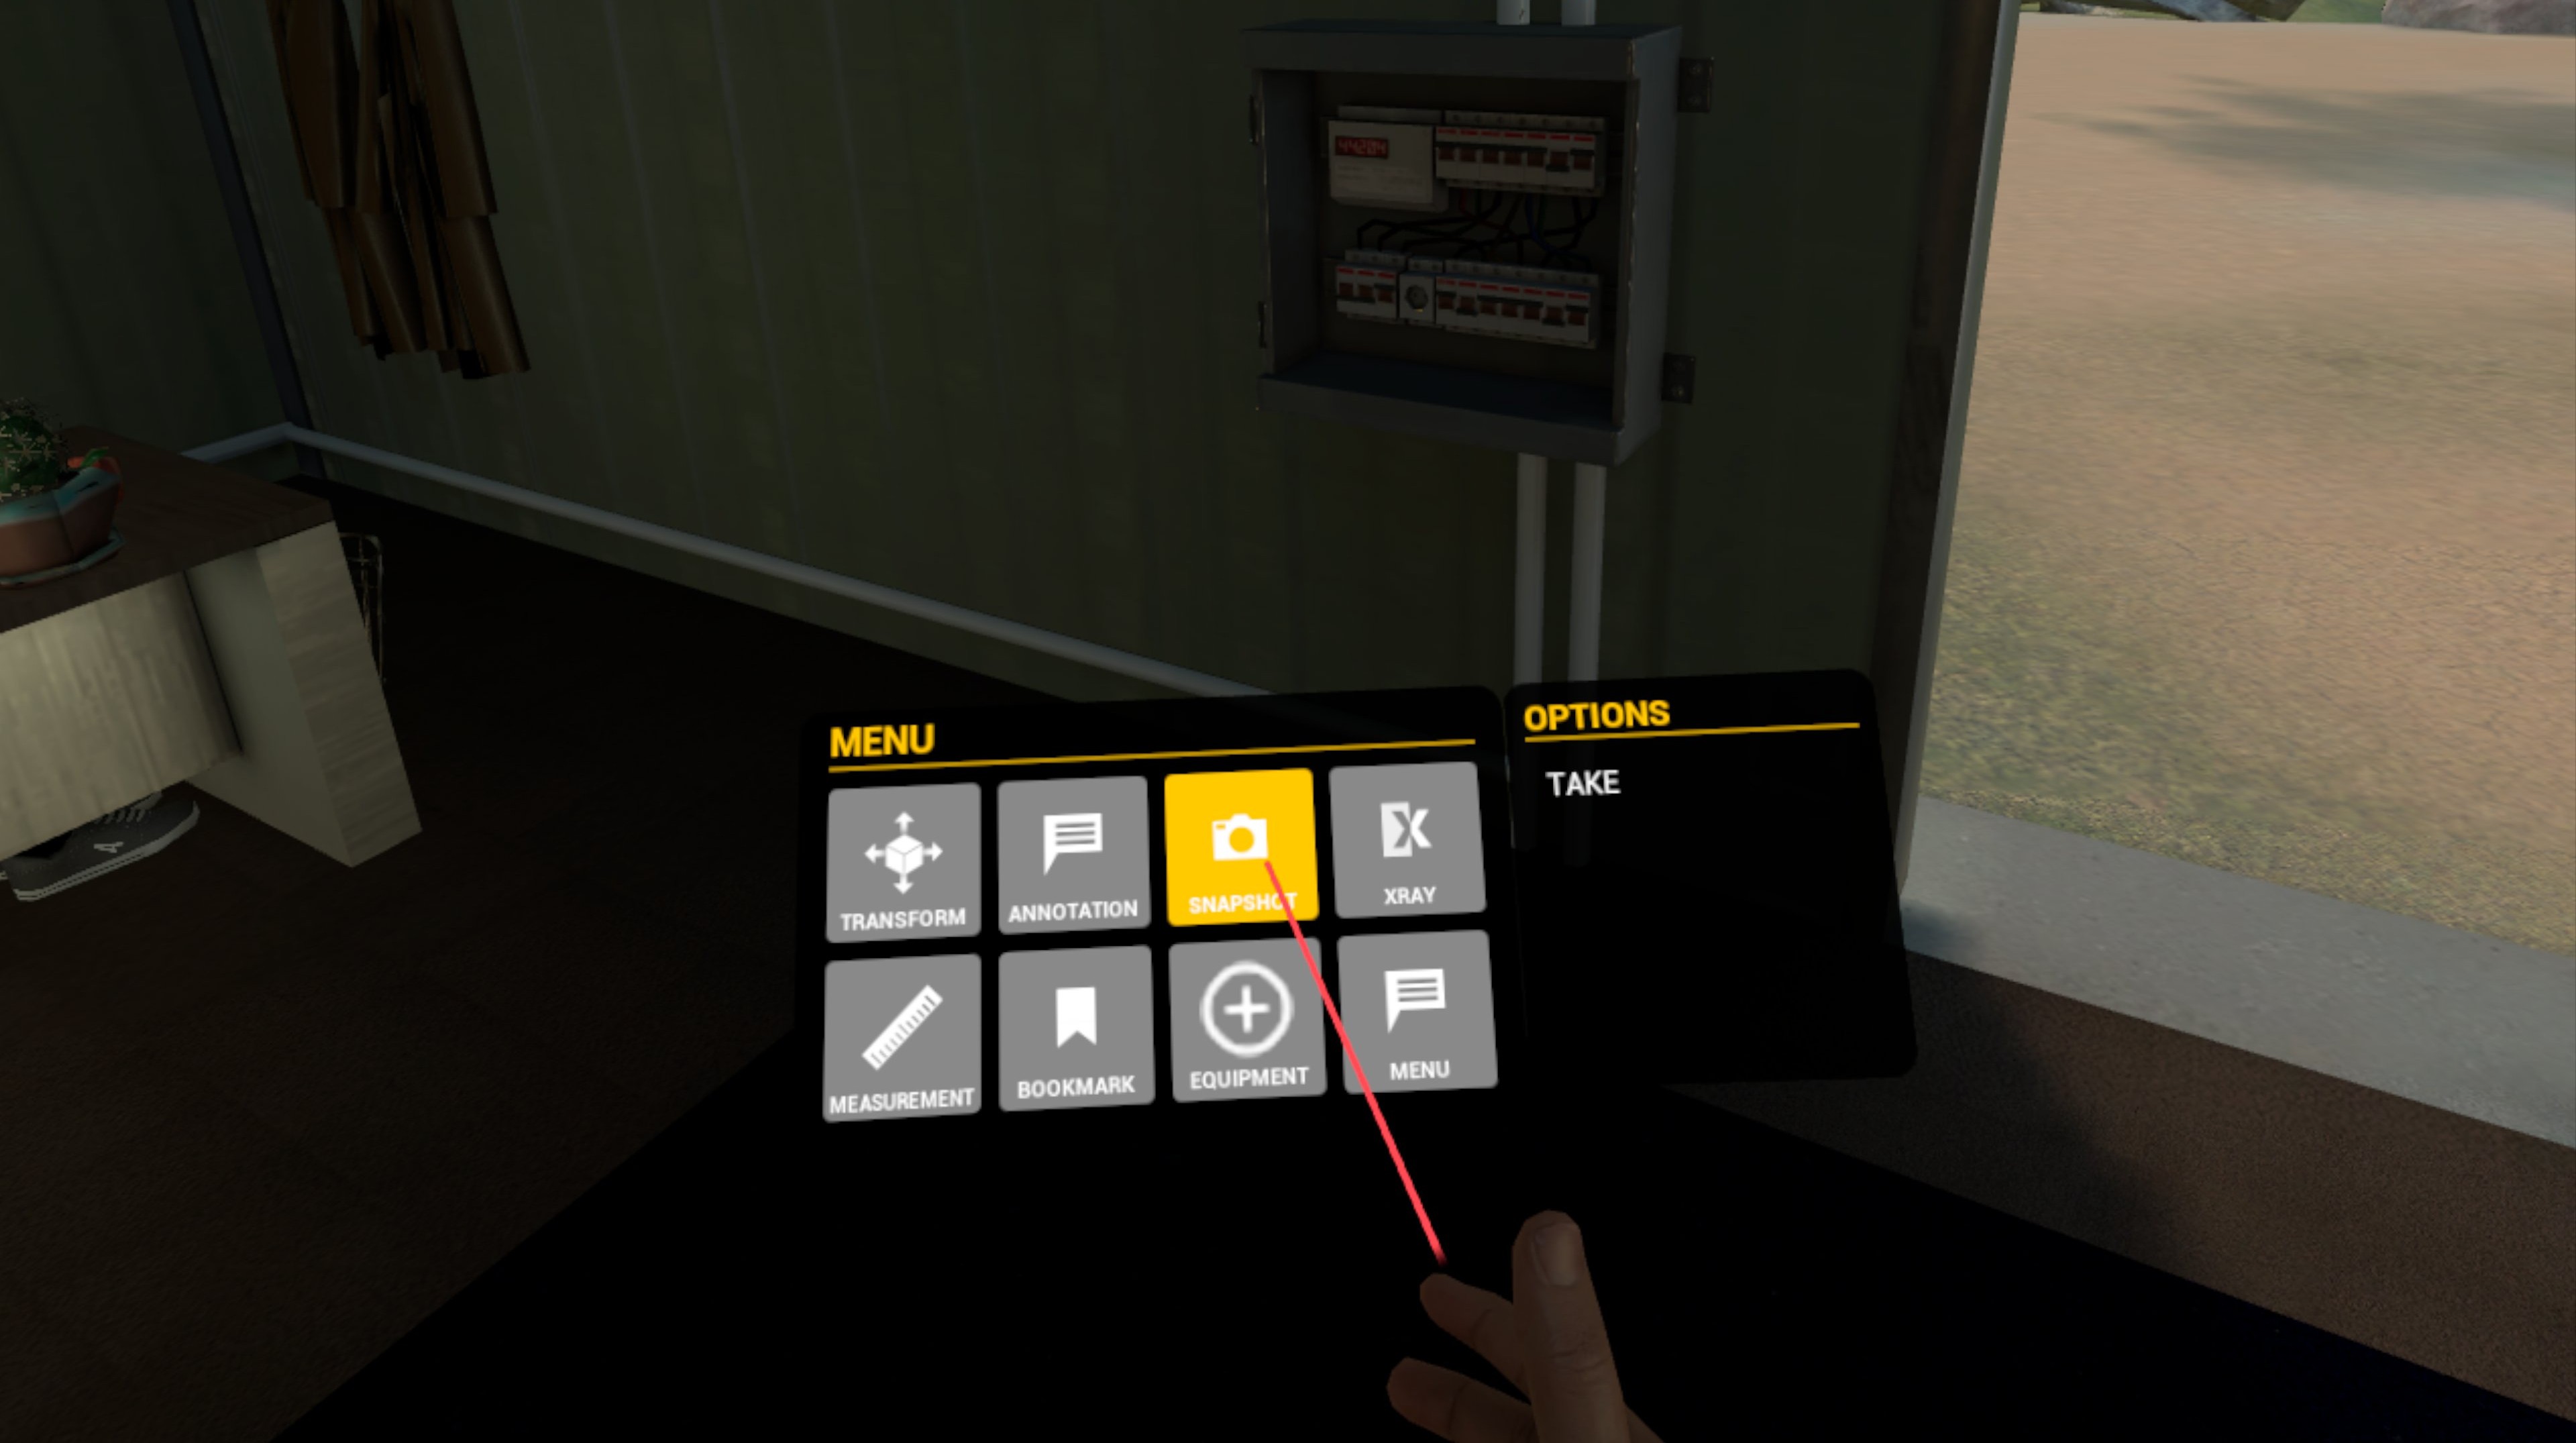
Allows the user to take a snapshot of the environment through the viewfinder that appears.
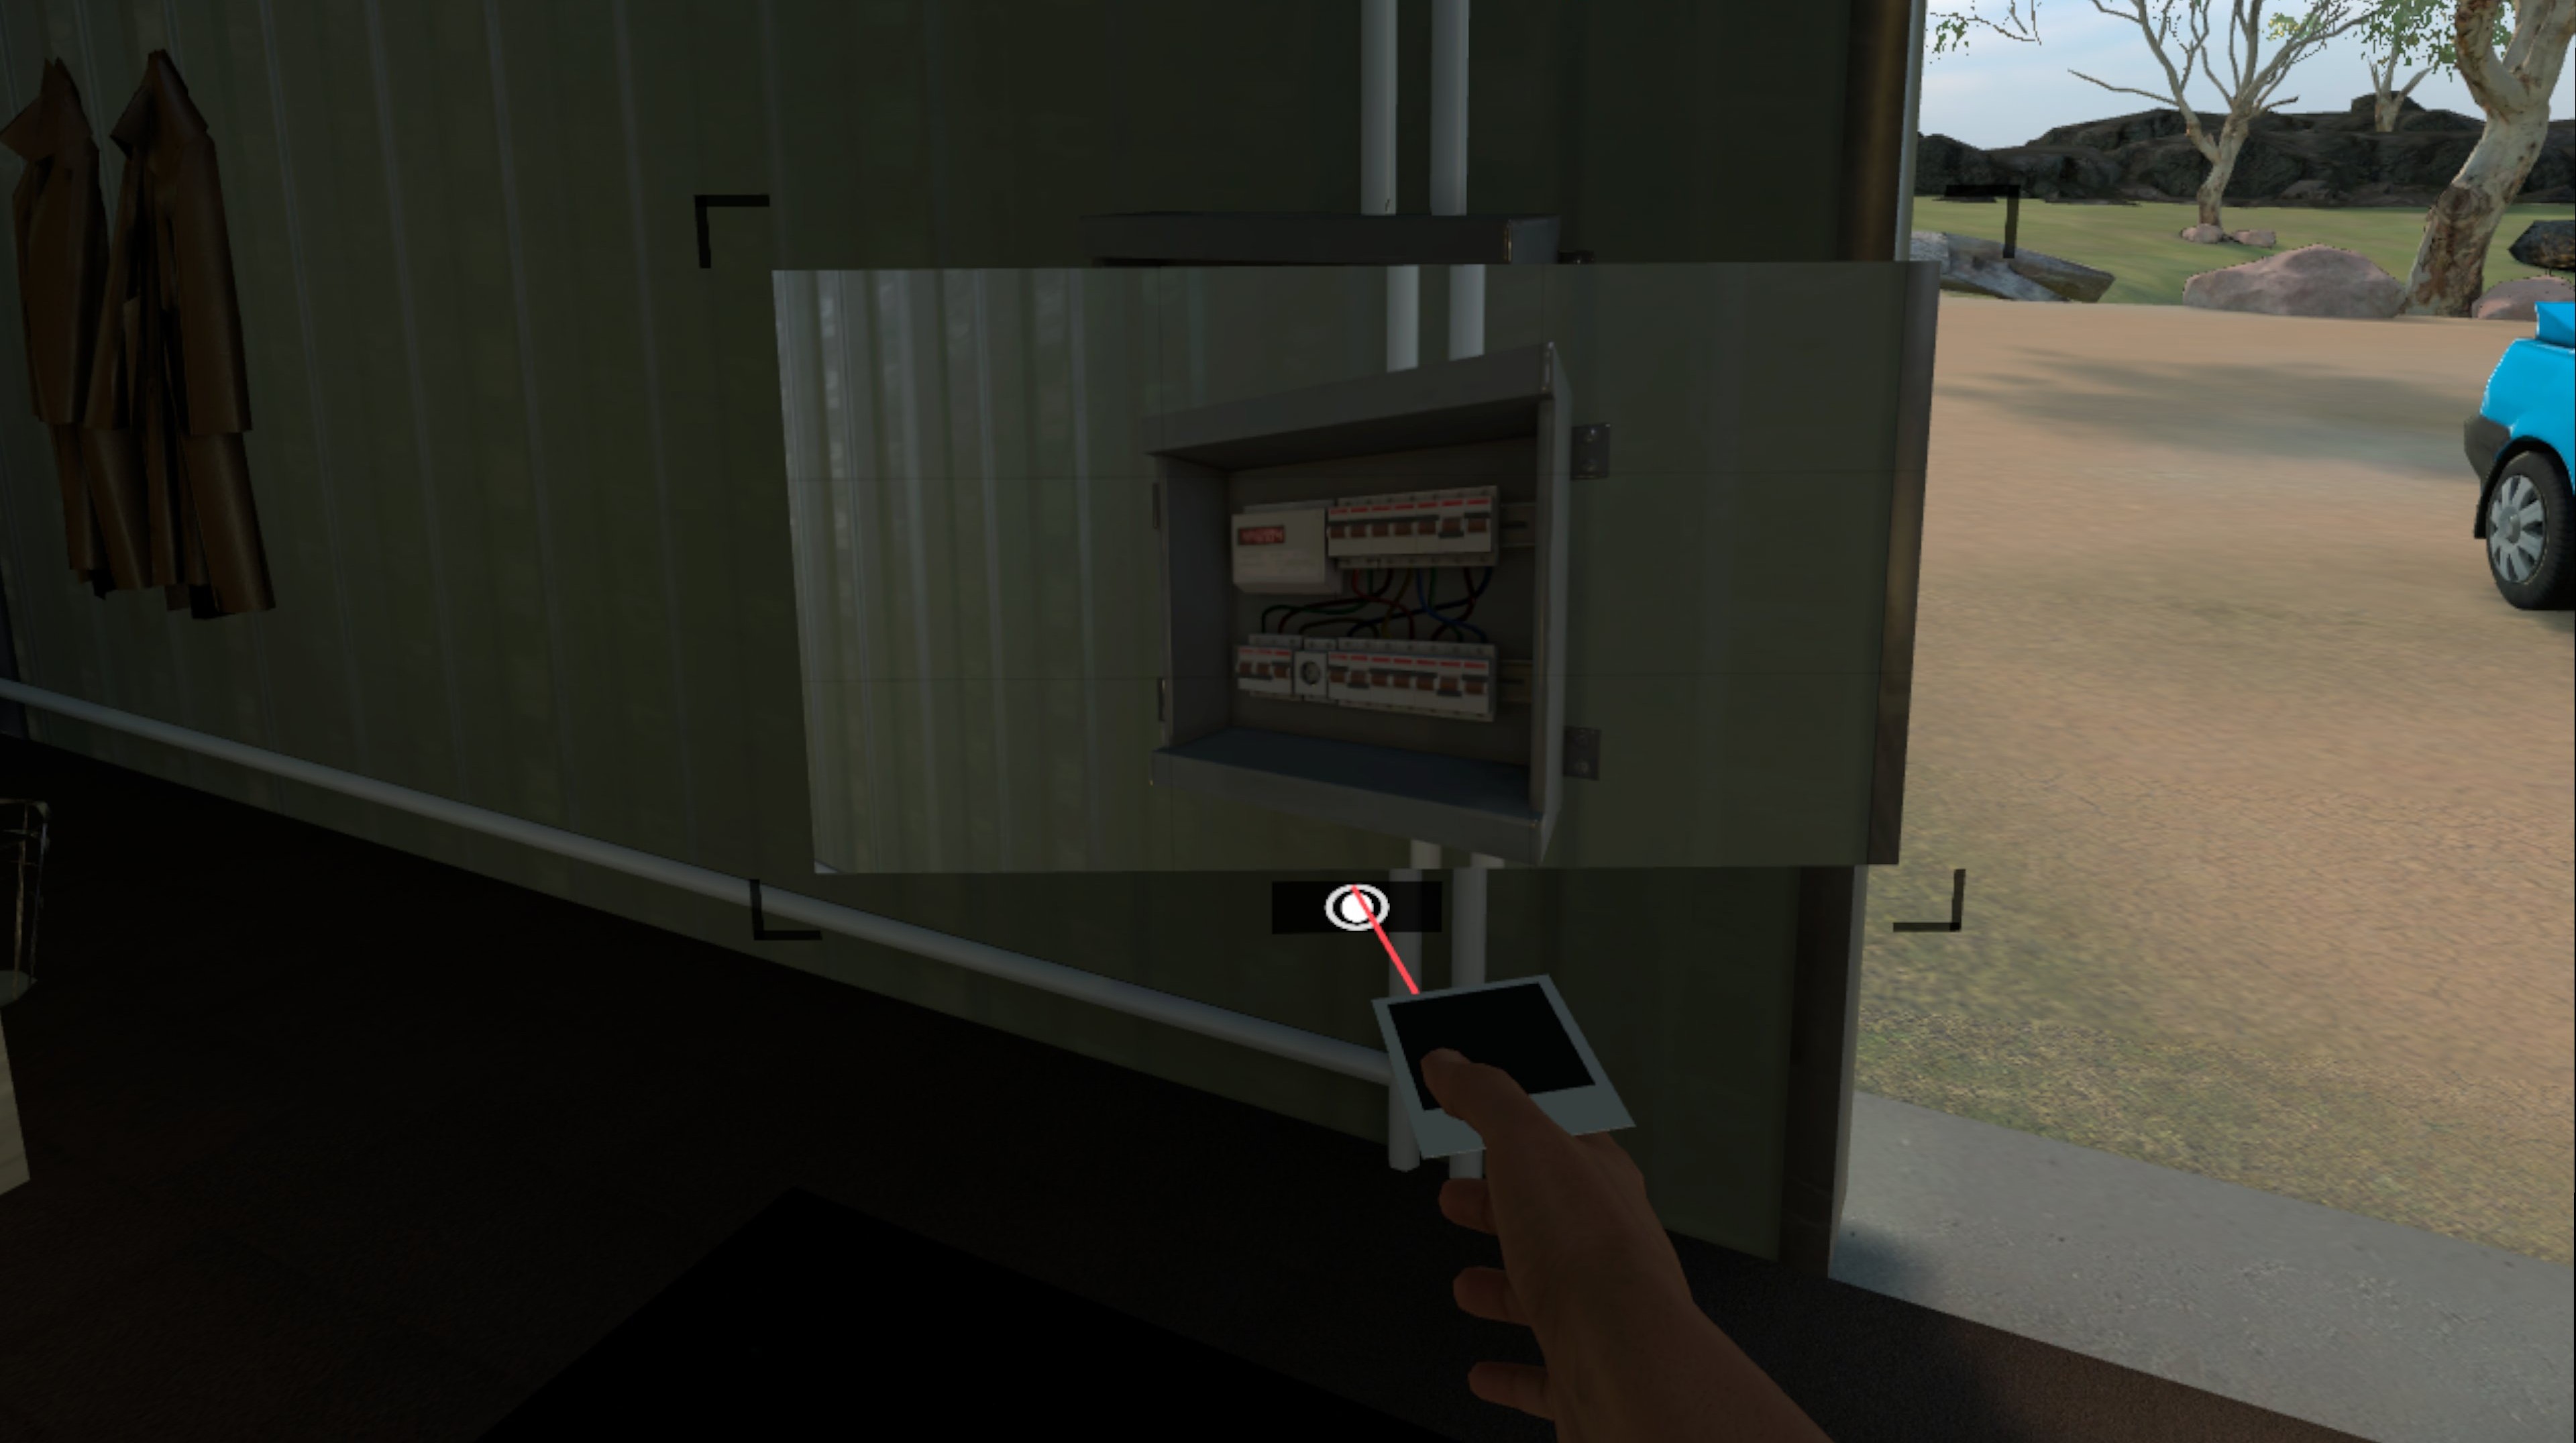
There is one sub item in this menu that can be selected by positioning the pointer over it and squeezing the trigger:
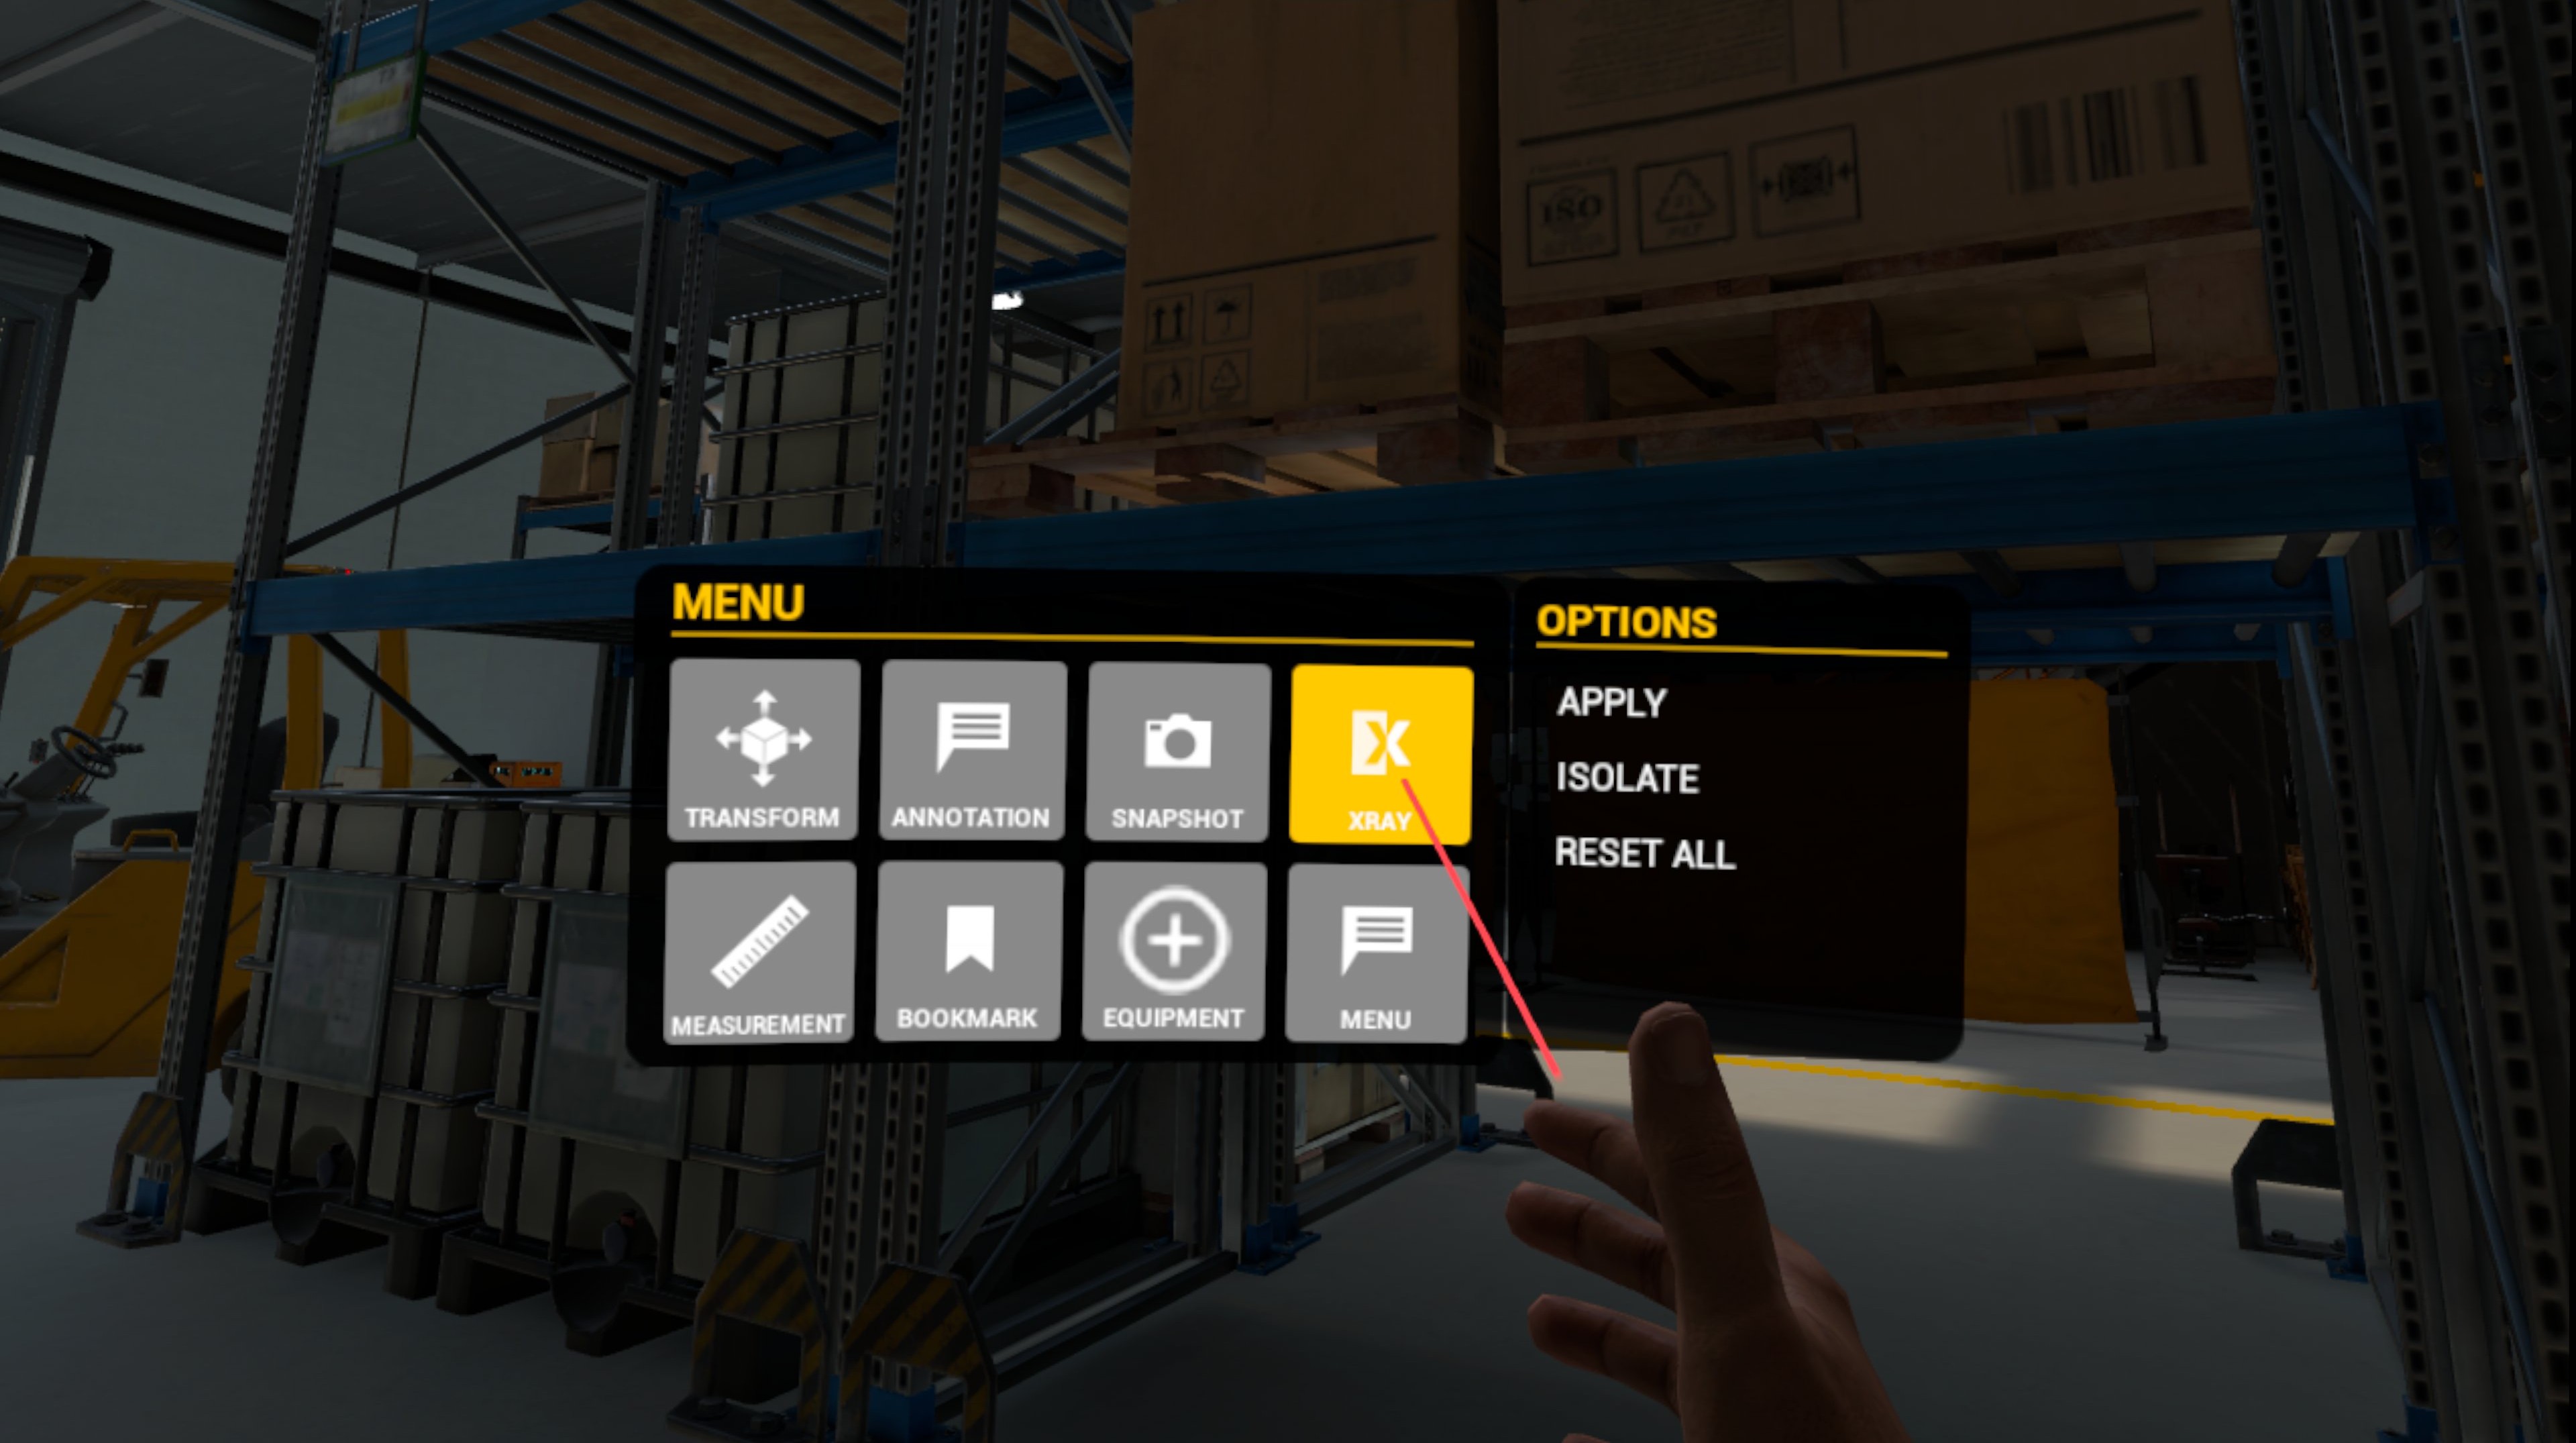
Allows the user to set objects in the environment to appear semi-transparent.

There are several sub items in this menu that can be selected by positioning the pointer over them and squeezing the trigger:
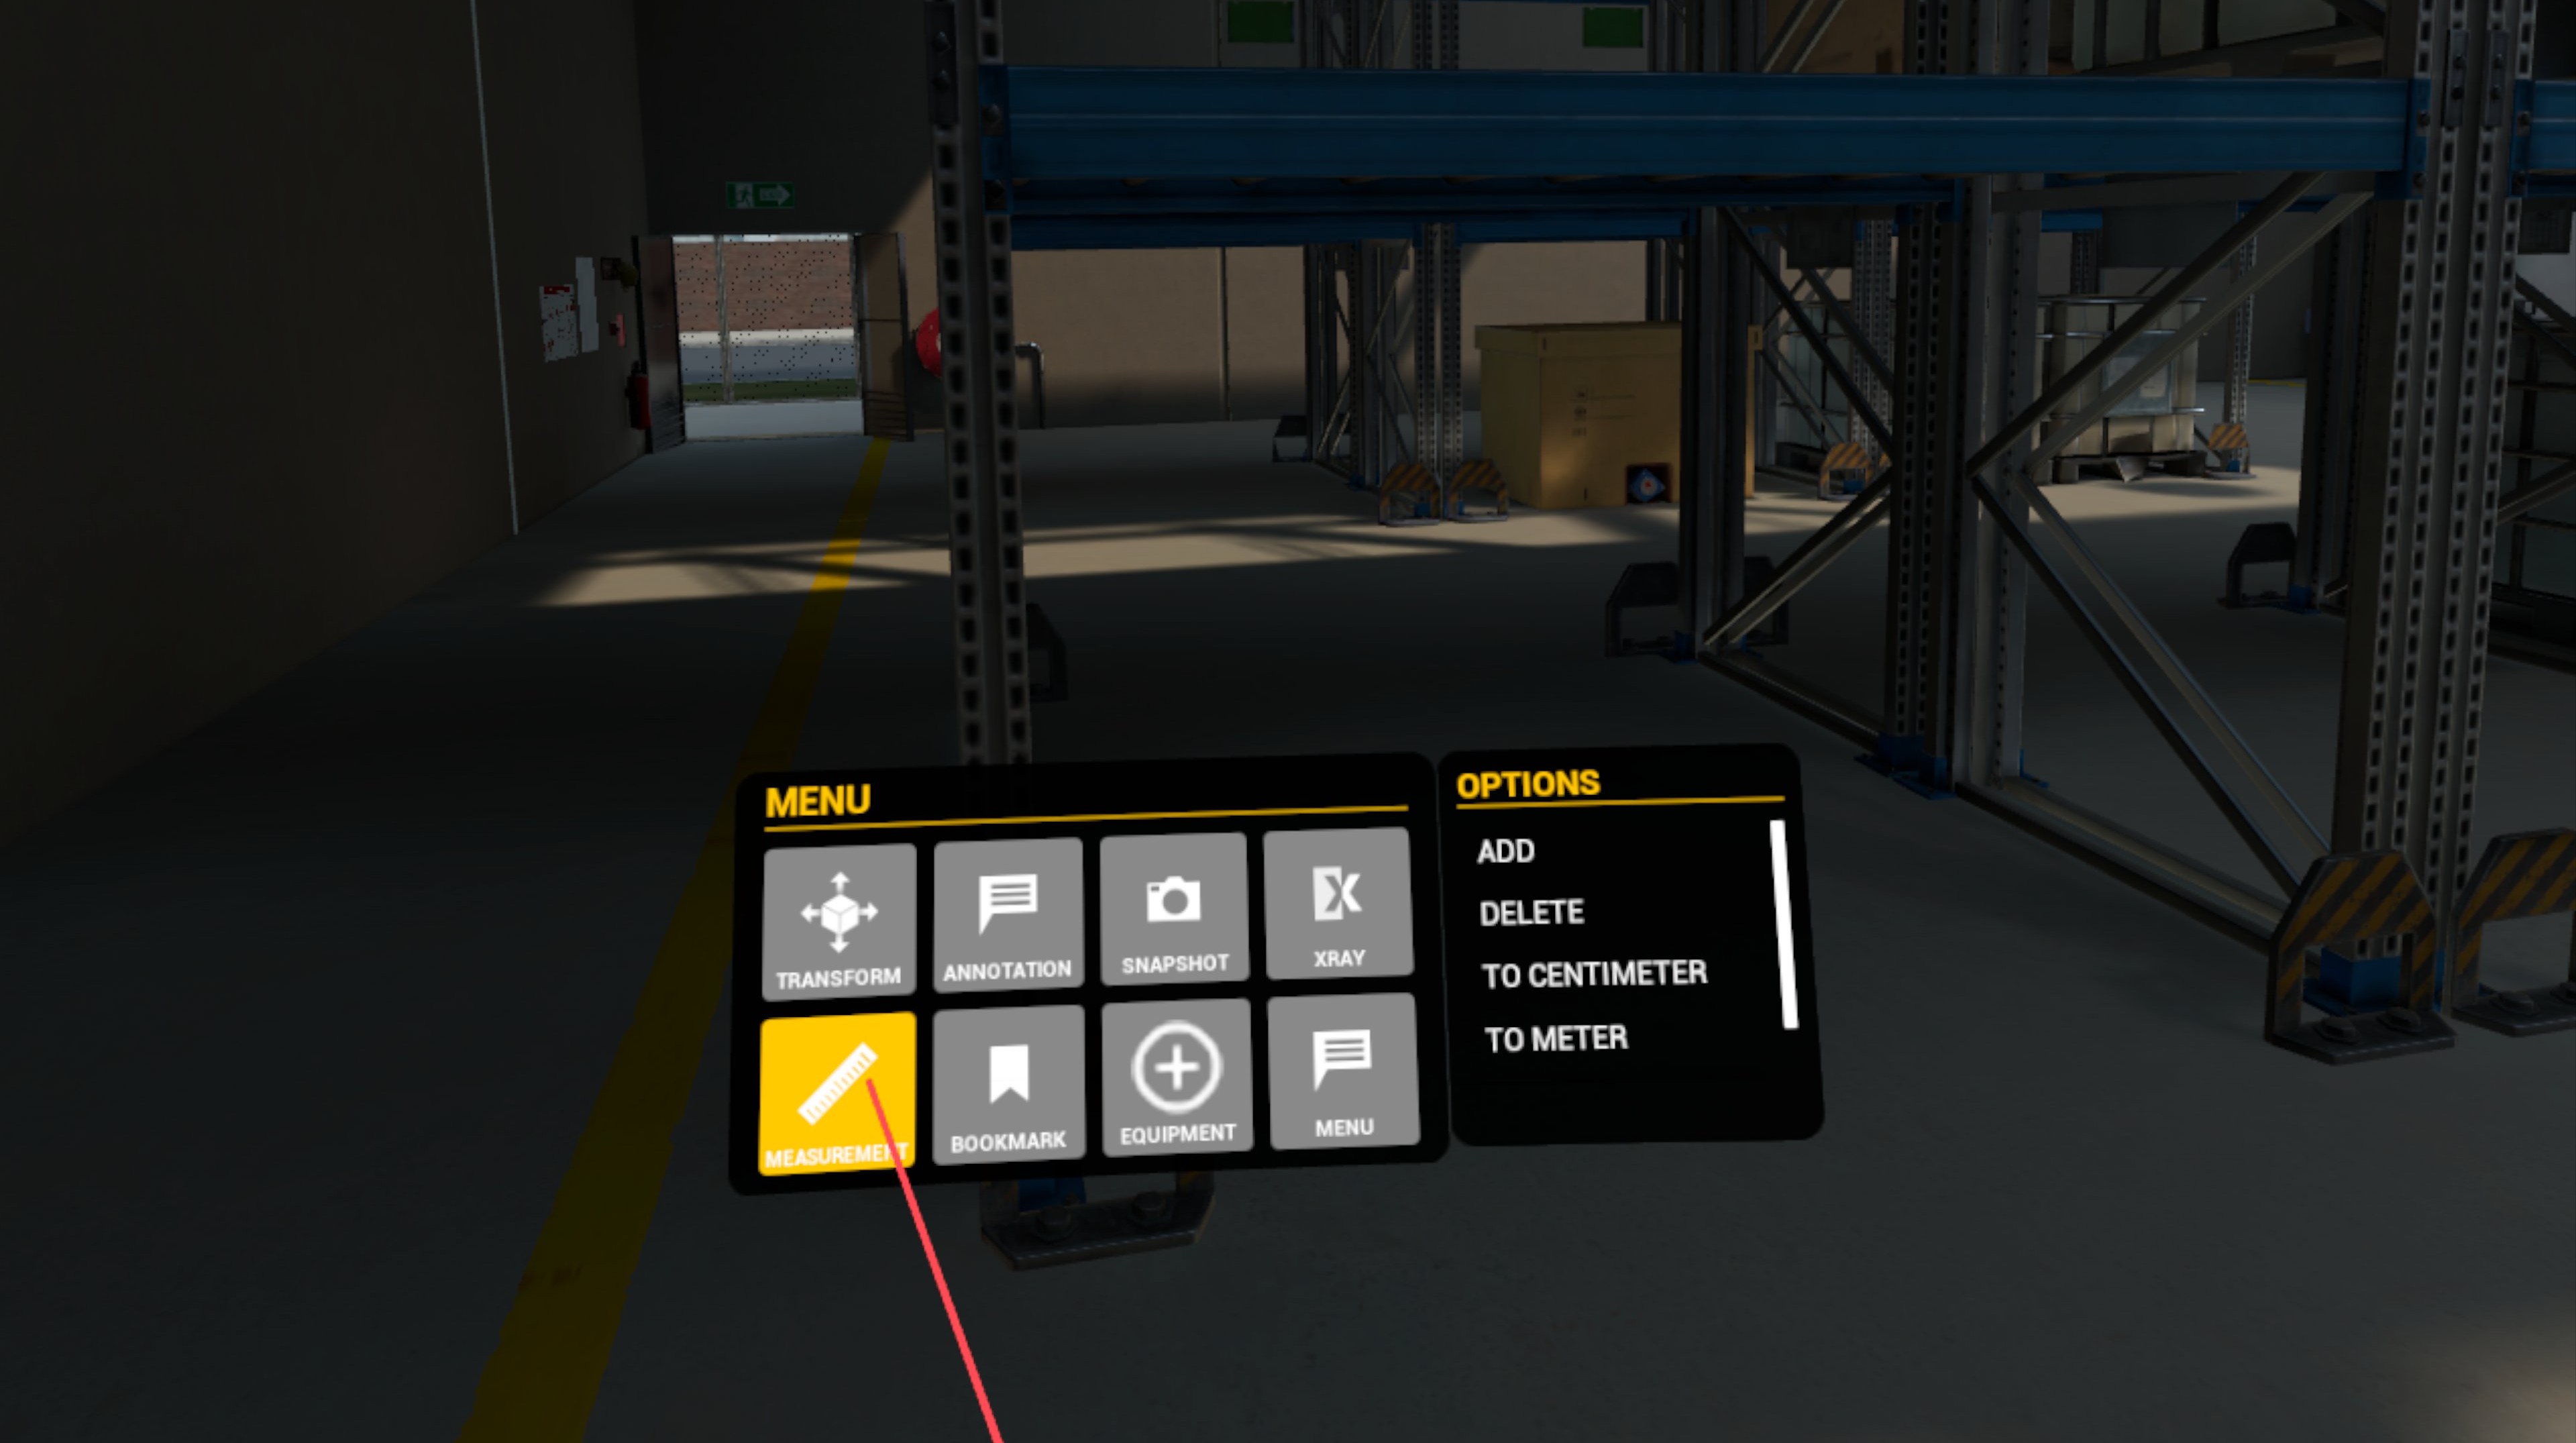
Allows the user to create measurements between two points in the environment.
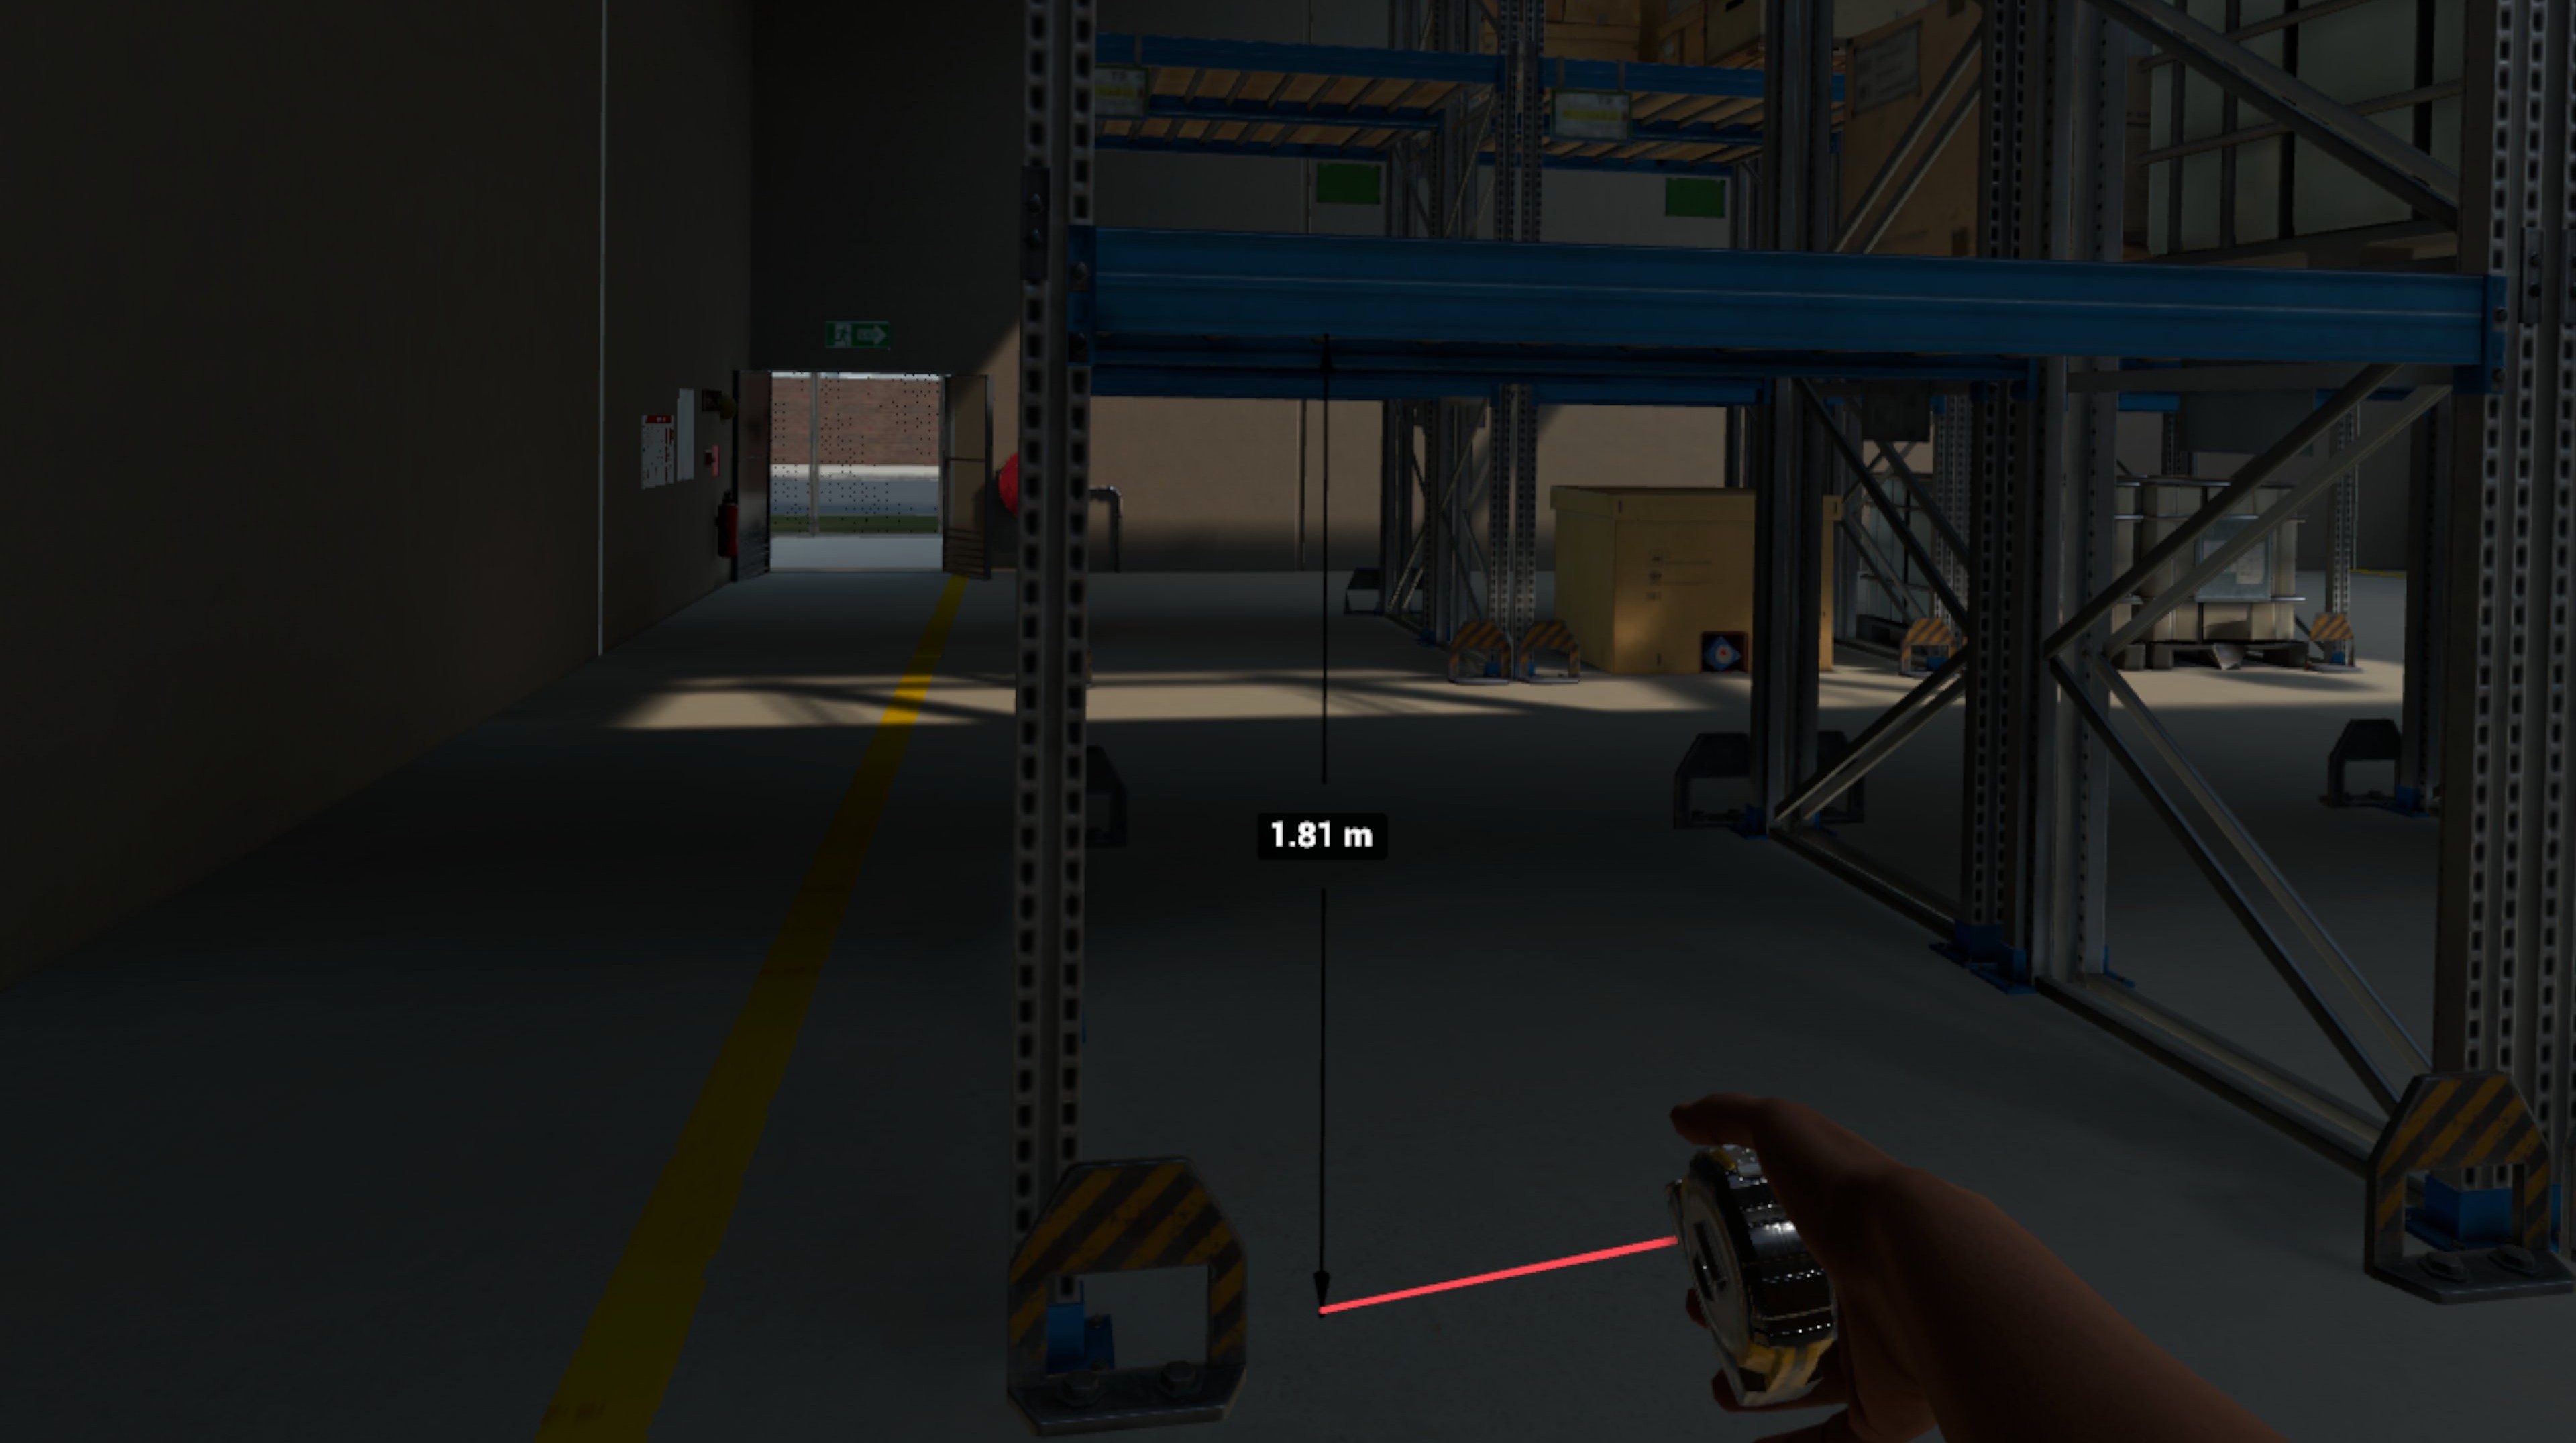
There are several sub items in this menu that can be selected by positioning the pointer over them and squeezing the trigger:
Allows the user to hold and use safety equipment in their left or right hand. The hand the item is held in is determined by the hand used to select the menu item.
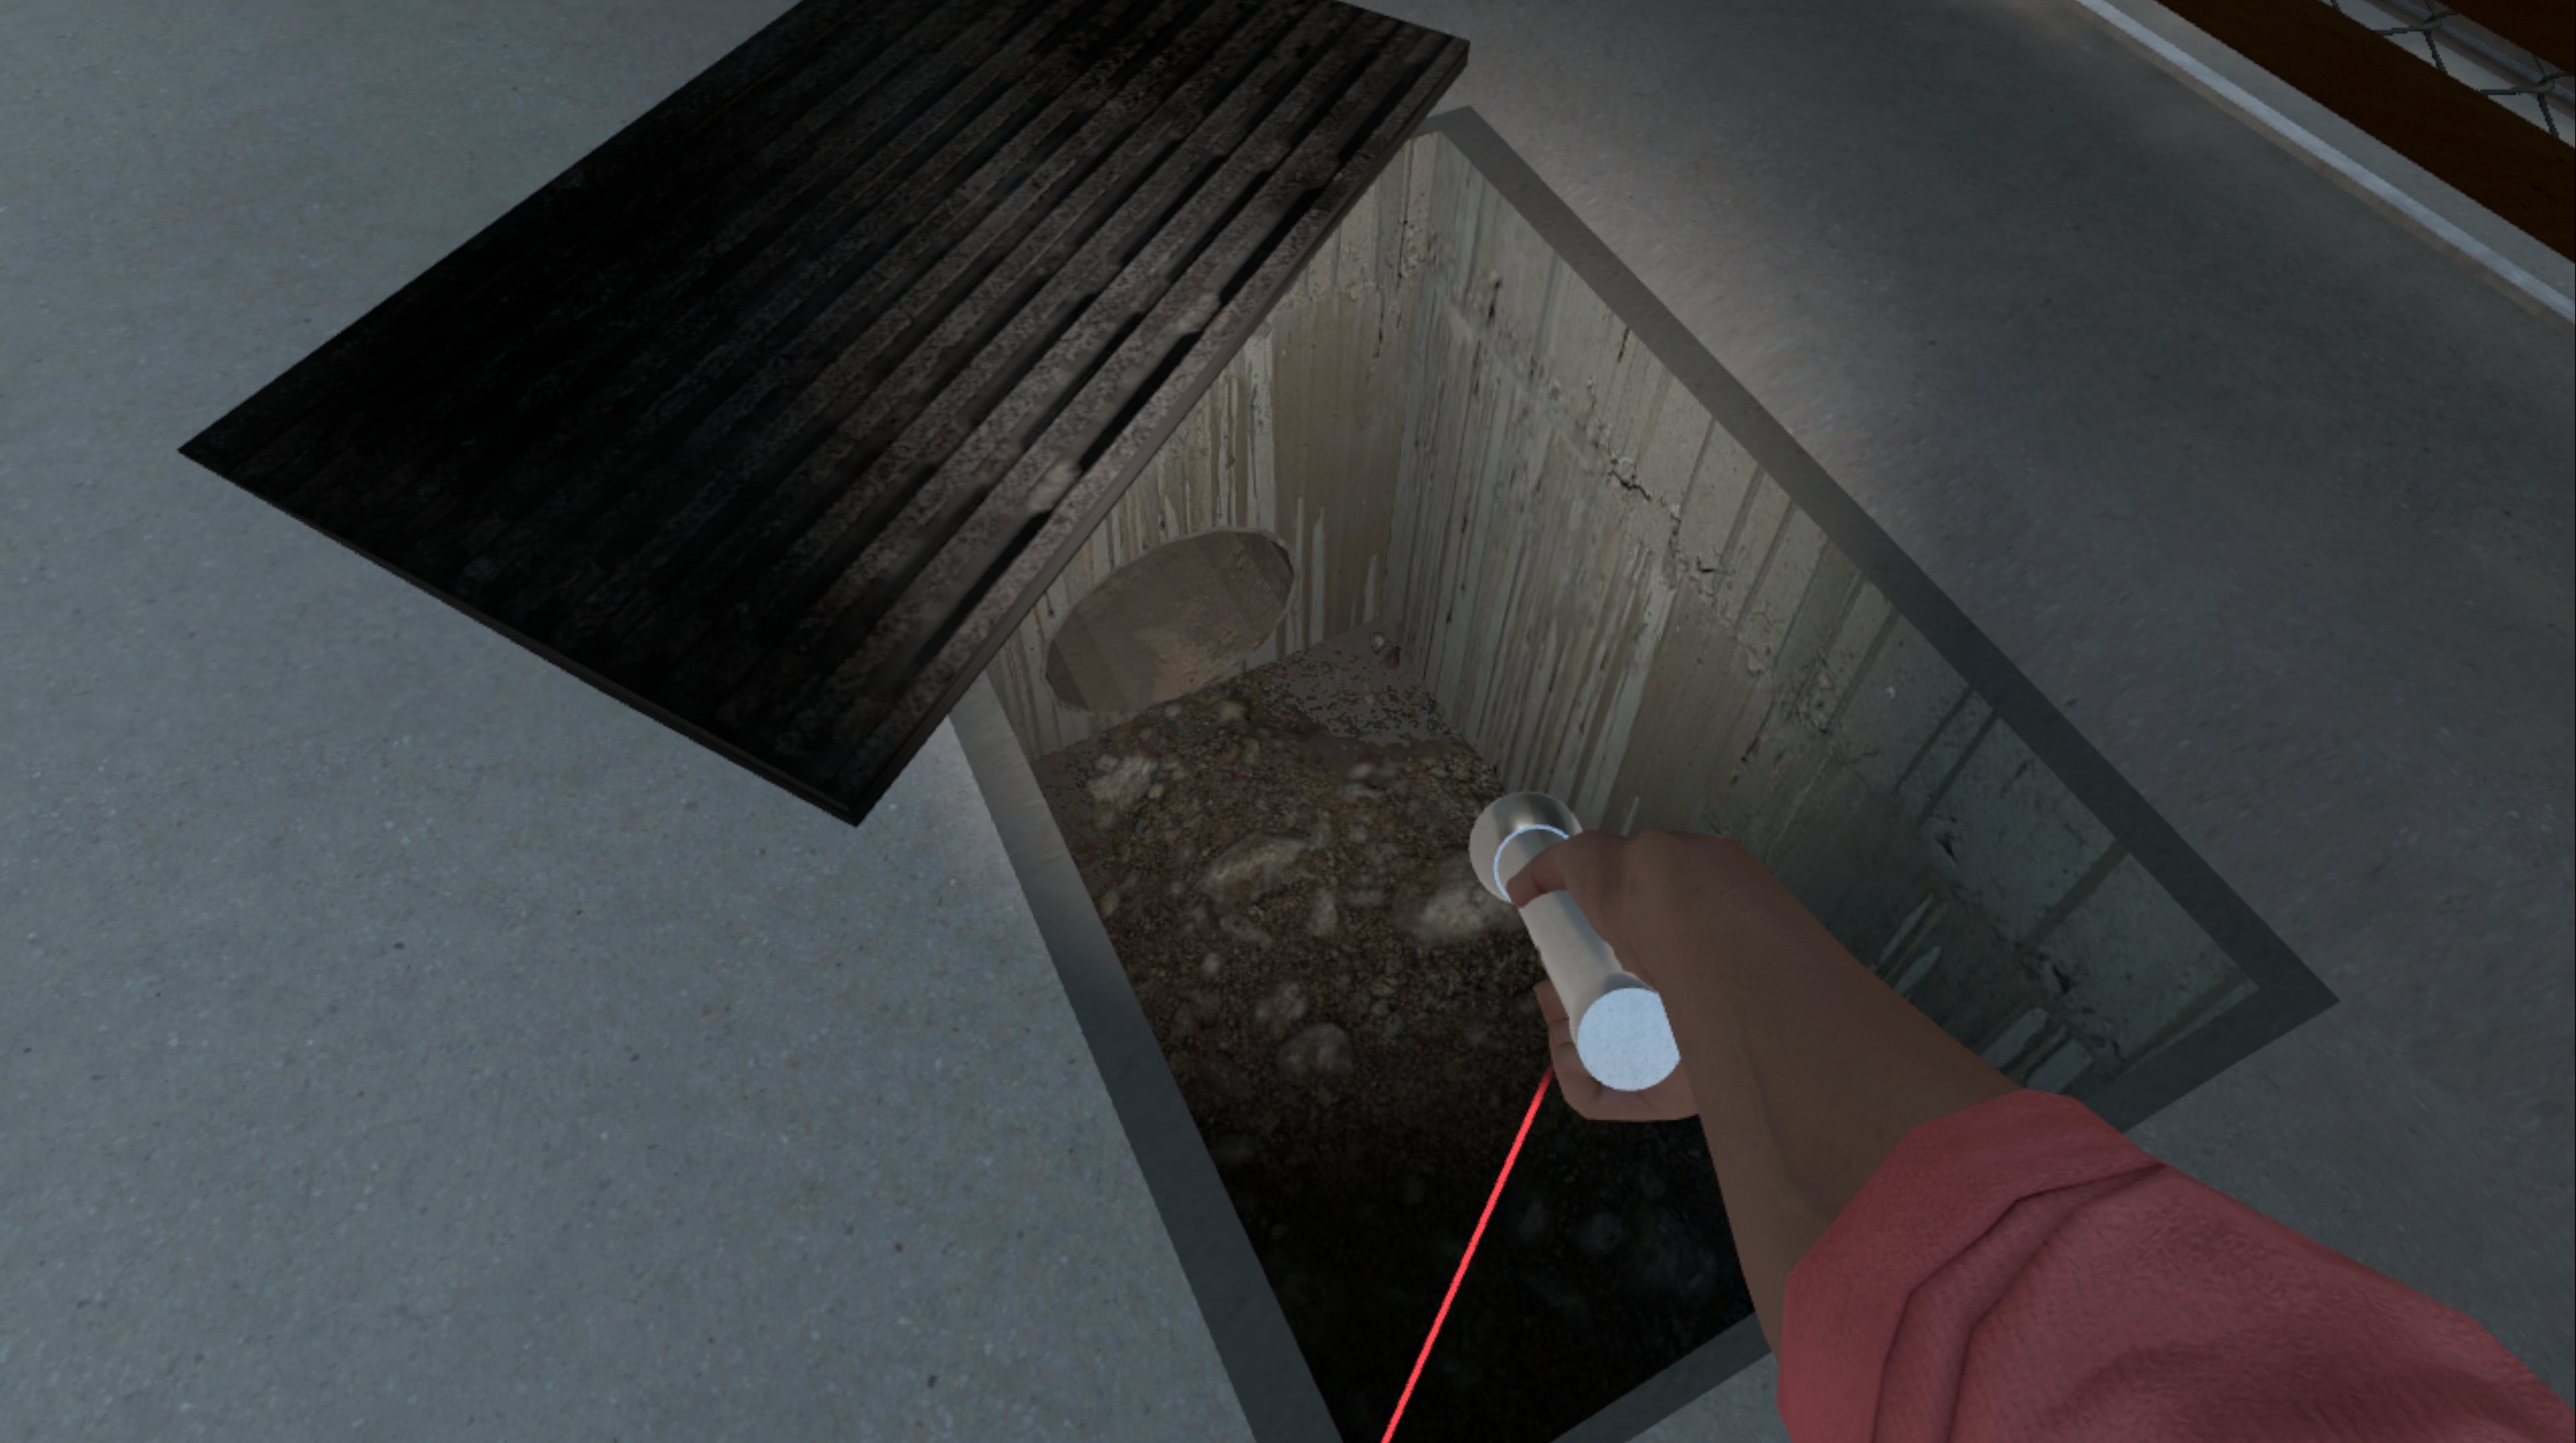
There are several sub items in this menu that can be selected by positioning the pointer over them and squeezing the trigger:
Allows the user to return to the Main Menu.
There is one sub item in this menu that can be selected by positioning the pointer over it and squeezing the trigger:
Send us a message here or you can email us on support@hazardreadytraining.com.